2

Sep

2013

DIY Tutorial: Paper Bunting

DIY Tutorial

Today I’m delighted to welcome Nikki Cabezal from Jam Paper to the Blog. Nikki is going to show us how to make this super cute and super easy paper bunting, that is perfect for an outdoor wedding or an indoor wedding, party or just to pretty up your house!

paper bunting

I’ll pass the Blog over to Nikki………..

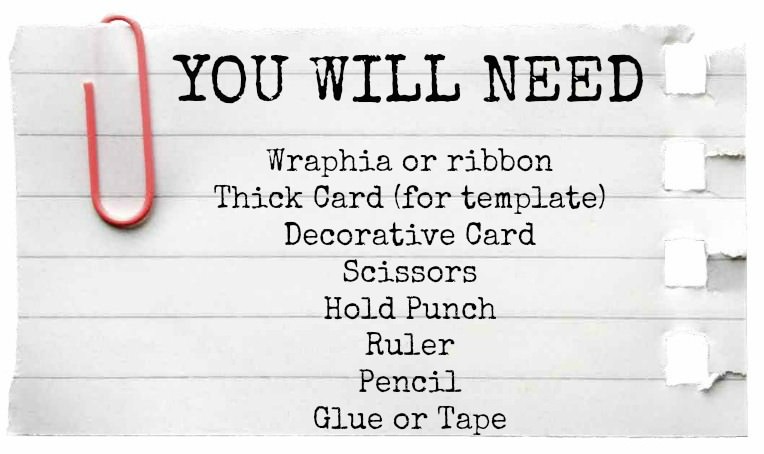
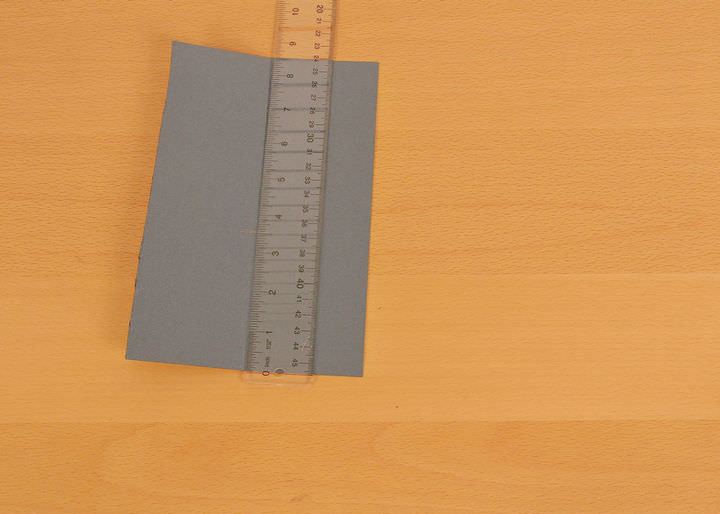
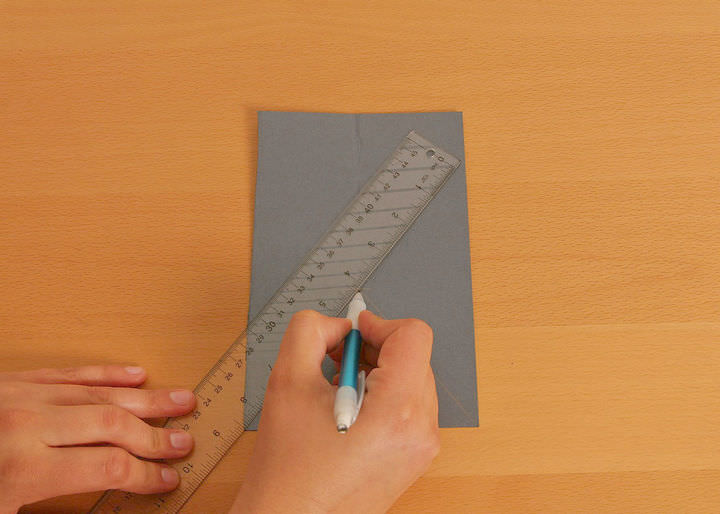
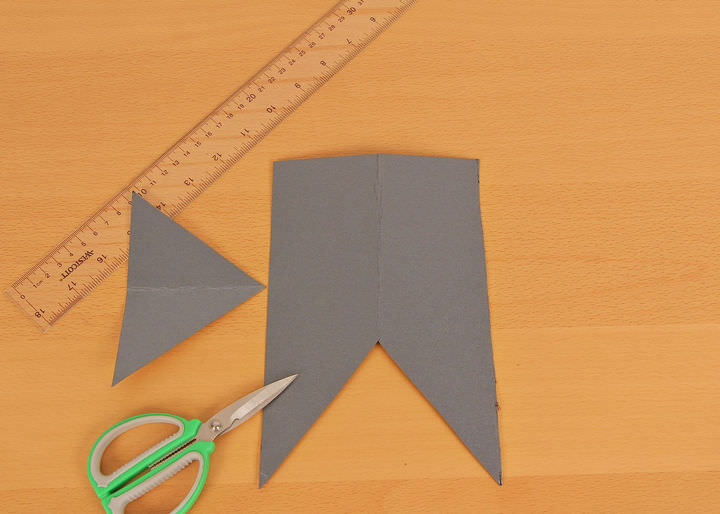
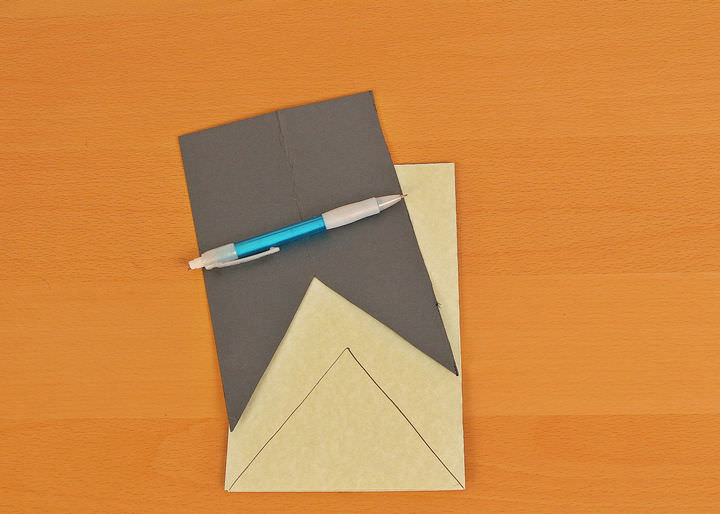
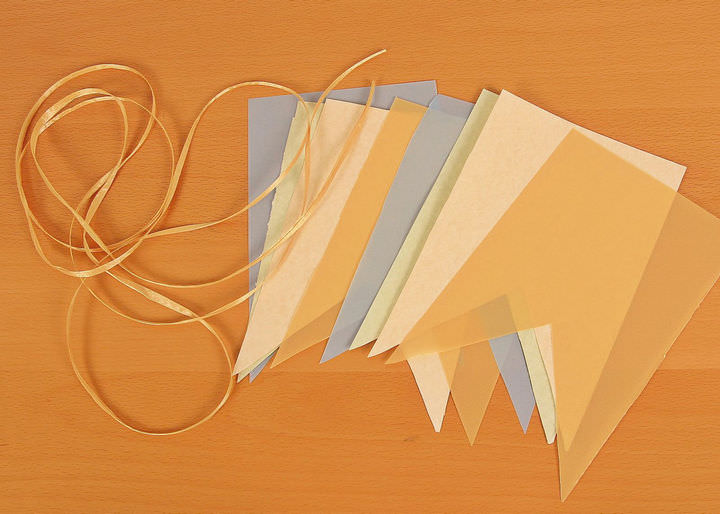
We’re bringing you a simple and beautiful wedding DIY, because we want to help you with outdoor wedding ideas that are pretty as well as manageable.  This wedding paper flag garland is easy enough for anyone to replicate. Especially with our step by step tutorial. For our example, we went with a gold and light blue parchment palette for a look that’s sweet and charming. You of course can choose any color or texture to match the theme of your wedding. The perfect DIY summer wedding decoration project, just gather the necessary materials and begin.

you will need words you wil need

Step 1) Create the Template

  • Take a standard size sheet of cardstock or paper and fold it horizontally twice over – fold in the direction of the white dotted lines shown in the pictures.  This helps you find the center of the paper.

Step1 Template

  • Unfold the paper once and line a ruler up with the center crease. Measure 3 ½” up from the bottom and make a mark. This will be the top point of your triangle.
Step3 Template Step4 Template
  • On both sides of the center crease, angle your ruler and draw a line from the mark to the bottom corners of the paper. Then cut along the lines to create your template.
Step5 Template

Step 2) Creating Flags

  • Take whichever decorative cardstock you’ve chosen for your banner and fold it horizontally once – the same way you first folded your template.
  • Line your template up with your folded cardstock and trace the cut-out triangle shape onto the cardstock.
Step6 Trace
  • Cut the triangle out, then unfold the cardstock and cut along the center crease. This creates two flags for your garland from one sheet of cardstock.
Step7 Cut

Step 3) Threading the Flags

  • Lay your ruler across the top width of one of your flags. Make hole punches at 2 inches and 4 inches.
Step8 Meausre
  • Take your ribbon and loop it through the holes, alternating between the back and the front on the flags until they are all strung together.
Step9 Holepunch
  • Lay the garland on a flat surface. Adjust the flags so they are about two fingers width apart. Secure the flags position with a small piece of invisible tape or glue.

Step10 Thread

  • Tie loops with the wraphia at both ends of the garland. This allows it to hang without tape or push pins.

Final3.jpg

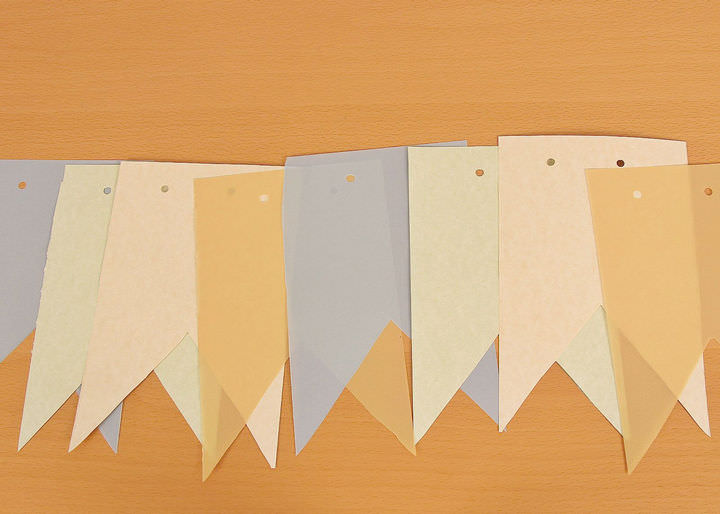
There you have it. That’s all you need to do to create this lovely and budget-friendly wedding adornment. We told you it would be easy. You can make one of these to hang over your wedding entrance. Or strewn multiple flag garlands all around your venue. Seems like too much work? Just gather some friends and family to help and have a little fun with the process. Your wedding will be coming along in no time.

Final2


For more information on Jam paper go to

www.jampaper.com
[email protected]
FACEBOOK
PINTEREST
@JAMPaper


Why not visit our Supplier Directory

Comments

Please leave your comment

We reserve the right to remove any comment that we feel is distasteful, rude, hurtful or inappropriate, so please be nice. Remember the weddings featured on this blog are real people and their weddings mean a lot to them. Please be mindful of this and other people's feelings. If youhave a problem with any of the content please contact me directly.

Thank you xx

This site uses Akismet to reduce spam. Learn how your comment data is processed.