Featured Post
6 Colour Combination Ideas for a Stylish Boho Wedding
So you’ve decided to have a boho wedding, fantastic news! You have come to the...
So you’ve decided to have a boho wedding, fantastic news! You have come to the...
10
Nov
2014
By Boho

Good afternoon you lovely people, and how are you? I have another wonderful DIY tutorial for you today and I am delighted to introduce you to the lovely people at CreativeBug. Creativebug is a go to to source for online DIY art and craft instruction. Their workshops provide project ideas, expert guidance and creative inspiration, so I am delighted to have Kelly Wilkinson from CeativeBug here on the blog today to show you how to make these super cute Luminarias (Candle Shades). These shades are so pretty and perfect for your wedding or your home, they would also make lovely little gifts.
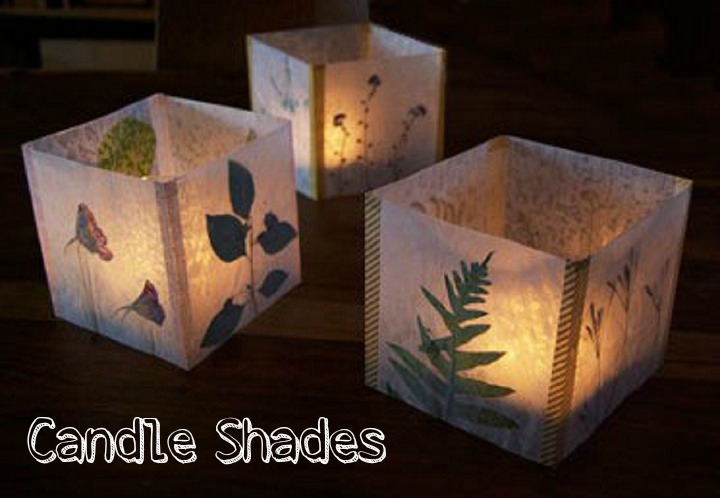
Bring an essence of nature to your reception with these simple, sweet lanterns that emit a lovely diffused light. These luminaries would go great as centerpieces for your boho wedding, providing a warm, glowing feel for your guests. These waxed paper lanterns come together quickly and easily and show off pressed flowers and leaves in a modern, casual way.

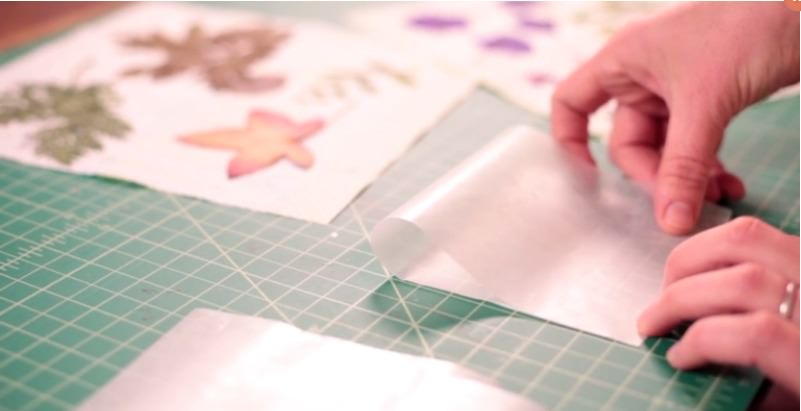
STEP 1) Cut the wax paper into four rectangles. Each piece of wax paper will correspond to one side panel of the luminaria.
STEP 2) Fold wax paper in half to create a square
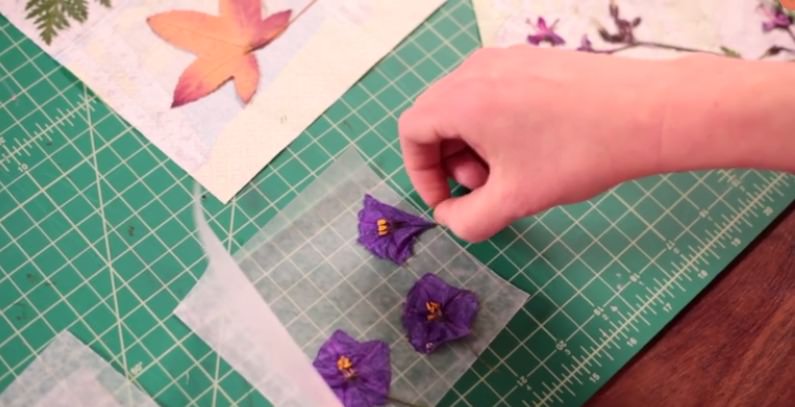
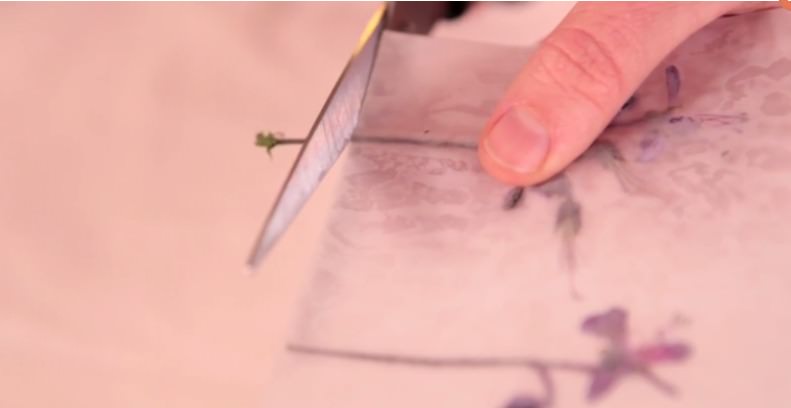
STEP 3) Arrange pressed flowers on the wax paper panel as desired. Tip: It is okay for stems to go over the edge of panel. These can be cut off after they are ironed.
STEP 4) Fold wax paper back over onto the pressed flowers
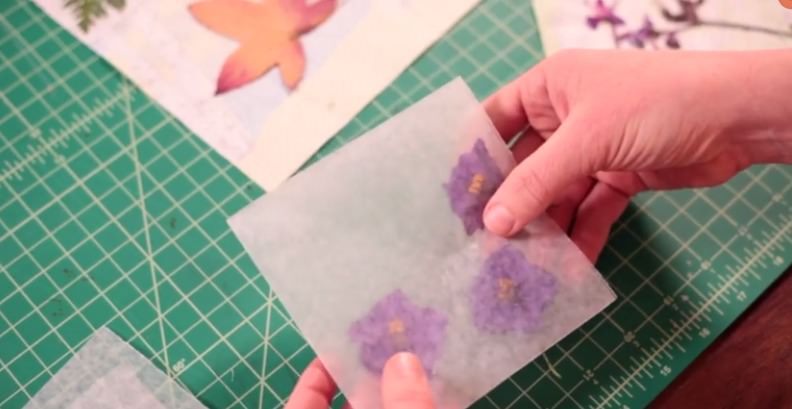
STEP 5) Create four of these flower arrangements using the other three panels of wax paper that you have already cut out. This will create one luminary.#
STEP 6) Now, we are ready to iron. Do a very light, quick pass over each of your wax panels.
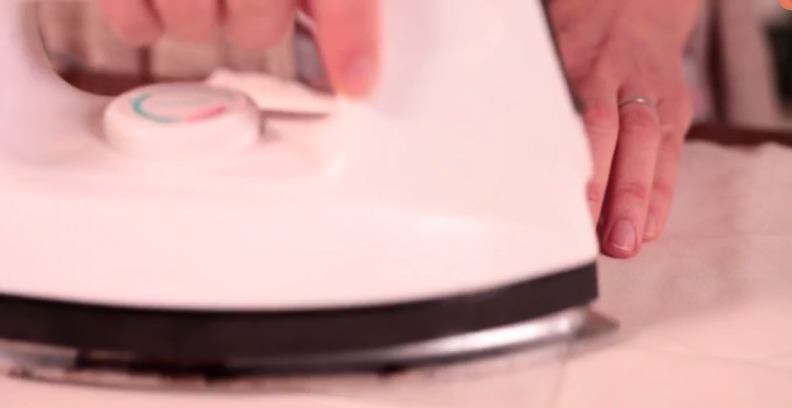
As mentioned before, you can easily cut off any excess at this point.
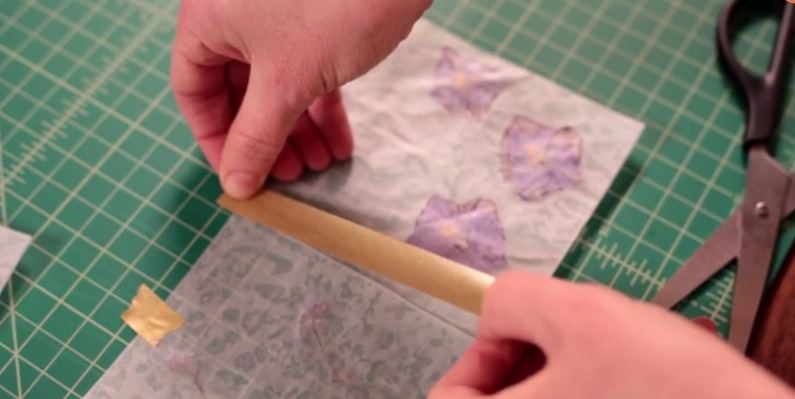
STEP 7) Take two of your completed panels and tape them together using the washi tape. Tip: you can use two pieces of tape to stabilize the panels while you line up the tape, seen here.
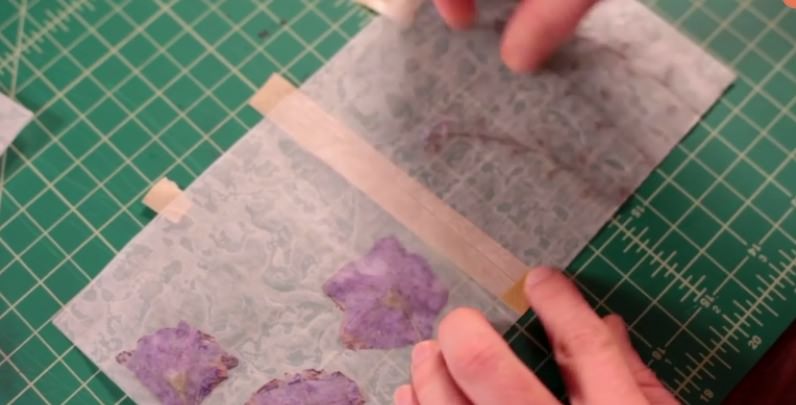
STEP 8) Flip your panels over and fold over about half an inch of the excess tape and remove the scrap tape that you used to hold the panels down.
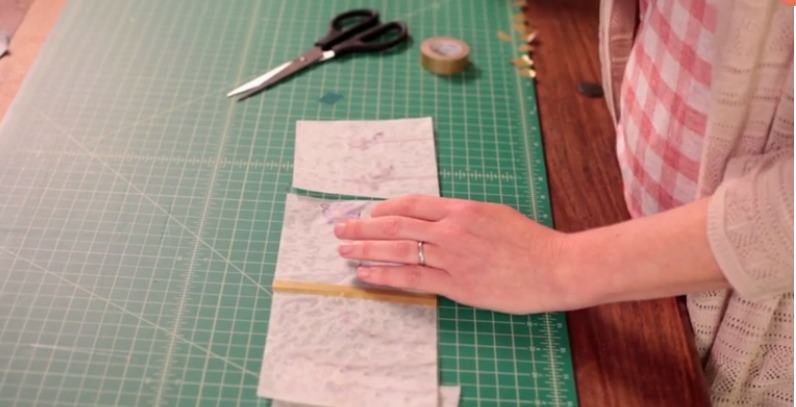
STEP 9) Attach the third panel in the same fashion, using the washi tape
STEP 10) Crease over/ fold the tape so that you may arrange the panels as so
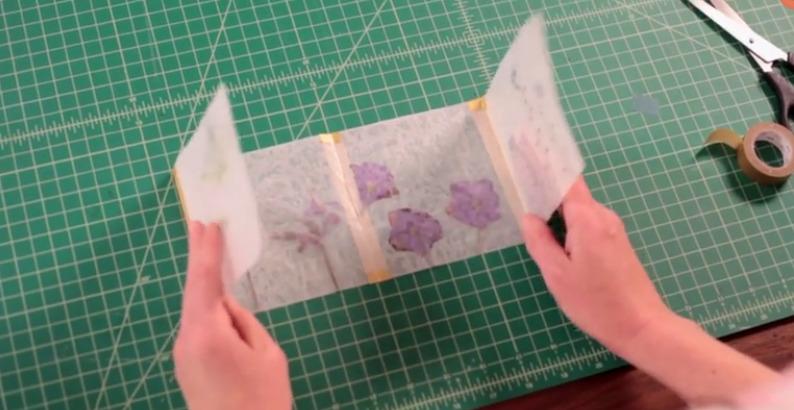
Lay these two side panels down and tape the fourth panel (again folding excess tape underneath)
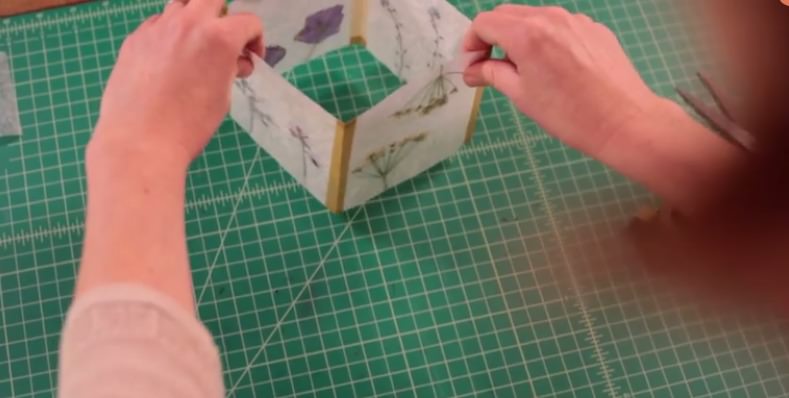
Your luminary is finished, simply stand it up!
www.creativebug.com
www.creativebug.com/blog
FACEBOOK
@creativebug
Share this post


Very creative!
Thank you. We love them