Featured Post

‘Marriage in Colour’ Bright and Bold Wedding Inspiration From France
I have been featuring a lot of colour on the blog over the past few...
I have been featuring a lot of colour on the blog over the past few...
6
Jan
2014
By Boho

It’s the first DIY Tutorial of 2014, so I knew it had to be a good one and who better than the very popular and super lovely Anna from Download and Print. Anna has proven to be incredibly popular on the blog and so far has brought you these FREE Printable Invitation and RSVP Card Template, FREE Printable Folded Wedding Program and FREE Printable Paper Christmas Ornaments.
Today Anna is back to the blog with a brand new FREE printable. Today Anna is sharing with us this gorgeous FREE Printable Gilded Edge Invitation. The download can be found HERE. Simply follow the easy instructions and it will both be downloaded to your computer in a matter of seconds, ready for you to customise.
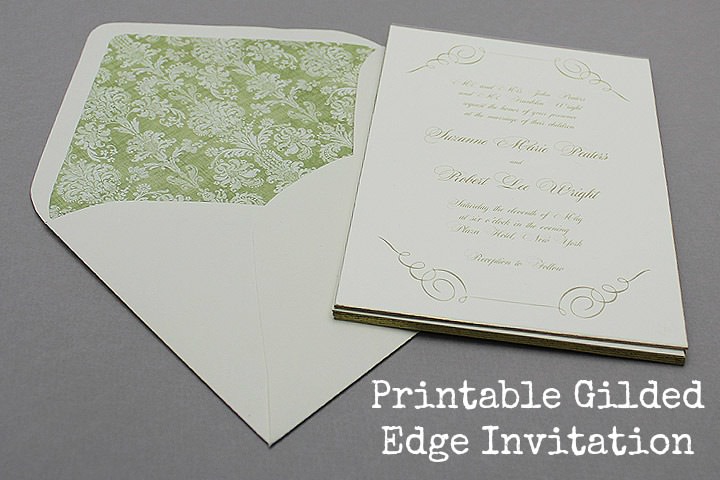
Happy New Year Boho brides. I hope you had a bright, merry, and relaxing Christmas break. I don’t want to alarm anyone, but we just rolled over to a new year, so if you are planning a wedding for 2014… this is your wedding year! The start of the year always sees a furry of invitations go in the post as Spring and Summer brides are on the countdown to wed-day. If you are still looking for the perfect invitation to set the mood for your upcoming nuptials, I’ve got a little something for you today that you might like to take a peek at. This is a gilded gold edge invitation that is 100% DIY, and 0% of a bank breaker. I can see a few eyebrows raising in interest. It is luxuriously thick, double sided, and the best part of this project is that you can coordinate the back of the invitation (and envelope liner if you are feeling really crafty) with your wedding colours and style. Pick scrapbook paper, wrapping paper (what a money saver), or wall paper that speaks to you, and of you, and craft away with the tutorial below.
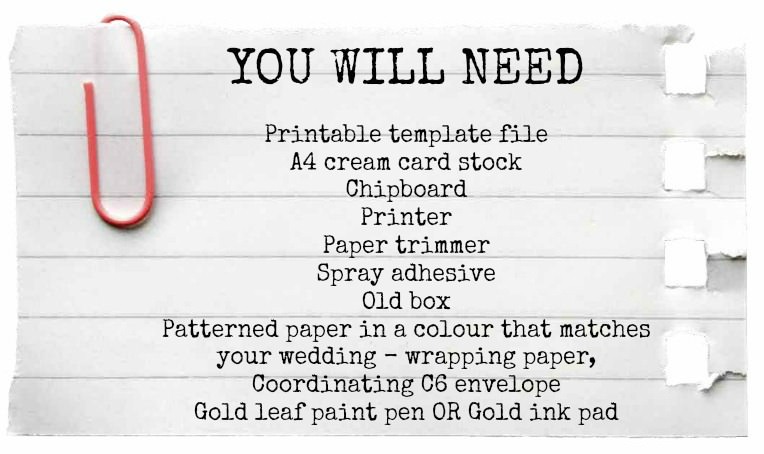
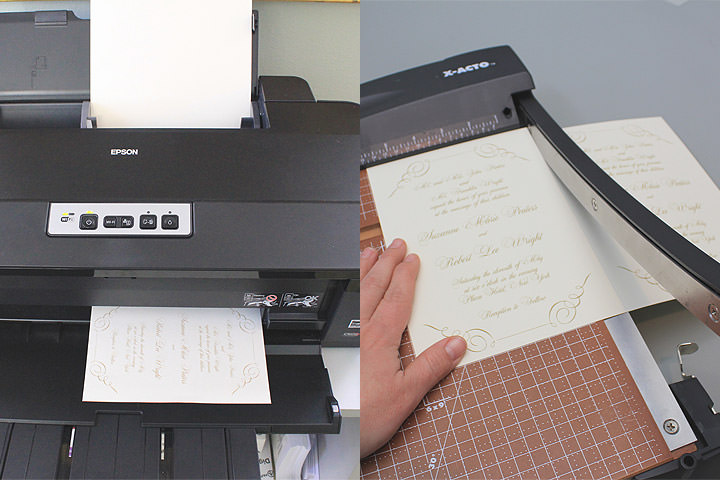
STEP 1) Download and Print Download the template file, add your wedding details in MS Word, and print on A4 card stock. The font used in the sample is Maratre, which can be downloaded here.

STEP 2) Trim Trim along the template cut line with a paper cutter or scissors.
STEP 3) Cut Chipboard and Decorative Paper Cut a rectangle of chipboard and decorative paper slightly larger than the invitation. Make sure you have enough to go with each invitation.

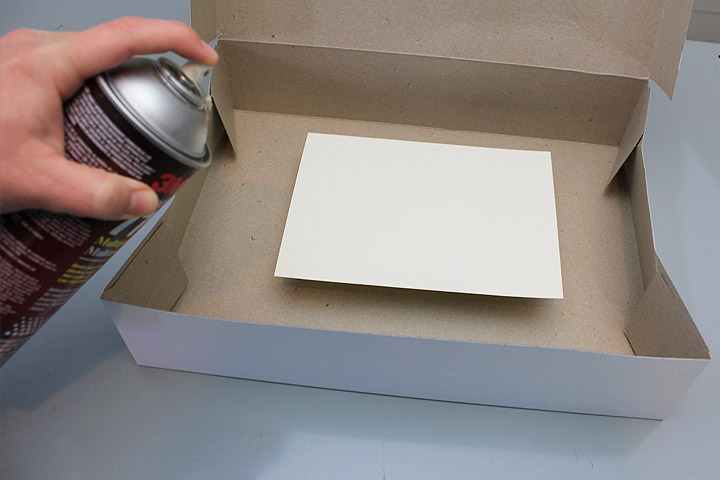
STEP 4) Glue Invitation Now the fun begins. Spray adhesive onto the back of the invitation in a well ventilated area, using an old box to catch the over spray. Immediately adhere the invitation to the chipboard and smooth with your hands.
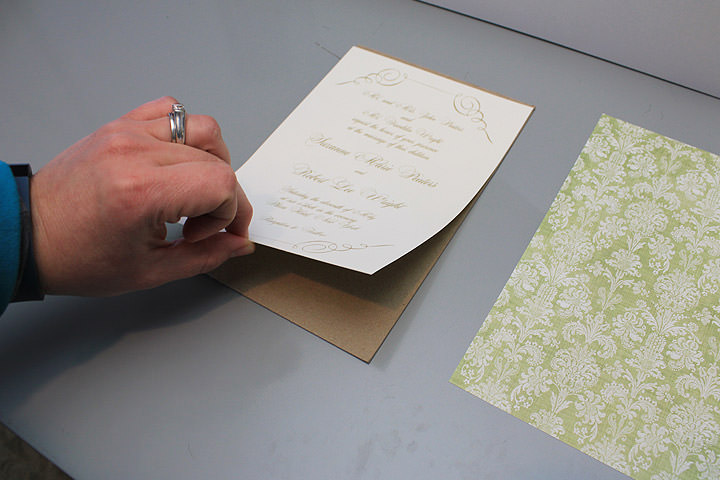
STEP 5) Glue Decorative Paper Using the same spray technique, cover your patterned paper with adhesive and immediately glue to the other side of the chipboard.

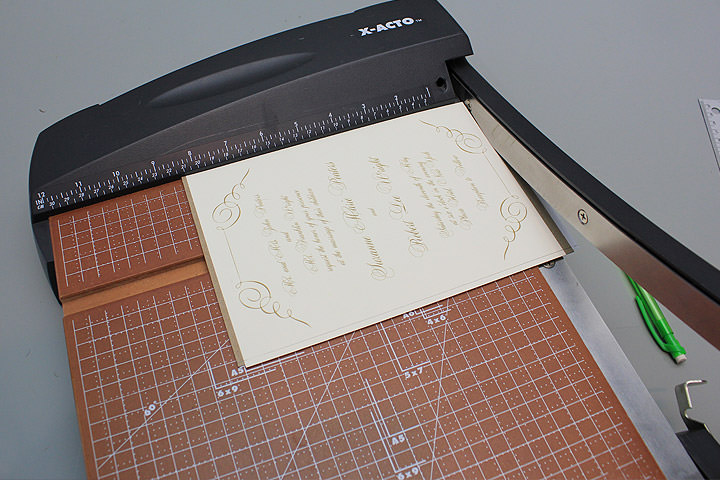
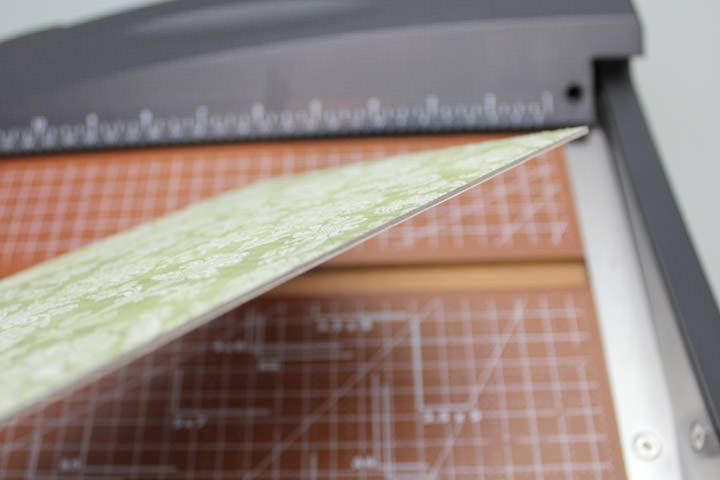
STEP 6) Trim Now that you have a sandwich (invite, chipboard, and pattern paper), do a clean up trim on the paper cutter. I found it helpful to use a ruler and pencil to mark the edge before cutting. It is important that all three layers line up perfectly for the gilded edge to have the most impact.
STEP 7) Gild the Edge There are two methods to apply the gilded edge; paint pen or ink pad. I prefer the ink pad technique.
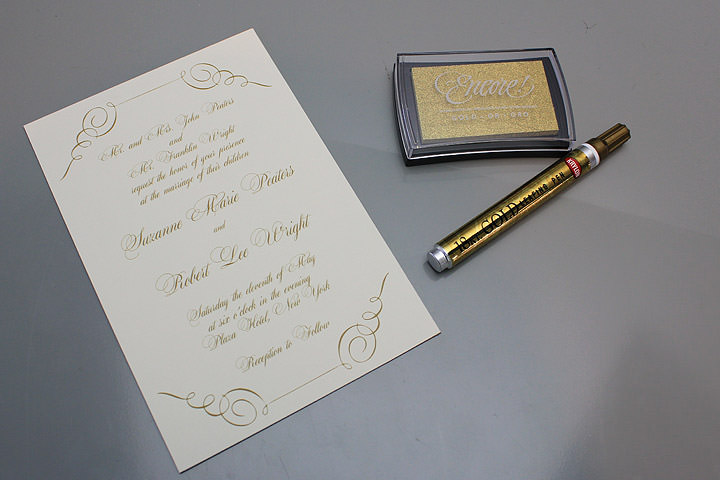
Paint Pen – If you choose to use a gold paint pen, pump the pen first onto a sheet of paper to get the paint flowing. Mark along the edge of the invitation with the pen, making sure you get solid coverage on all four edges.
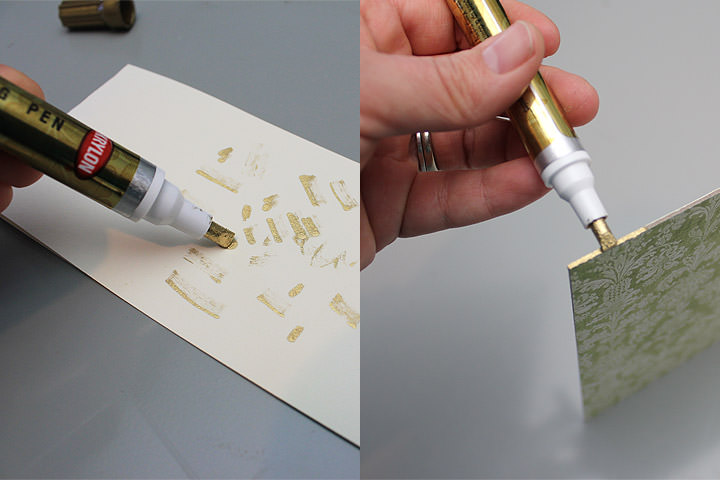
Ink Pad – If you use a gold ink pad, in a blotting motion tap the pad to the edge of the invitation. It takes a few taps to get solid coverage.

Thanks so much to Anna from Download and print for this gorgeous downloadable DIY Tutorial, It certainly is a great addition to your wedding if you are looking for something sophisictaed and a bit special! Anna will be back in a months time with a FREE download for Valentines Day!
www.downloadandprint.com
www.downloadandprint.com/Blog
FACEBOOK
Share this post


Great tutorial! I can’t wait to try it
xo
Coco
COCOCOZY