Featured Post
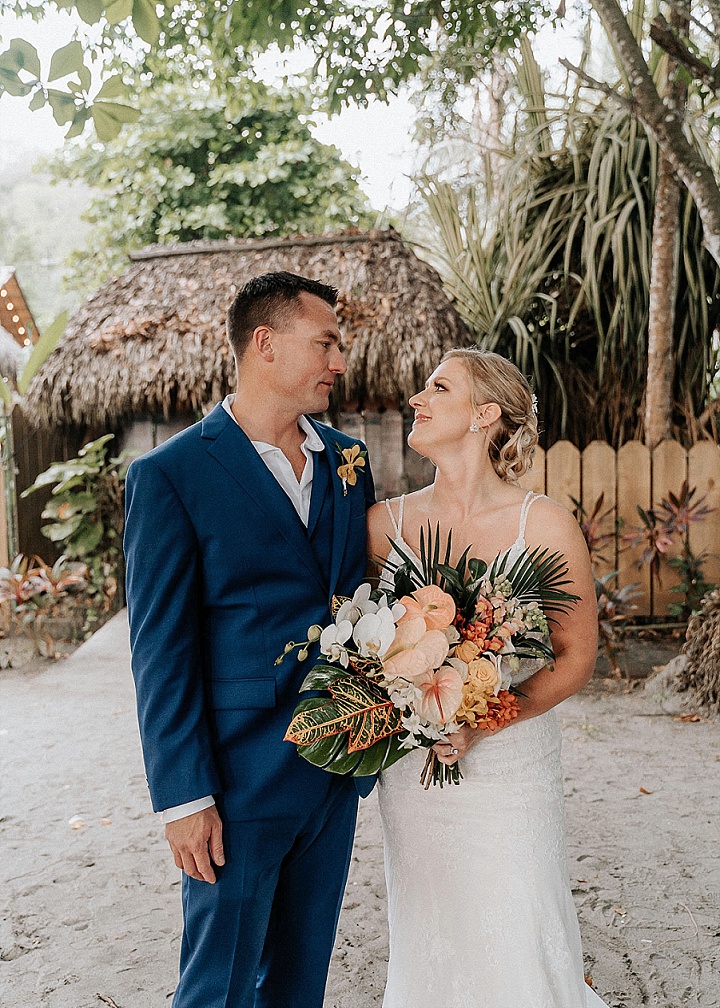
‘Katie and Jake’s ‘Back to Nature’ Tropical Chic Wedding in Costa Rica by Raw Shoots Photography
Katie and Jake were married on 14th March in Costa Rica and what a wedding...
Katie and Jake were married on 14th March in Costa Rica and what a wedding...
20
Dec
2012
By Boho
Today’s DIY Tutorial comes from the very lovely Lauren from Flat Broke Bride. A few weeks ago Lauren shared with us her wonderful DIY Flower Pendant necklace tutorial, she mentioned at the time she had a follow up DIY post for cute Gift Boxes to put the necklaces in and today she shares that Tutorial with us.
I thought these would also be perfect for Christmas Gift Boxes, if you were looking for a cheap alternative for your Christmas present wrapping.
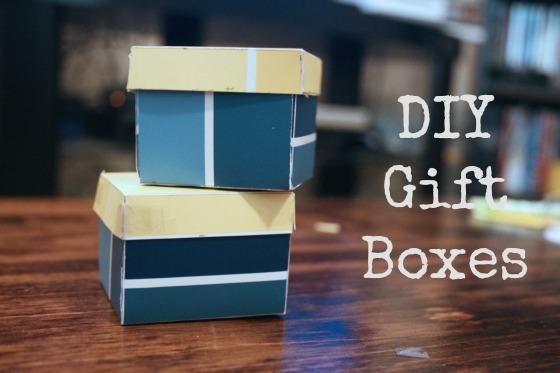
Here is the companion piece to the necklace DIY from last month: DIY Gift boxes (just in time for the holidays too!)
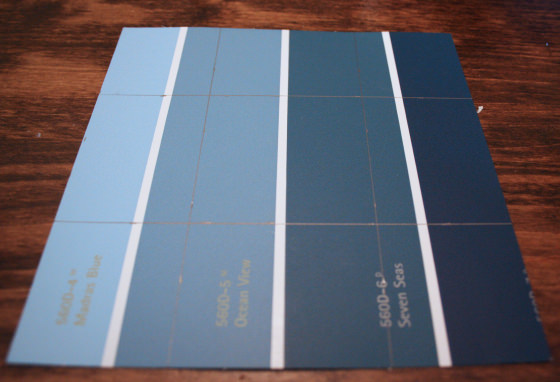
As promised a nearly free DIY, a gift box to put your bridesmaids gifts in! I think the best thing about playing with paint swatches is that you can walk into any paint store, grab 20 of them and walk out without anyone saying a word. Free stuff you can play with is always the best stuff. The ONLY thing you’ll probably have to pay for in this DIY is the double-sided tape that helps it all stick together.
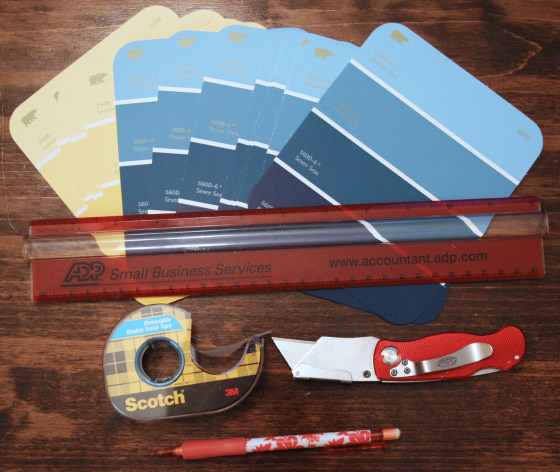
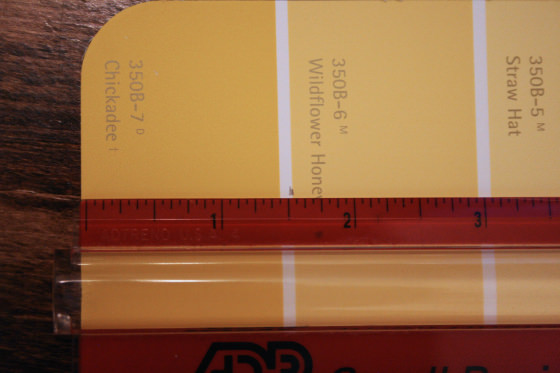
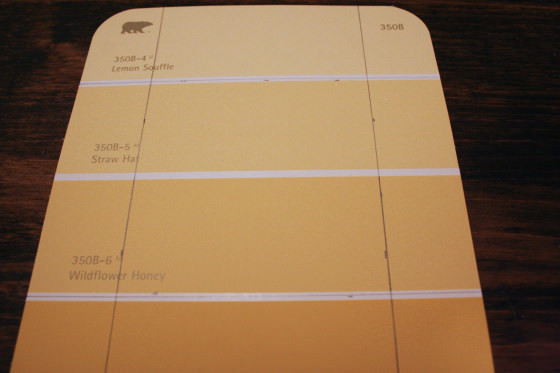
Step 1) I got two different color swatches one for the body of the box and one for the lid. Start out with whatever swatch you want for the body, and measure about a half an inch in on the rounded sides.
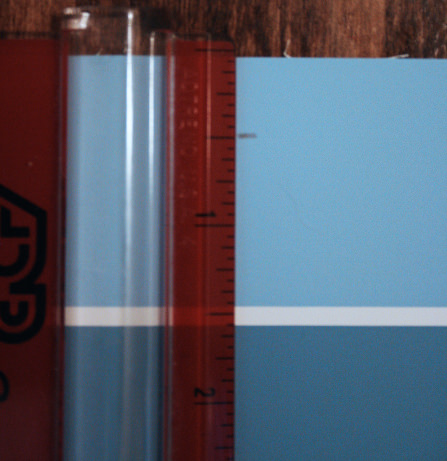
Step 2) Once you’ve measured a half-inch on both sides, draw a line and cut along that line. Make everything square,I did mine 5″ all around.

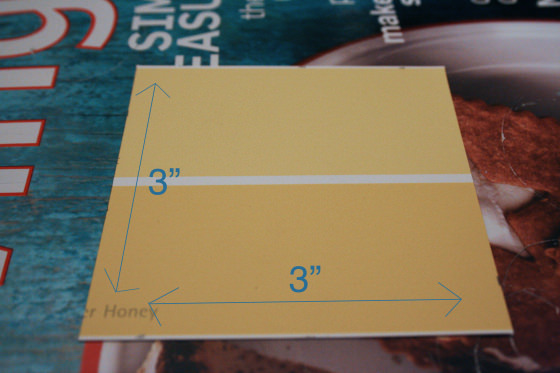
Step 3) Now we have to make the sides of the box, so take up your ruler again, and measure in 1 & 1/2 inches on all sides.
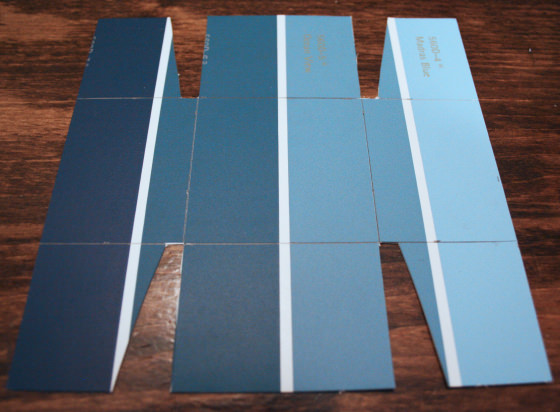
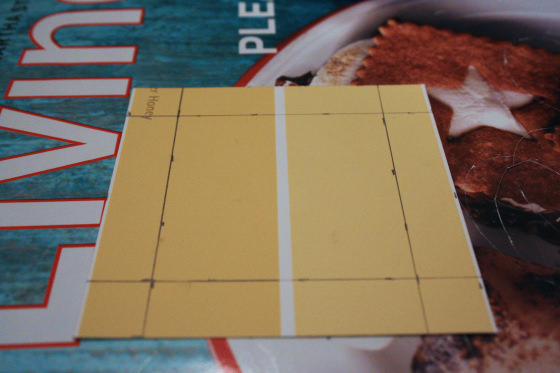
Step 4) creates a grid pattern that looks like this:
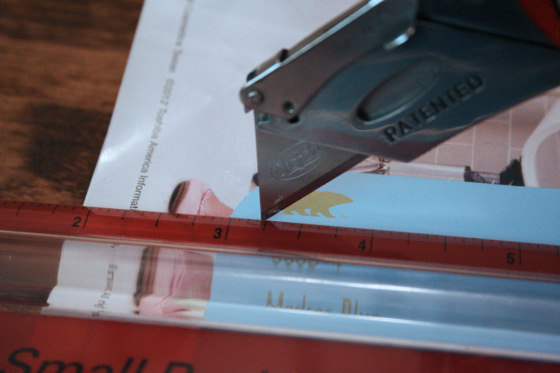
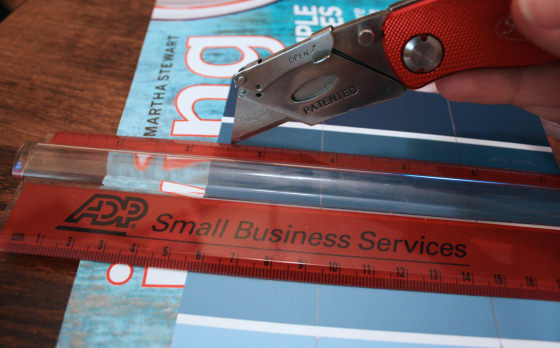
Step 5) it’s time to score all the lines. Use the knife and use gentle pressure. You don’t want to cut the swatch just weaken it a little so it would be bendable along those lines.
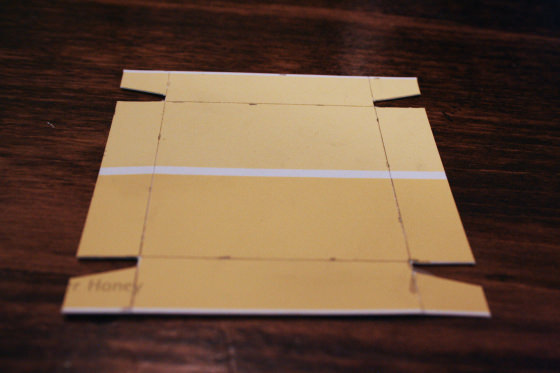
Step 6) you have scored all the lines, you can now create the little triangles that allow you to form the box.
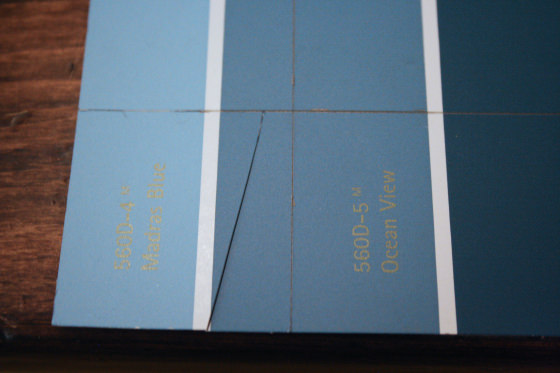
Step 7) These I just eye-balled. It’s not a huge deal to get these right, so something that looks basically like the above picture is just fine. You will do this on two sides with the finished triangles looking like this:
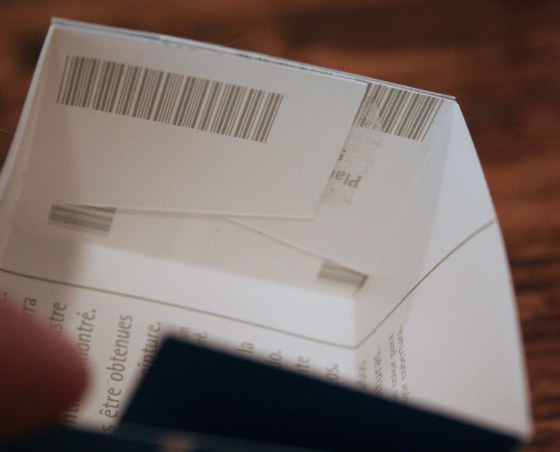
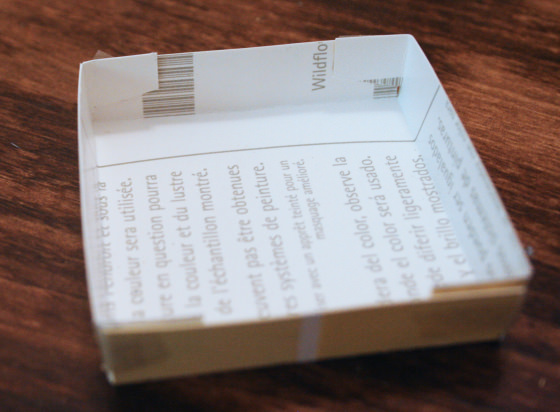
Step 8) Notice how the angled side is facing outward. This is important to the folding of the box. Now it’s time to fold the box along the score lines.
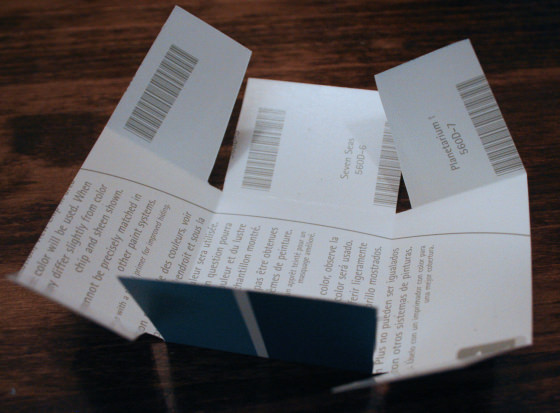
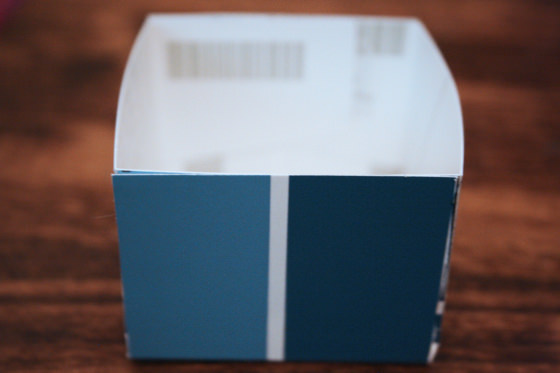
Step 9) To finish the body of the box you just have to tape it all together
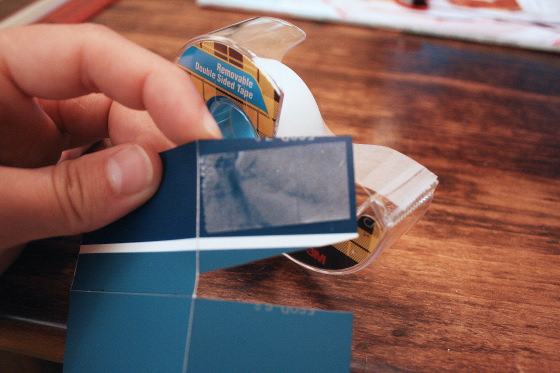
Step 10) Close the box up with as much tape as you need.
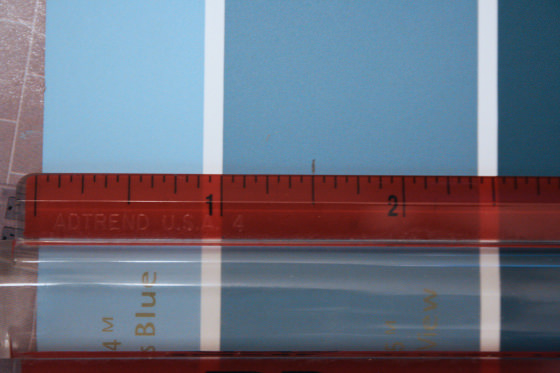
Step 11) Now it’s time to take your other color (or a new swatch) and measure in one and a half inches on either side of the rounded end (pictured) and one inch on either side of the non-rounded end (not pictured…sorry about that)
Step 12) Once again, this creates a grid. It will look like this:
Step 13) Of course you now need to cut along those lines, and you’ll come up with a 3×3 box
Step 14) Now more measuring! Measure in a half-inch on all sides to make another grid.
Step 15) Pick up your knife again, and score the yellow lines. Remember not to put too much pressure! After you score, you have to cut your triangles out again. Here are the finished triangles:
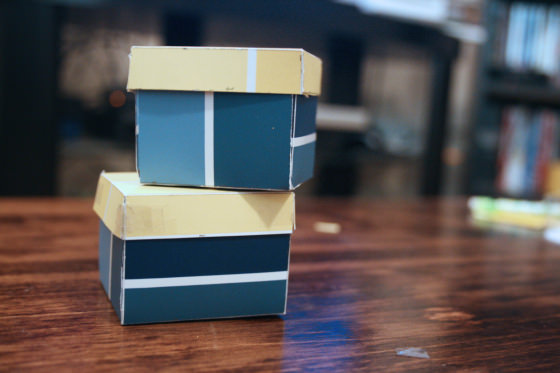
Step 16) Bend at all the angles and then close up the box lid just like you did the box.
Step 17) I taped the outside, but I don’t like the look of that. Taping the inside would have looked much better. Hindsight is 20/20. Your lid should fit well right over the box and that is all! I know it’s a pretty detailed tutorial, but it’s really super easy once you get all your measurements right.
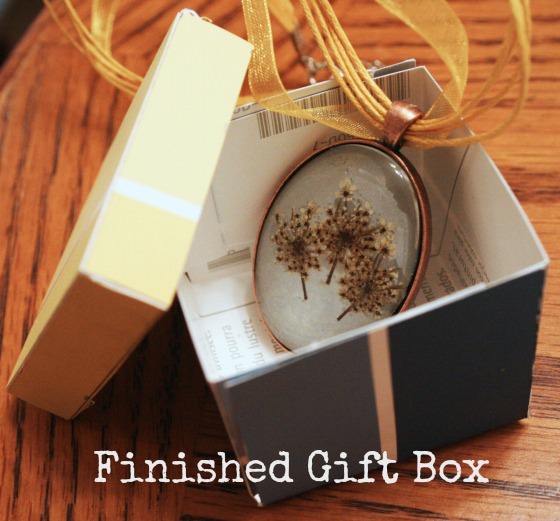
Step 18) And of course, a great place to put your newly made necklaces!
Thanks so much to Lauren for this fab DIY Tutorial. Lauren will be back in a few weeks time with another great idea!
To see more of her posts you can read Lauren’s blog here:
http://flatbrokebride.wordpress.com
[email protected]
FACEBOOK
TWITTER
Share this post
This site uses Akismet to reduce spam. Learn how your comment data is processed.


Comments