Featured Post
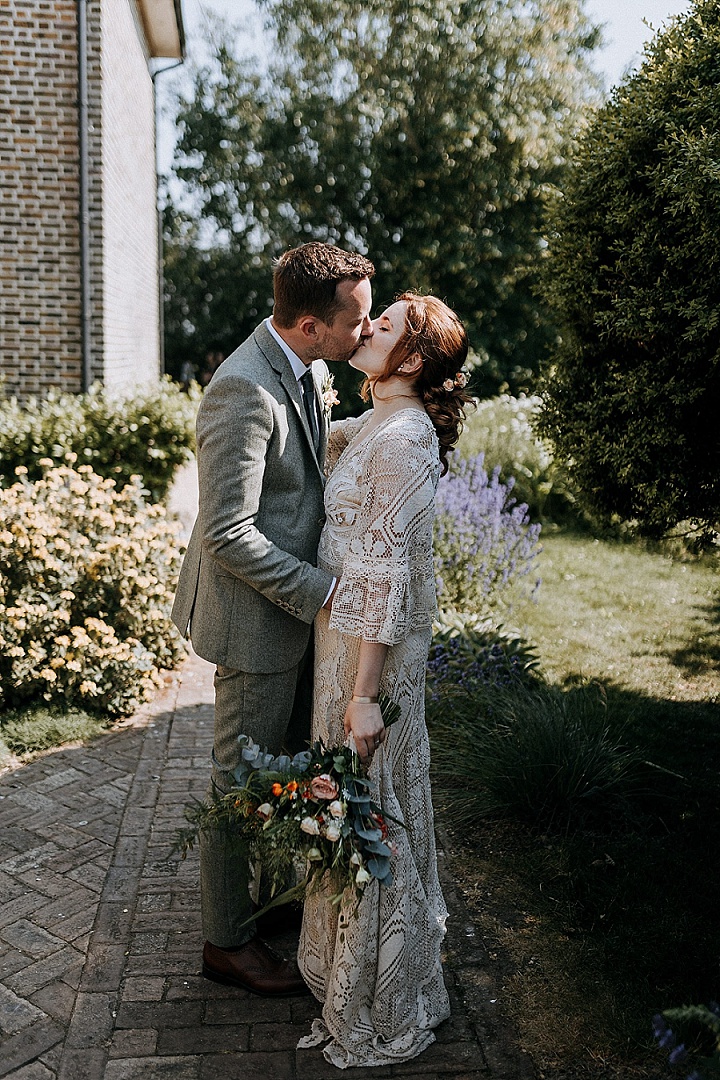
James and Sophie’s ‘Low Waste’ Nature Loving Kent Wedding by Chris Blackledge Photography
Today I have another fabulous wedding from Chris Blackledge Photography who is becoming quite the regular...
Today I have another fabulous wedding from Chris Blackledge Photography who is becoming quite the regular...
19
May
2014
By Boho

I have a super cute DIY tutorial for you today and it comes from Rachel Thompson. This tutorial comes in two parts so it’s up to you if you do one or both parts. If you are looking for a cute homemade gift to give to your bridesmaids, or even a friend then this tutorial is for you. It dosn’t have to be wedding related it could be for a birthday or a christmas present, it’s totally up to you.


STEP 1) Place your fabric lengths on top of one another and pin the paper circle template on top.

STEP 2) Cut around the template and then re-pin all the cut out fabric circles to keep them together. You will need approx 5 circles per flower. Using your fabric scissors, cut 5 slits around the outer edge of the circles and towards its centre. Careful not to cut too far in!

STEP 3) Light your candle, and being careful not to burn your fingers, take each circle one at a time and hold the cut edges over the flame. The heat from the candle will ‘curl’ the edges and create ‘petals’ for your flowers. You can use tweezers to hold your fabric here if the flame is too hot! Repeat this process until all your circles have been curled.

STEP 4) Layer each curled flower on top of each other and then taking a needle and thread, run a couple of stitches through to secure in place

STEP 5) Using a glue gun, stick a decorative button or bead in the centre of the flower, and then turning it over, stick the small felt circle on the back.

STEP 6) Stick the flower onto the blank hair clip, wait to dry, and then your lovely hair clip is ready to packaged for your Bridesmaid!

STEP 7) To create some extra special packaging for your handmade gifts, take your gift box, ribbon and buttons of your choice, as well as your alphabet stamps and ink (although of course, you can hand write any messages).
A craft card box as shown here offsets the ivory fabric really well, and are readily available at craft stores or online.
Place a little extra fabric in the box to line it and lay the hair clip on top.
Cut a length of ribbon or lace that stretches across the lid of the box and down its sides. Glue this in place using textile glue. You can use the glue gun again here, but UHU textile glue is better for this as it is like PVA and dries clear.

STEP 8) Next, glue your buttons or beads along the length of ribbon to create a pretty pattern.

STEP 9) Then, taking your alphabet stamps and ink, stamp the message you wish you say. I’ve put ‘Thank you for being my Bridesmaid’ here- but you could type the name of the recipient, or just ‘Thank you’- whatever suits!
You now have a beautifully hand made gift for your special Bridesmaid that is packaged with a personal touch.

www.rachelthompsondesign.co.uk
www.facebook.com/RachelThompsonDesign
https://www.etsy.com/uk/shop/RachelTDesign
[email protected]
Share this post


Such a cute idea! This little gift is so creative and charming!