Featured Post

Boho Pins: The Best of Boho – Group Shots
The group photo shot can sometimes be a wedding photographers nightmare, trying to cram every...
31
Jul
2012
Today I am delighted to invite a new DIY expert onto the Blog, some of you may already know her, her name is Lauren and she writes her own bridal Blog called Flat Broke Bride. Lauren is currently planning her own wedding and has become a DIY expert in the process.
Today she is showing us how to make tin can Lanterns, which can be a stunning way to light up your wedding reception or evening ceremony.
Here’s Lauren to tell us a bit more about herslef…….
‘I’m broke and planning a wedding! My fiance and I met about a year ago. He is the perfect man for me and I can’t wait to marry him, but it is so difficult to plan the wedding of your dreams on a teeny-tiny budget! However, I refuse to go into serious debt for the wedding. This is not the time to be in debt, especially when you are young and still paying off college loans. I started my blog, Flat Broke Bride, to show how to achieve the wedding of your dreams on a tight budget. I offer lots of DIY tutorials as well as some great inspiration pictures. This is my first (and hopefully only) time planning a wedding, so check out the site and come along as I feverishly plan away!’
I want to step out of the mason jar box for a bit. I know, I know, every rustic wedding should have mason jars for everything. But I want to step out of that box…just for a second…and make some different luminaries. I found these really early on in the planning phase of things, and have really thought they would make a better (and safer) type of luminary than those bag luminaries we always see.
These people are VERY ambitious, I was not so ambitious, but since I am doing A LOT of cans, the simpler the design the better.
NOTE: Pre decoration – Fill the cans with water and put them in the freezer overnight. This is a pretty important step!
Step 1) After you gather all of your stuff together, you need to decide on what picture you want to be illuminated. I decided on butterflies, which is quickly becoming a side theme for me. My butterfly tattoos were the template for the butterflies made for the cans. So create a template and then trace it on your paper.
If you cut a regular piece of paper in half that should be the perfect size to fit your can. Once you trace the outline of your image, it helps to go over it with marker, so it’s easier to see.

Step 2) The dark line really helps when you begin to make the holes. Now that you have your pattern…make more…a lot more. Well I guess it depends on how many of these you want, you will need a new pattern for each can you decide to make. Once you have enough patterns, grab a frozen can from your freezer.
Here is where things might be a little tricky for you. If your cans reacted like mine, the water expanded downward, not upward, and popped the bottom of the can a little. Also, when the can expanded outward, some of the cans busted their sides. None of this is worrisome. You can still do the project with a ripped can, unless the whole can split up the side. Also, the expanded bottoms can be banged in with your hammer after all is said and done.
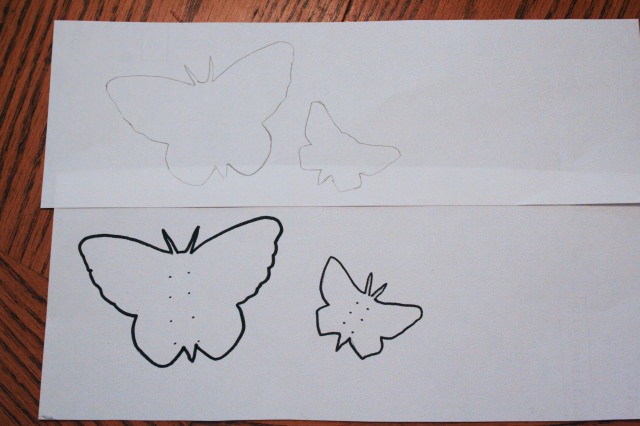
Step 3) Next, tape your pattern around the frozen can with some tape. Sorry! Once again I have not pictured something you need in the Materials picture…but yeah…tape…you need it…
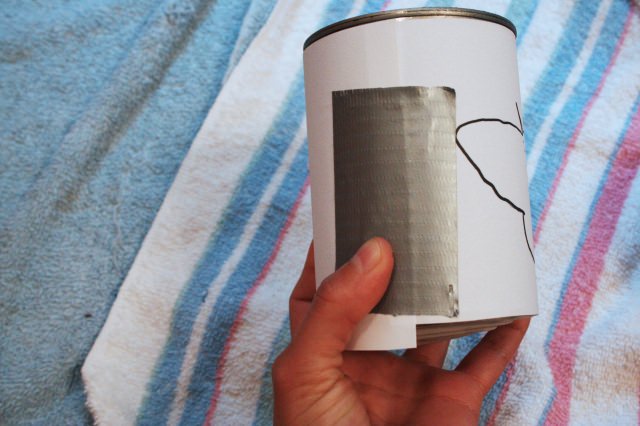
Step 4) Now it’s time to break out the hammer and nail. It’s a good idea to cover the floor in towels as well as have an extra towel to help hold the can. Take your nail and tap it a few times around the outline of your desired shape. The ice is there to give your nail some resistance so it doesn’t bend the aluminium.
Here is where things got funny. My dad and the boy wanted to work on this as well, but thought they had a much more clever and faster way to do this. They pull out the power drill with a small bit all ready to conquer the can project. Not only did they break TWO drill bits, but the end result leaves a rough edge where the drill pulled out of the hole. Men. They think they know everything. So word to the wise…do not use a drill.
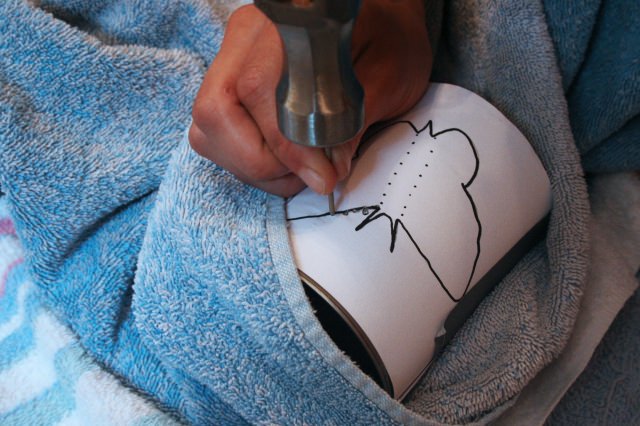
Step 5) You’ll notice, as you move forward, that the can starts to collect condensation and the marker starts to run, the paper can also start to rip. Don’t worry too much. The ice will never melt enough where hammering becomes impossible, and you just have to be really careful to not rip the paper. Once you have traced your pattern(s) you can remove the paper, and you pretty much have a finished luminary. Before you can do anything else to it, you have to melt the ice. You can do this the slow way, or the quick way. The quick way being running the can under the hot water and watching the ice melt
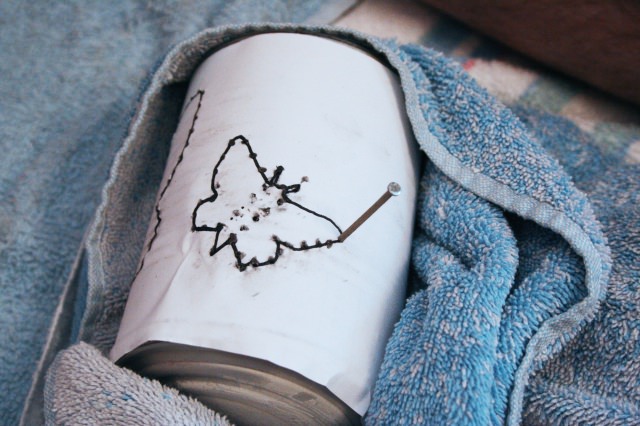
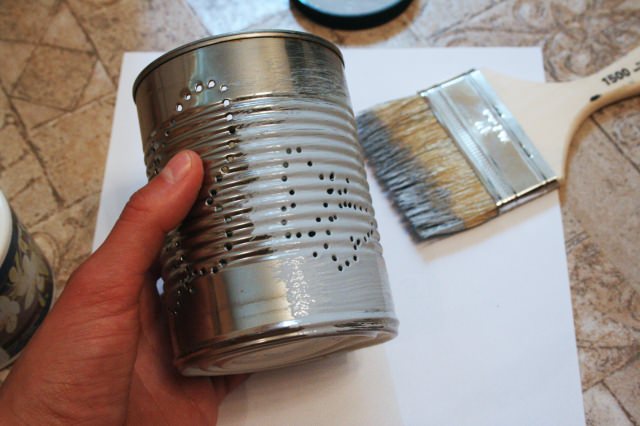
Step 6) Now you can leave your can like this, for a more industrial feel, or you can jazz it up a bit with some paint!

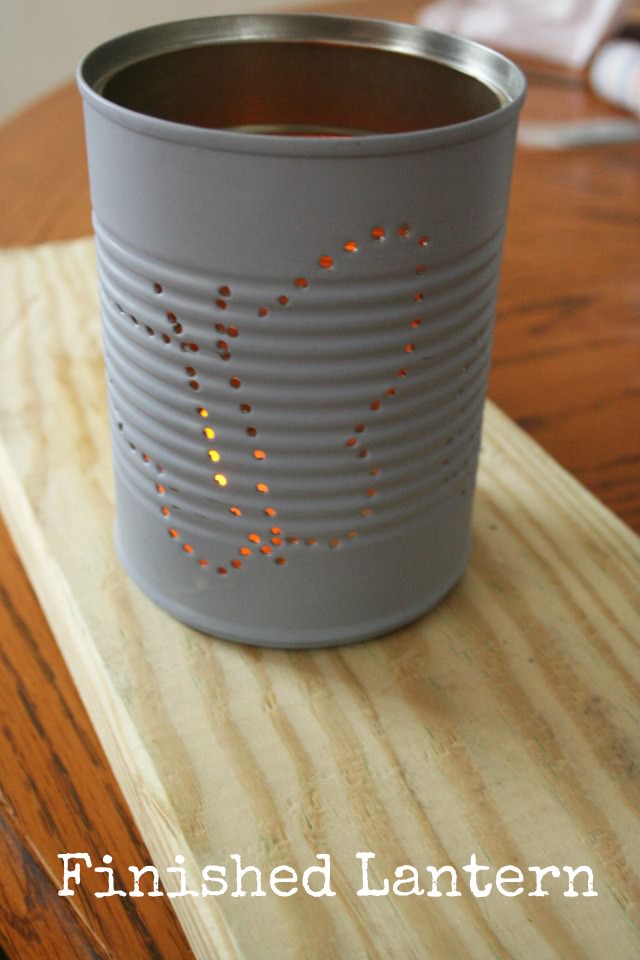
I chose to use blue, but I think I will also paint some yellow! Once it is all painted you are truly done! If you would like to use a real candle, there is really no fire hazard, or you can just use those battery operated candles that will burn all night long. Either way, I think this will be a delightful luminary to light the way to the reception area!
Thanks so much to Lauren for this fab DIY Tutorial, I can imagine lots of these cute lanterns dotted around any wedding. Lauren will be back in a few weeks to talk us through another great idea.
To see more of her posts you can read Lauren’s blog here:
http://flatbrokebride.wordpress.com
[email protected]
FACEBOOK
TWITTER
Great tutorial! I love a great DIY project…they are so fun and economical! Congrats on your upcoming wedding!
What a simple yet really great idea. Have my first tin sat in the freezer just deciding on a design. Going to hang them from our hanging basket brackets in the back garden when we BBQ in a few weeks time. Thanks :)
Thanks guys! I really had fun making them!
These look great and we have started making some for our wedding in July, just a quick question, what paint did you use to paint yours, just normal or paint particularly for metal?
Thanks
Those are awesome..i saw one post where someone put sand in the can and froze that!
LOVE this as a decoration – we have a big oak tree in our front yard, and are making tin can luminaria to hang from the branches spelling out “just married” – the advantage to this craft project is that you can do it a year in advance, and store the cans in an attic or crawl space, unlike all the flowers and perishables and cooking that need to be done in the final weeks and months leading up to the big day. The cans can be spray-painted to match any wedding color scheme. AND if you decide to do words instead of a picture, you can use your own printer and just enlarge the font to 400 or so. (We are using #10 cans – got them free from our local pizza place!)
Does the can over heat by any chance??
Also what’s the importance of freezing the can over night before hand?….I already made one without freezing it, could I still use it?
You’re freezing water in the can to create a solid surface to pound nails against, preventing the can from having dents.
This looks really fun! Well described process from the beginning to the end! Great tutorial, thanks!
Thanks
I used a drill before
Hope the ice will save me a lot of time
not having to remove the sharp edges of the drilled holes
Have you tried our fabulous wedding directory?
discover more