Featured Post
Kelsey and Kevin’s Golden Hour Garden Party Wedding in Ohio by Dennis Crider Photography
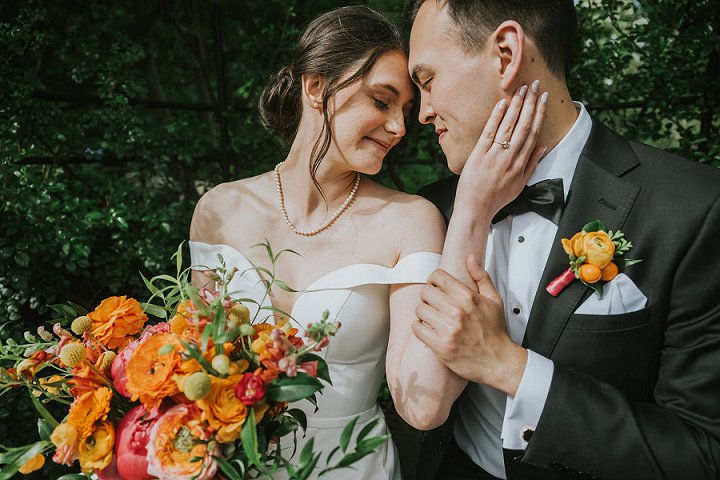
Kelsey and Kevin were married on 24th May 2025 at Cleveland Botanical Garden in Cleveland,...
Kelsey and Kevin were married on 24th May 2025 at Cleveland Botanical Garden in Cleveland,...
3
Jul
2012
By Boho
It’s Tuesday so it must mean it’s time for another DIY Tutorial. Today it is the turn of the Lovely Laura, who you will know from her Bridal diarys. Laura’s wedding which is now in April (currently moved from September) has a whole load of DIY going on, so she has been kind enough to share some of her DIY projects with us. Today we are looking at how to make decorated papier-mâché letters.


Step 1) Draw out your letter on an opened out cardboard box. Remember to draw on side backwards!


Step 2) Cut this out, trying to keep as much of the original box as possible.


Step 3) Reassemble the box inside out with masking tape.


Step 4) Papier-mâché the box with strips of newspaper dipped in PVA glue, cover the whole letter. Leave to dry overnight and repeat the papier-mâché step. The more you cover the stronger it will be.

Step 5) When it is fully dried decorate how you wish!

Step 6) I painted mine white first to stop any paper peeking through, then used wool to wrap each letter. If you use wool too, do the hard bits first, and try to imagine which way you want the yarn to wrap to get an even finish.


Step 7) This would look great in glitter!


If you want to read more about Laura’s wedding journey and more about her DIY adventures then she ahs just started her own blog http://themrsmakes.blogspot.co.uk
Photography By:
www.jesspetrie.com
[email protected]
TWITTER
LINKEDIN
FLICKR
07581209794
♥ If you are a DIY Bride and you have a Tutorial you wish to share then let me know. Email me at [email protected] ♥
Share this post


They turned out beautiful!!!