Featured Post

‘Industrial Boho’ Disco Balls Meet Peach Fuzz, Modern Wedding Inspiration
If you love a bit of colour and the odd disco ball here and there...
27
Apr
2012
Welcome back to our weekly Make up Lesson here on the Blog. So far we have shown you how to create the perfect day look, so today is about turning that day look into a night time look in a few easy steps.
If you are anything like me, you don’t always have time to start your make up all over again when venturing out for an evening out, so I personally have a few things I do to turn my normal day makeup into a fresh night-time look. With the help of Catherine from Ivy Clara, we will show you how to do this quick and easily!


In case you have missed the other weeks so far we have covered:
Make sure you check them out as they are full of useful hints and tips to help create the perfect day make up look.
Once again I’d like to say a big thank you to Catherine for the Make Up, Bil from Hair Aesthetics, Nicola Thompson for the Photography , Styal Lodge for the use of the Venue
I’ll pass yo over to Catherine………….
Day makeup can easily be turned into a more dramatic look without the need to start from scratch.
Kelly expressed her love for a dark eye look so with a few more products I ‘smoked’ up Kelly’s eyes using a smouldering eye colour and some intense eyeliner.
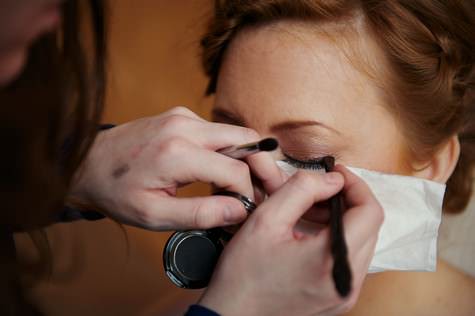
1) When applying dark powder eye shadow (especially if you don’t want to have to touch up your base makeup), folding a tissue and placing under the eye ensures that any product ‘fall down’ is caught by the tissue and does fall onto the rest of the face.

2) To increase the intensity of the bronze eye colour I used a thick angled brush to push a matte black shadow into the outer lash line. Before applying to the eye, apply to the back of your hand to get rid of any excess product.

3) The next phase is all about the blending! Use a fluffy brush to blend up and out into the outer socket line buffing in small circular motions. Don’t take the dark colour too far along the lip towards the inner eye-keep the inner eye lid lighter.

4) After the blending of the initial application of the darker shadow, you may wish to add more intensity by repeating steps 2 and 3 above. Little at a time and blending is the key when working with really dark shadows. This cycle produces a multi-dimensional finish which is much more flattering than just applying a block of ‘black’ all over the lid.

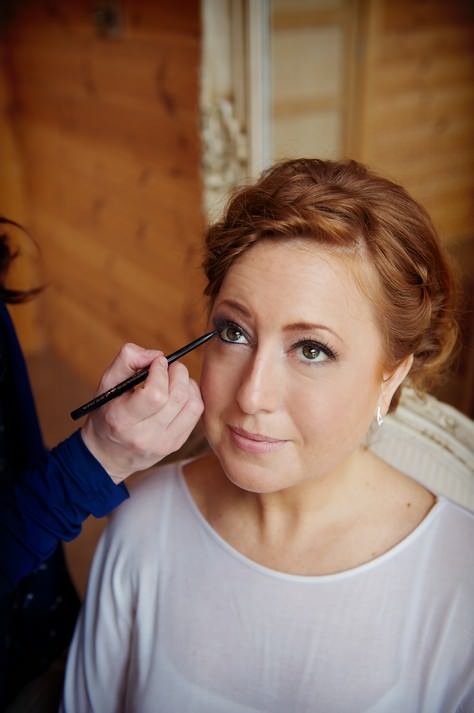
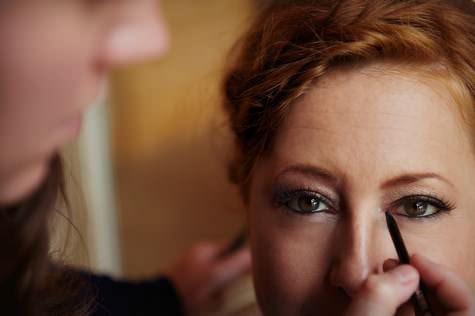
5) To really increase the intensity I added a black eyeliner all along the lower water line (this is the line that lies above the eyelash line). If this is something you don’t like doing for squeamish reasons, simply add the liner along the lower lash line (the bit the eyelashes grow out of!).


6) I then took a tiny amount of black shadow and used a small smudging brush to apply along the lower lash line buffing into the eyeliner applied. This creates a softer, smoky effect.


7) Finally, to add more drama, I applied ANOTHER set of lashes. It may seem excessive but because both pairs were quite natural, the final look was not over the top. In fact, I prefer using 2 pairs of more natural lashes than one extreme pair and the natural lashes have an invisible strip which is undetectable against the lash line. In my opinion, some of the more dramatic lashes have a very thick lash strip which can sometimes look too obvious.


8) I then added a nude lip gloss to Kelly’s lips to finish the Look off. When using heavy, dark eye make up it is best to keep the lip colour to a minimum so a more natural nude colour suits this look the best

Next week , Catherine will provide a list of products to re-create the looks on a save or splurge budget!
For more information for all of those involved in the shoot go to:
Make Up – Ivy Clara
Hair – Aesthetics Hair
Photography – Nicola Thompson Photography
Venue – Styal Lodge
Hair accessories and Cuff – DC Bouquet
Great tips! Love the step by step photos!