Featured Post
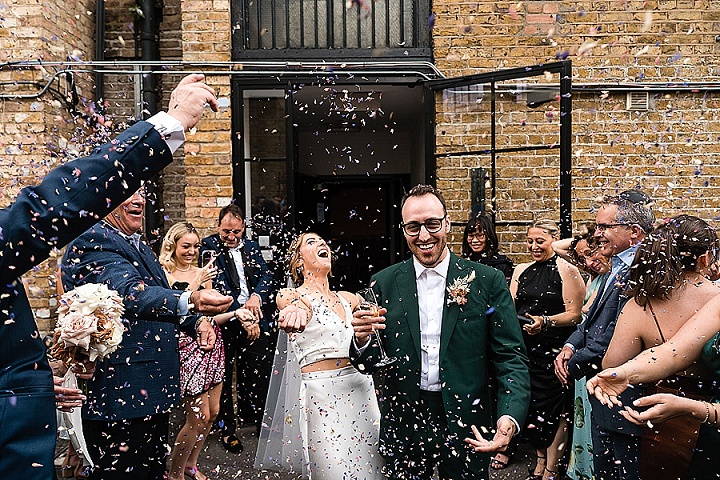
Samantha and Harrison’s Laid Back, Modern London Wedding by Babb Photos
I have been lucky enough to feature the gorgeous work of Babb Photos quite a...
21
Feb
2014
Yay, it’s Friday! are you excited? In only a few hours you will all be clocking off for the week and enjoying the weekend! Happy days. But before that happens I have another Diary of a Boho Bride entry for you and this time it’s the lovely Kate! last time Kate told us all about how her wedding planning had taken a different direction, with some change in plans and how she was dealing with them all. Today she gives us a bit of an update on how things are going as well as sharing with us her super cute DIY Kraft Pocketfold Invitations. These invitations are fab, Kate has worked long and hard on them and I’m sure you will agree she has done a fantastic job. The tutorial is easy to follow and she gives a full and comprehensive list of the supplies she used and where she got them all from.

Wow, time must be speeding up – these blog posts are coming round faster than ever, which means our wedding will too! Less than 5 months to go now! But I’m enjoying it more than ever as all those ideas rattling round in my head are finally becoming real!
Today I have a general update – things keep changing! And also pictures of my invitations, and how I made them!
But first for an update. The picnic theme is still well and truly happening. In fact, a big delivery of ten picnic baskets last week made it really real! And the huge box they came in kept my girls occupied for at least an hour! Bonus!
I also collected some slate from our venue, which I’m going to use for all the signs. They’ll be like the ones in the photo which my friend used for her wedding. Cute hey?

We are also still debating the ‘To marquee or not to marquee?’ question, after we were unfortunately let down by the marquee company we had all lined up with a brilliant price. Apart from other companies generally charging more than we had planned to spend, we also had a good look round the venue again last weekend and realised that our wet-weather-plan could actually be to have everything inside the house, including the picnic! It’s a risk, but it would save us quite a bit of money.
If we decide ‘not to marquee’ I’ll be expecting every one of you to be praying for no rain and plenty of sunshine for 12 July!
The legal wedding ceremony has also been booked. For us, this is just the ‘paperwork’ and so it will just be us and our best friends as the two witnesses. It will take place at Leeds Town Hall, which is a fantastic place (and very reasonably priced too!). We booked it for the 30 June, only to be told a week later that it would have to be changed as the whole of the Town Hall is shut down that day because of the Tour de France! Yes, the Tour de France is becoming the Tour de Yorkshire this year! Anyway, it was fine for us to change it, luckily! No yellow vests for us!
And so on to the invitations, which once posted really seemed to make me realise that it will be happening before I know it! V. exciting!
The inspiration for my invites actually came from a Boho blog post by a previous Boho Bride, Becki. I absolutely loved her invites, and it was so useful to have the links to where she got her blank cards from, etc. I’ll try to do the same!

STEP 1) The blank pocket folds firstly need to be put together so get some good double-sided sticky tape and get sticking!

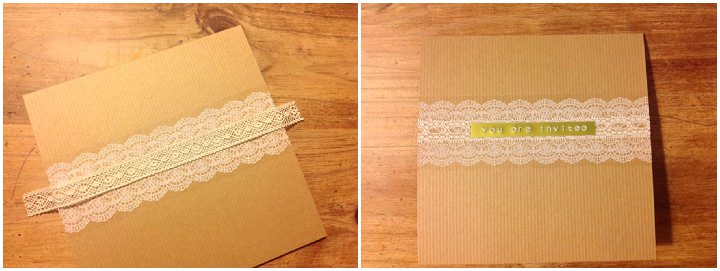
STEP 2) Next I put the lace adhesive tape across the front of the card. I love this stuff. It comes on a large roll so there’s plenty left over for putting around my jars for flowers!
STEP 3) I then added a real piece of pretty lace across the middle of the adhesive lace – secured on the inside with tape. You may also want to add a bit of glue to the middle of this lace to secure it to the front of the card.

STEP 4) Next we decided on our wording for the front – ‘you’re invited’. This seemed a bit less formal than ‘invitation’ which we liked, and all lower-case gave this impression too. The label maker is brilliant, and I was so pleased to find the gold tape! It can be a bit laborious making all the labels, but spread out over a few nights and it doesn’t seem too bad (although, if I’m honest, I gave this job to Andy!).
The label maker tape has a backing that peels off, and in theory it should then stick. But it doesn’t. I tried all sorts of glue dots, double-sided tape etc but I found a good strong glue worked the best (and squashing the invitations under a pile of heavy books overnight too).

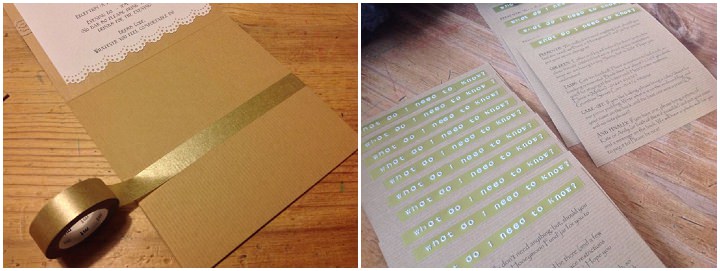
STEP 5) Now for the inside… Here you can see the main information – printed on standard paper but with the lace pattern on the top and the bottom created by using the lace punch. The inserts have more gold labels, and then I set up my printer to print the text directly onto them. The top of the pocket also has a strip of gold washi tape parallel to the edge.
STEP 6) Lastly, seen as I am going to be Mrs Campbell, and because we both love a bit of pop art, I bought an Andy Warhol Campbell’s Soup rubber stamp which I put on the back of the invitation and also on the envelopes.

For the evening invitation, I used a single piece of card the same size as the pocketfold. The front was identical and the back was very similar with just the slightly different information. I then simply printed off the other information onto an A4 piece of paper, on which I used the lace punch on the top and the bottom.
I’m really happy with the finished product. Hope you like it too! It was a bit of a production line, making them all, but I loved it!


I’d love to know what you think. And if I’ve left out any vital info, just let me know!
Happy February everybody. See you next time (which will be after my hen do – I can’t wait!)
Awww Kate! These look flipping amazing hun!!
Thank you for linking back to my tutorial and I’m super chuffed that you decided to use it as inspiration for yours, they are wonderful and I absolutely love the use of the lace tape & the label maker. You did an ace job with them and fab tutorial.
Becki xxx
Thanks Becki! I really couldn’t claim the credit for myself as your tutorial was sooo useful for me! I had so many ideas initially but your invites were spot on with the style I like. Glad you like mine too! Thanks for your comments! Xx
You can buy adhesive lace?! Why did I not know this? Why? I’m not clear on my first scroll what the washi tape does, so back I go.
Looking good!
They look brilliant Kate! So freaky, we are right in the middle of making the same Kraft pocketfold invites after getting inspired by Becki’s tutorial too! Us Boho brides are a like-minded bunch :) all the supplies arrived yesterday and we are about to get sticking/printing etc so it’s lovely to see your amazing finished product for inspiration to get started! That adhesive lace tape is great, have never heard of that before. Have a fab Hen do xx
Sorry, forgot to ask… Which font did you use to get those squares for the tick responses on the RSVP card? Xx
Hi Kirra! Definitely a boho-bride thing then haha! Make sure you put a few photos of yours on your blog post when you’ve done them! I did the tick boxes, and all the text actually, in Photoshop – I find it easier to arrange the different parts for the layout etc. I’ll check on the font though – can’t remember off hand! It will be the same as the smaller text. Good luck with it all! I really enjoyed making them, and it’s so nice when people like them too! Kx
Hi, just wondered what printer you used to print the R.S.V.P card, my printer does seem to like the small card size!!
Hi all,
I have ordered the different size pieces of card to put inside the pocketfold but am really struggling to print onto the card from Word as it is quite a small size. How have others managed to do this? Any help would be greatly appreciated.
Hi Kate
Do you have a picture of each of the inserts to see what information you included and how best to word it/lay it out? Thanks!
Hi there Kate,
Like Amy and Nicola I am really struggling with how to print onto the inserts. Did you use a specific printer for the job? And if so what printer? Hope you can help xxxx
Hello,
I used just a normal canon printer for it. It’s this one.
http://www.canon.co.uk/Support/Consumer_Products/products/printers/InkJet/PIXMA_iP_series/PIXMA_iP1900.aspx
You need to set up the word document to the correct size of insert. ie. change the page size from A4 to the custom setting and type in the correct measurement.
My printer has a top loading paper feed and a slider to adjust to hold the paper/card in. It should go through even on the smaller size ones. I even printed on luggage tags which are thinner than the inserts.
Hope that helps xxx
Becki xxx
Have you tried our fabulous wedding directory?
discover more