Featured Post
Ask The Experts: Personal and Creative Touches for Your Small Wedding
Standing in front of 150 guests at a wedding can feel daunting, which is why...
Standing in front of 150 guests at a wedding can feel daunting, which is why...
15
Jul
2013
By Boho

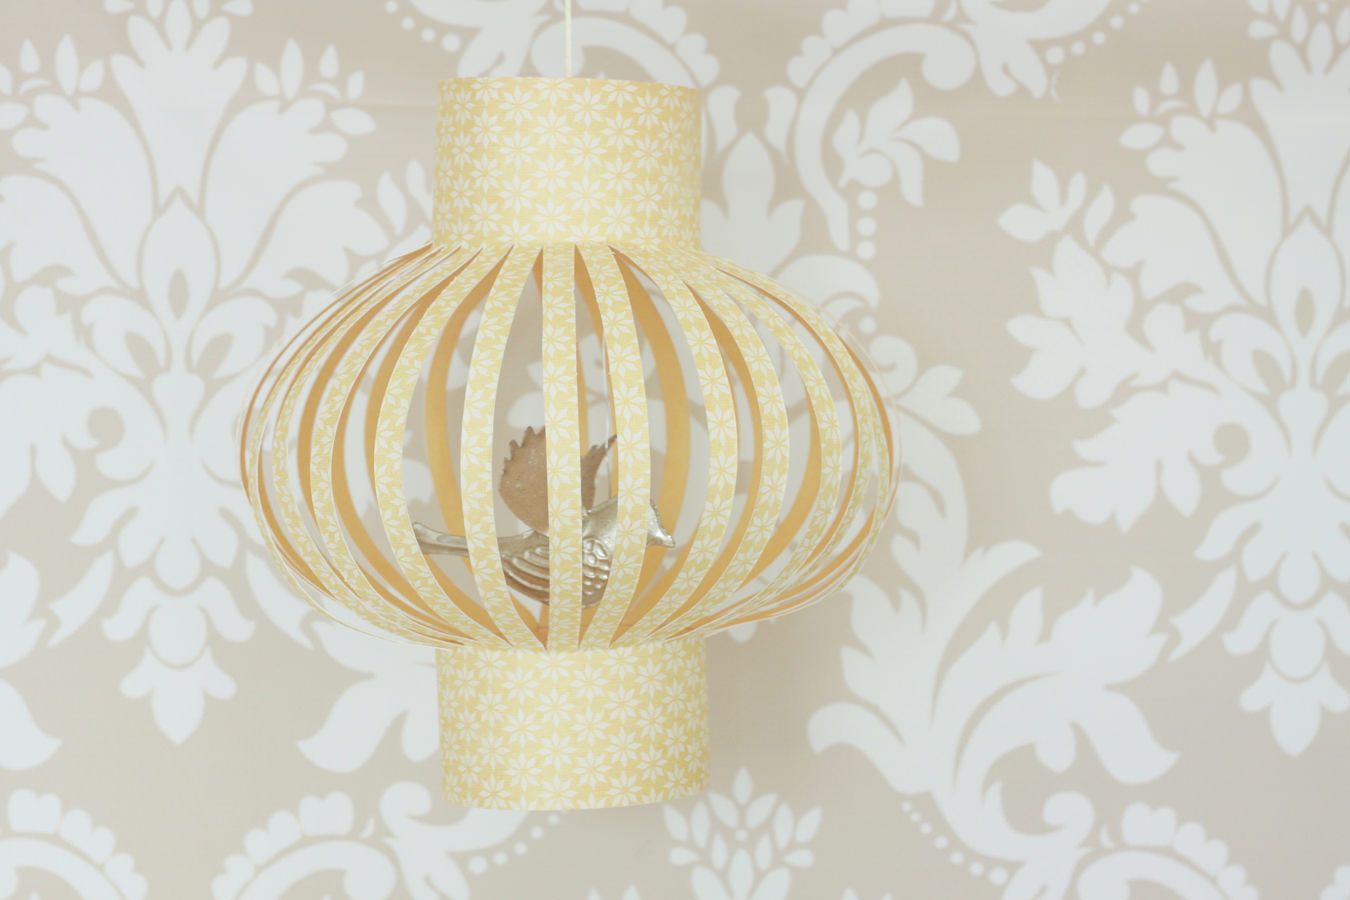
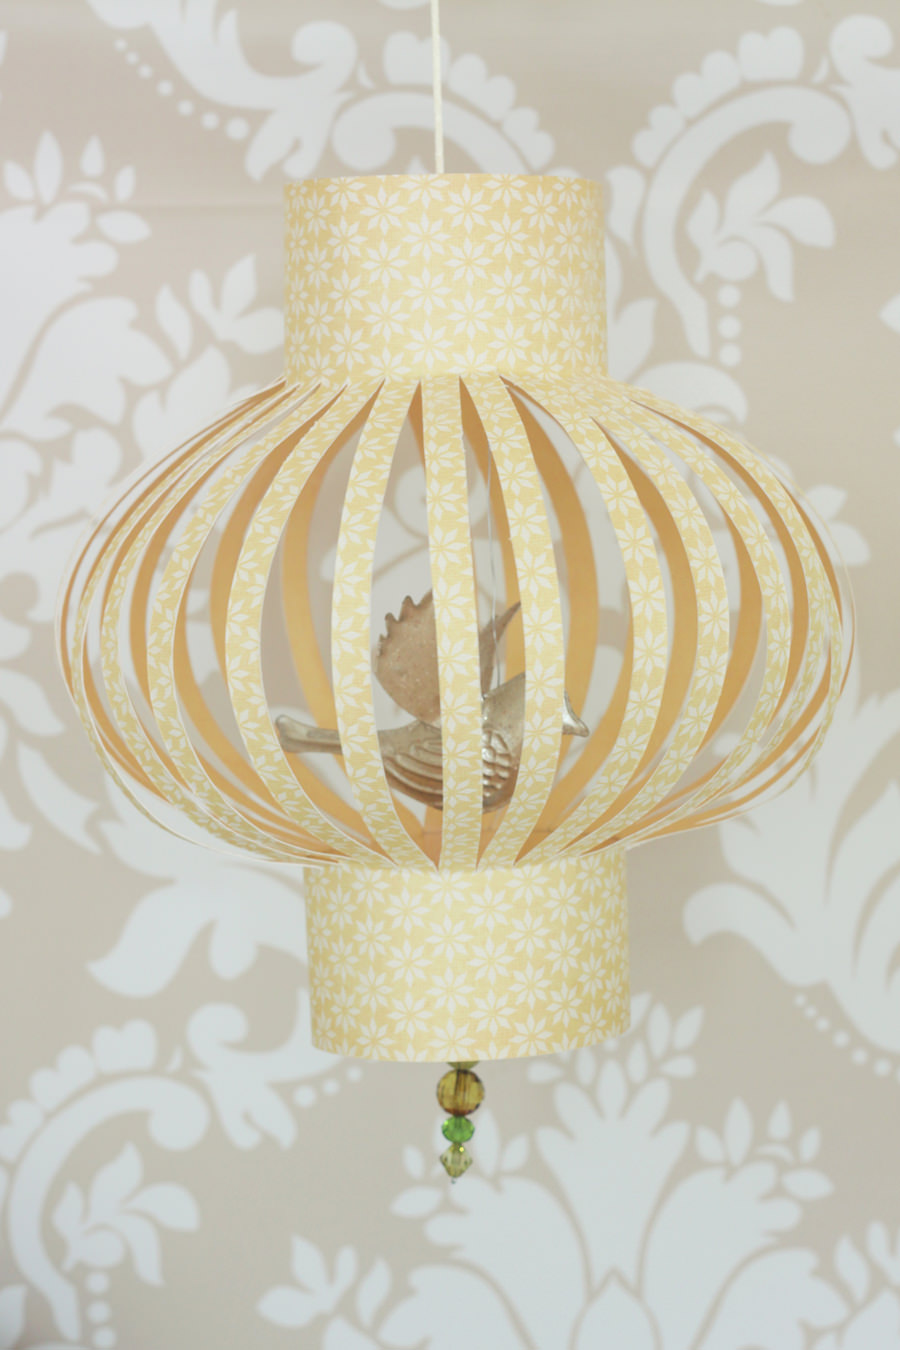
I am delighted to welcome a new DIY contributor to the blog today. Andrea Pittam from Kiss the Frog, is a photographer as well as crafter and will be on the blog on a monthly basis sharing with us her numerous DIY Tutorials. Today Andrea is showing us how to make these super cute paper Birdcages, which would be perfect to hang around your wedding, or party or simply at home.
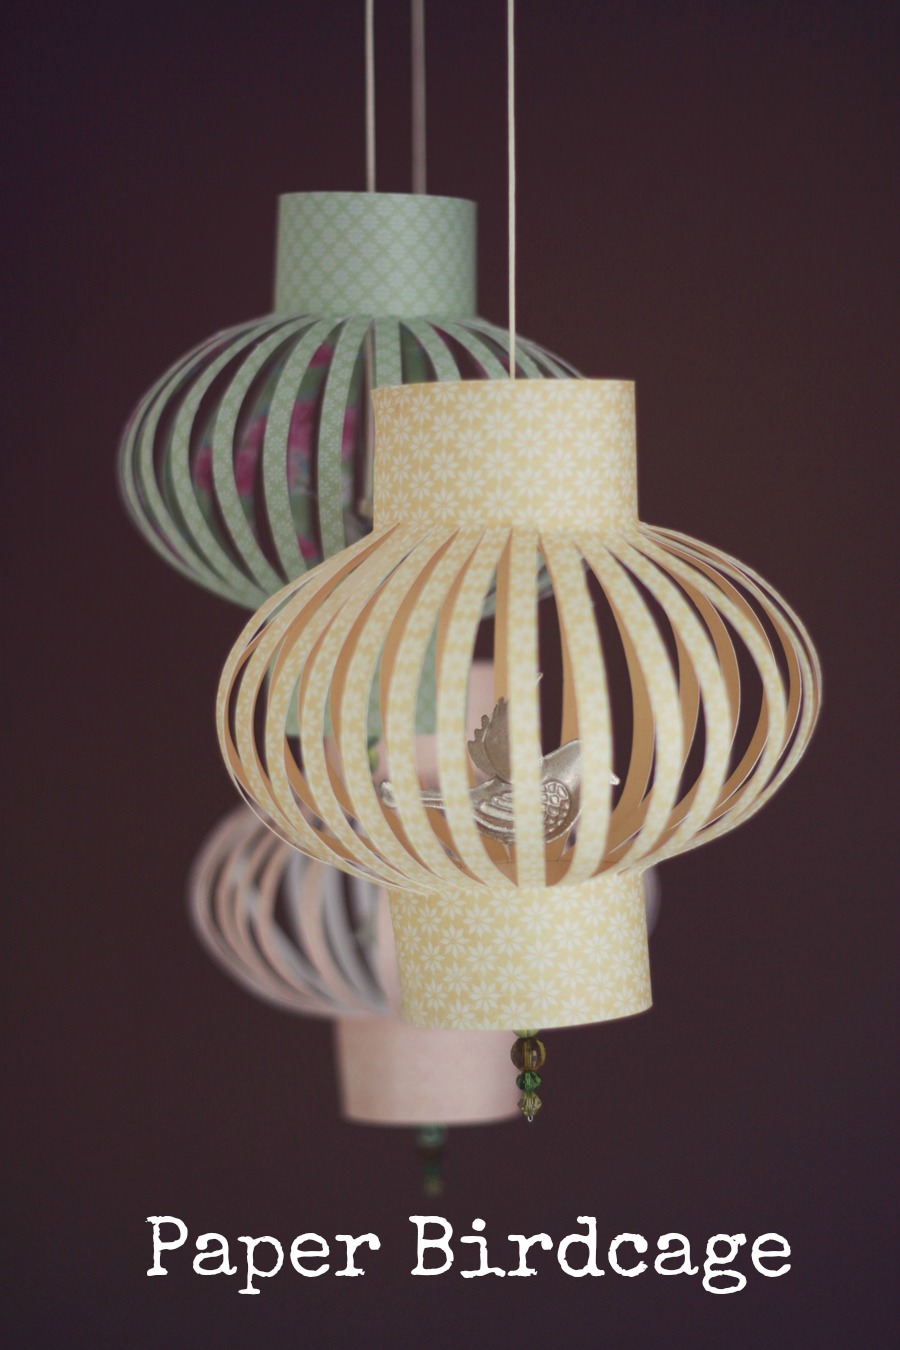
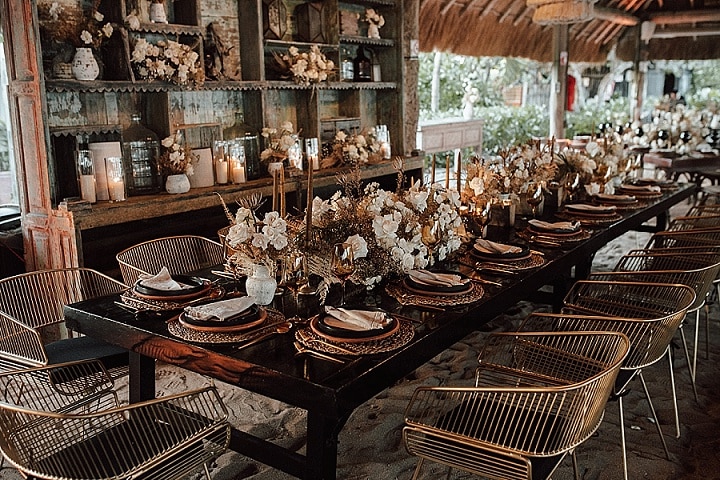
These birdcages are really simple to make and look great hanging in your home or perhaps to decorate your garden, for a party, or even to use for your wedding decorations.Use different coloured paper and birds to co-ordinate with your preferred colour scheme.

STEP 1)
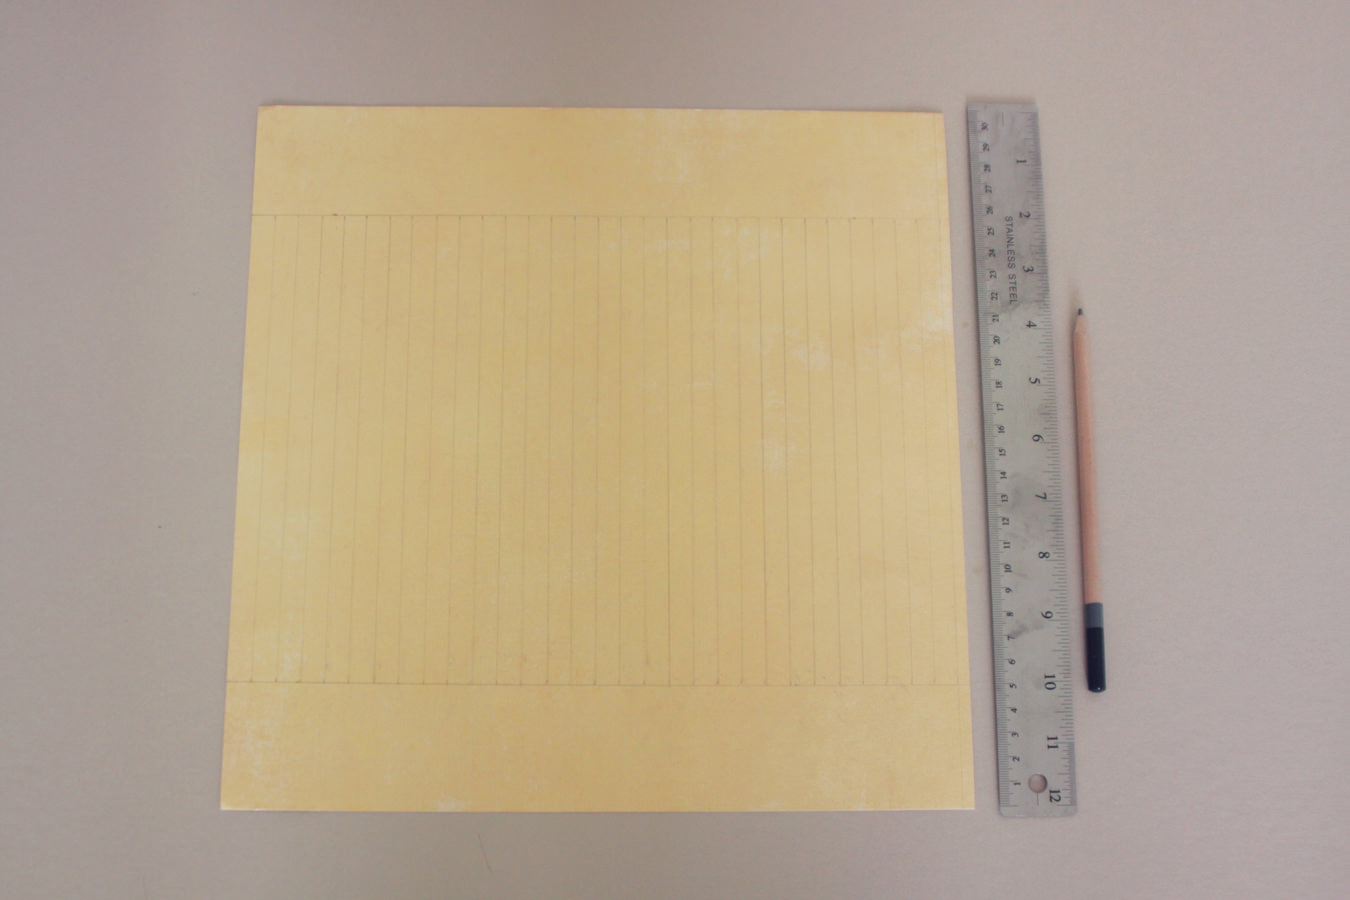
Turn the paper over and mark 5 cm from the top and draw a line across the paper. Draw another line 5cm from the bottom.
In between the two lines draw vertical lines 1 cm apart.

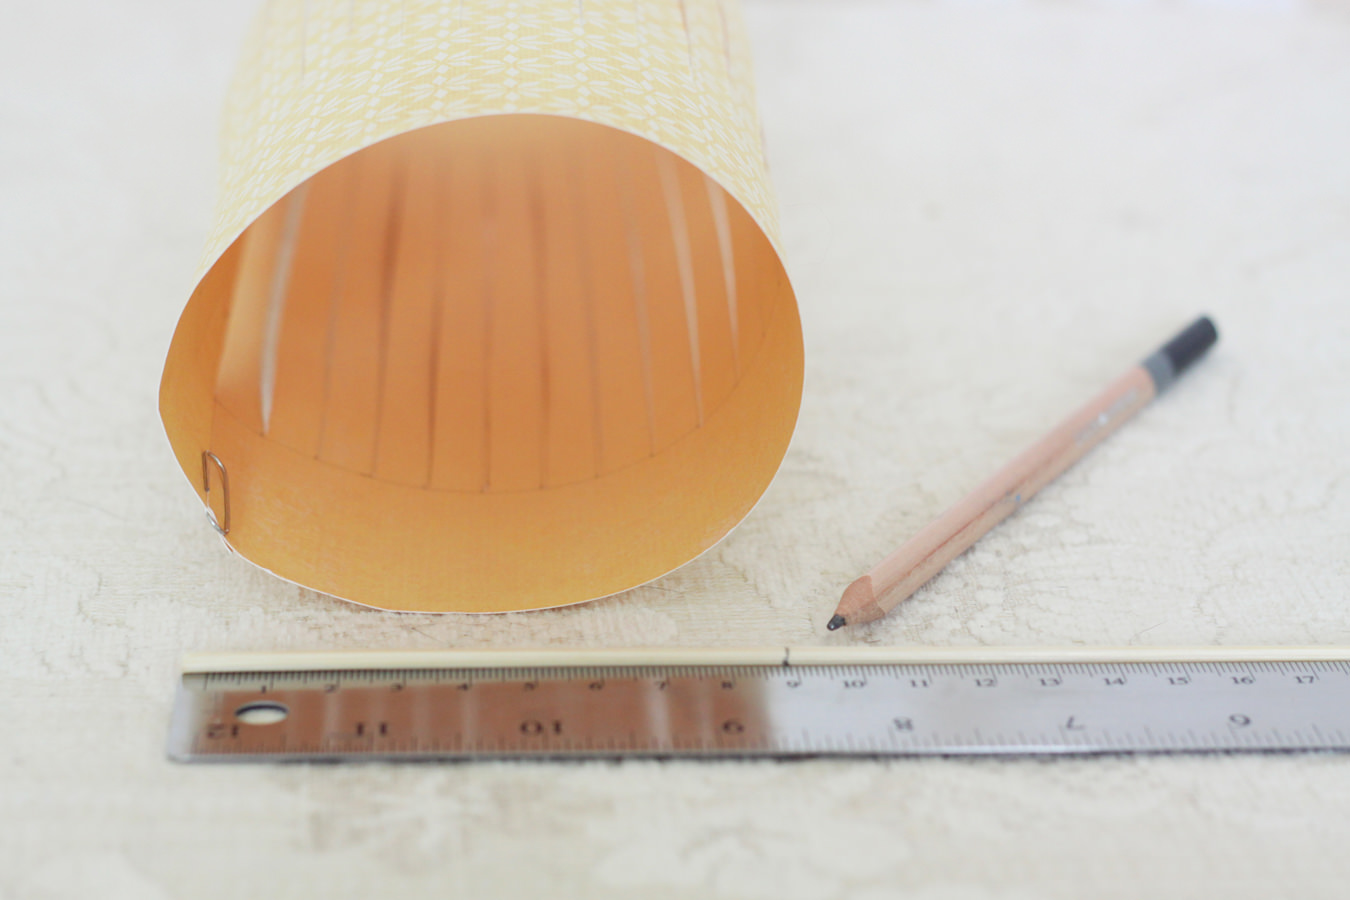
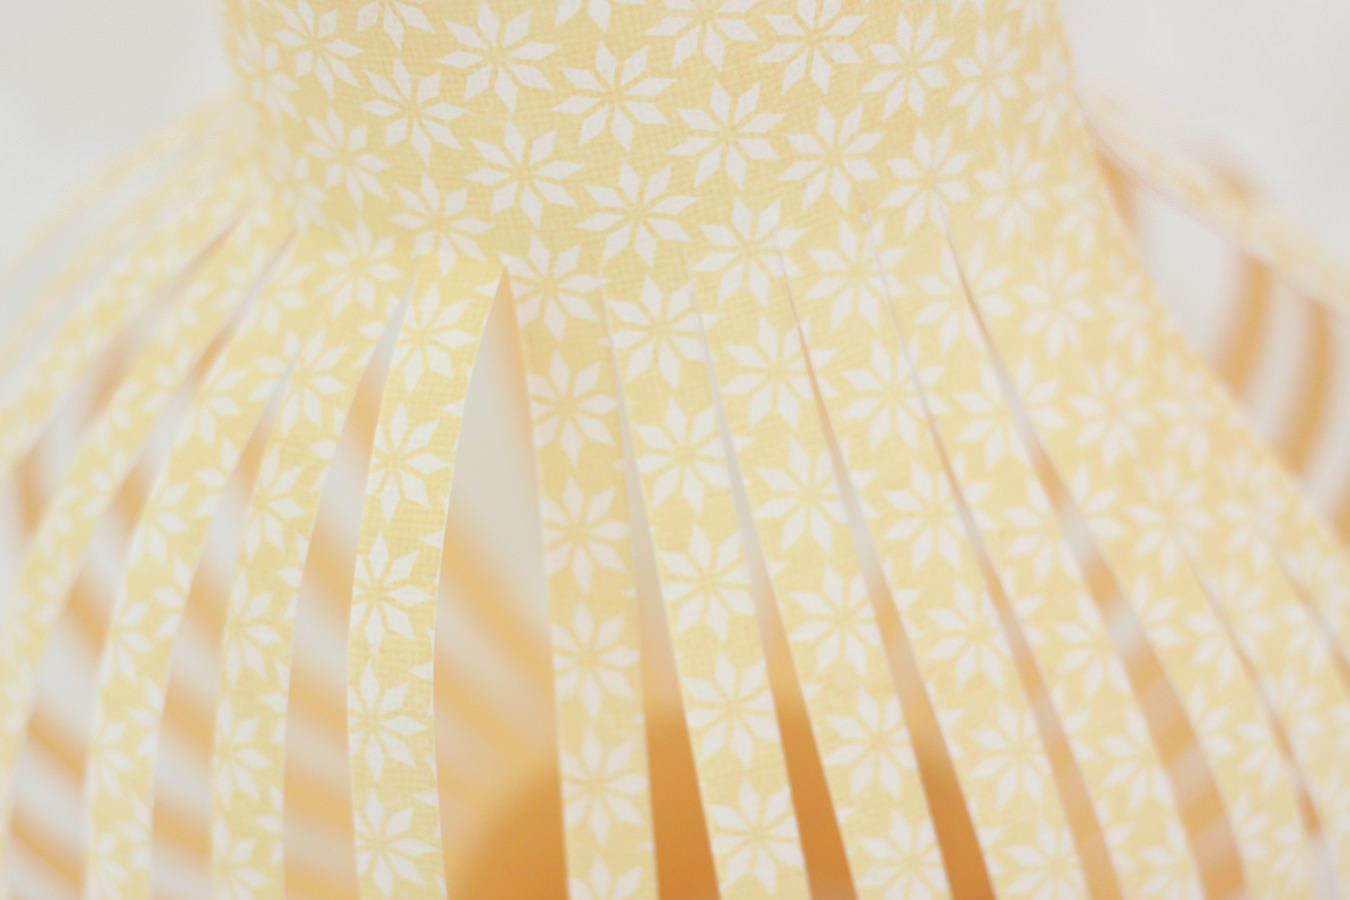
STEP 2)
Cut off the excess paper on the right hand side.
Cut from the top to bottom of each vertical line using a craft knife of sharp scissors.
Glue from the top to bottom of one side and curl into a cylinder. Secure with paper clips until glue is dry.
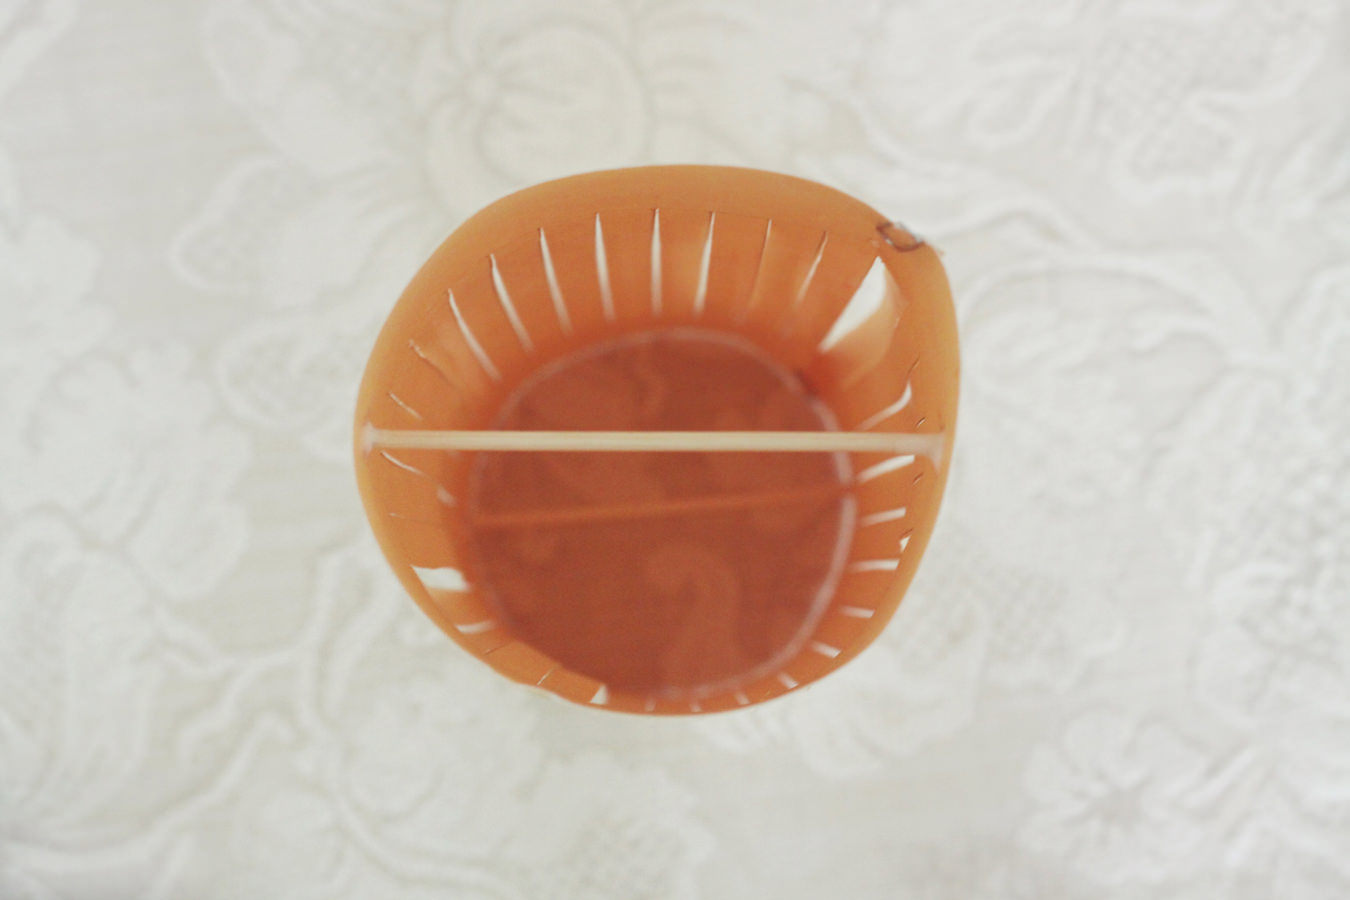
STEP 3)
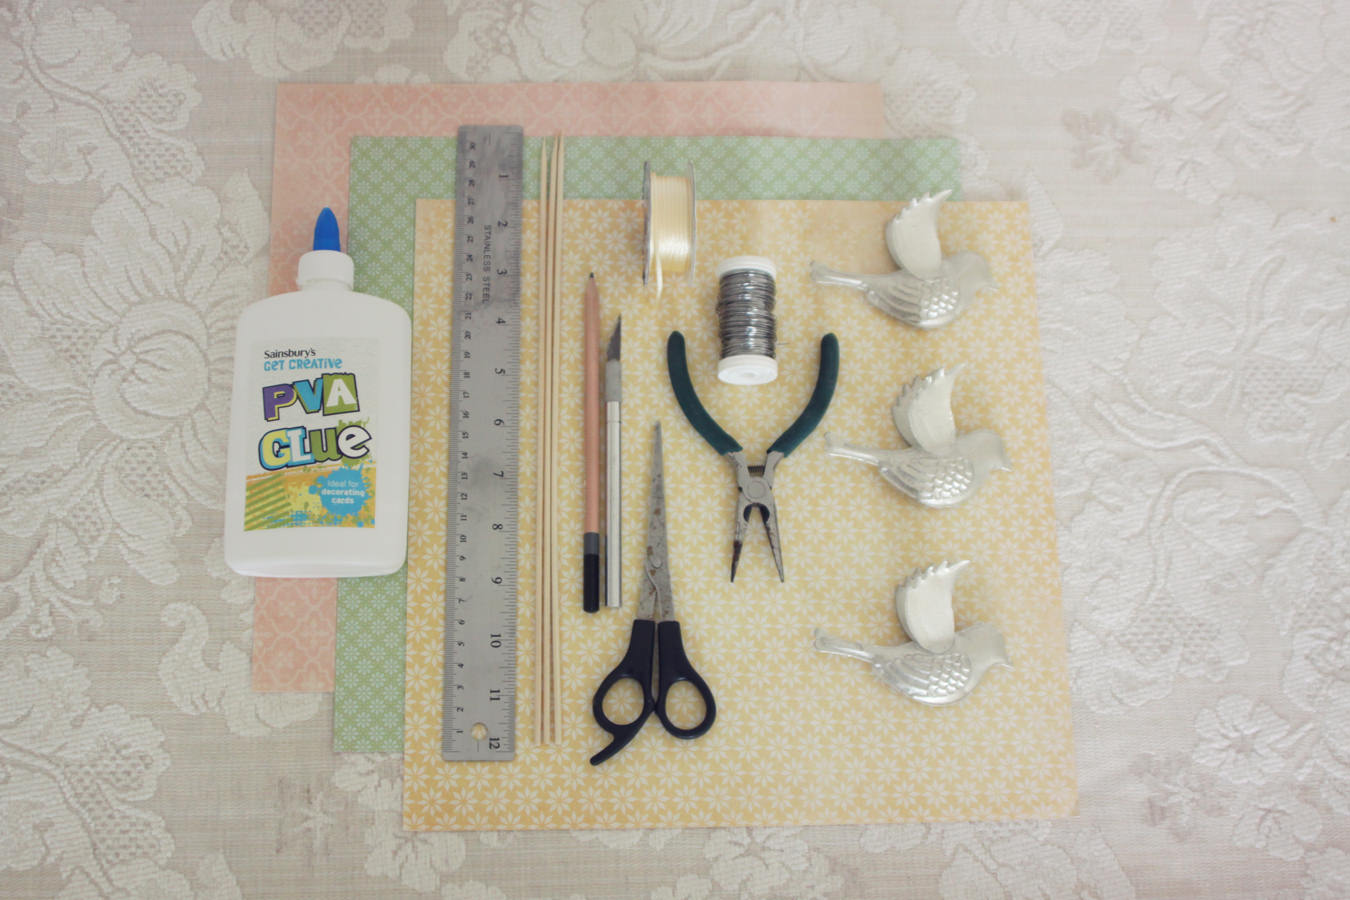
Cut the wooden skewers into 9 cm lengths. You will need two for each birdcage.
Glue in place at the top and bottom of the birdcage and allow to dry.
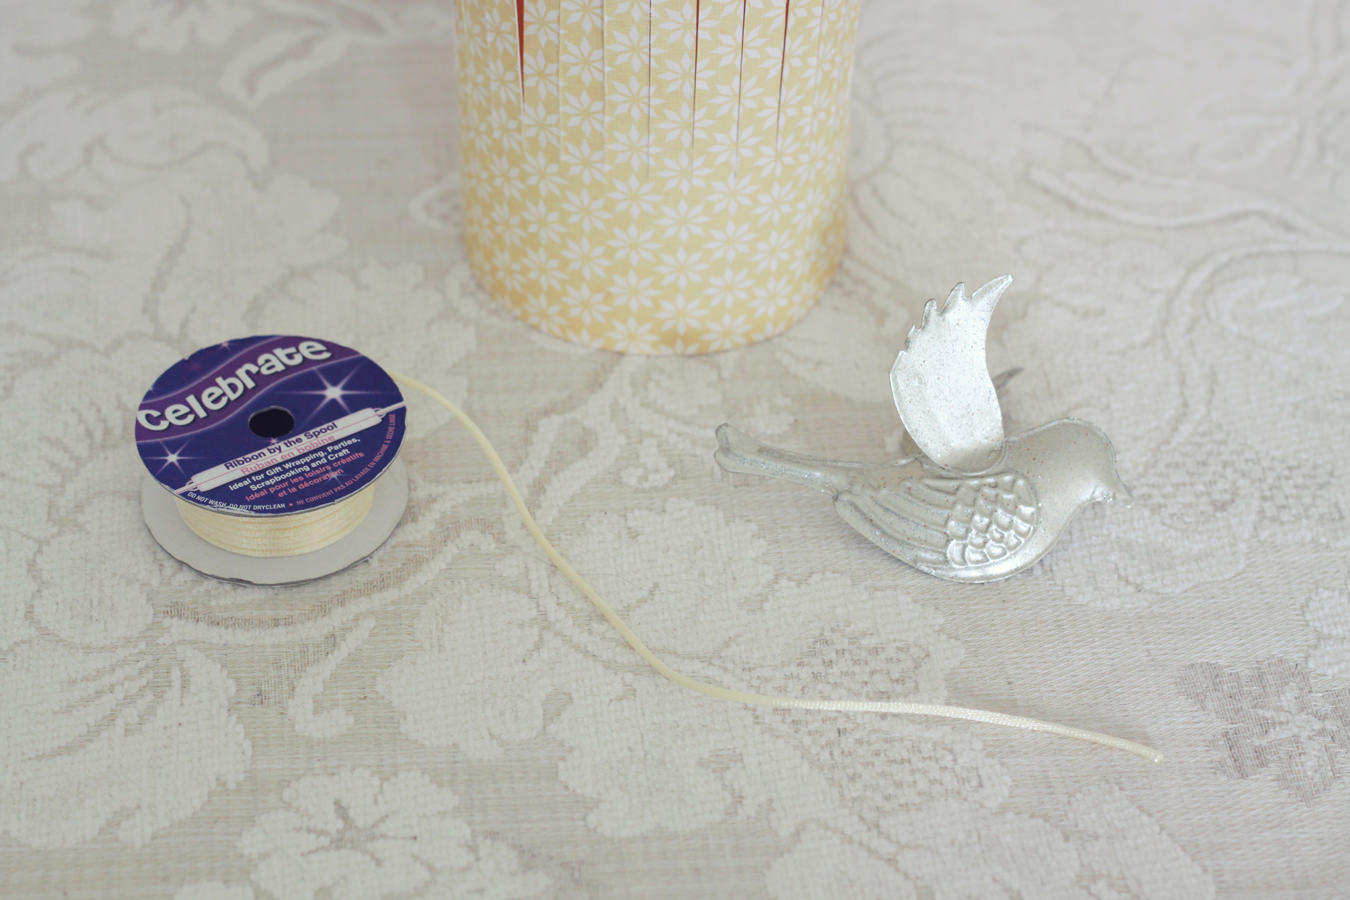
STEP 4)
Prepare your bird – You can buy artificial birds from many sources. Either from local shops or on the internet. These metal birds have a loop in between the wings and were suspended by cord from the top wooden skewer. If your bird is made from fabric or polystyrene then you can thread them with the wire which goes down the middle of the cage. You will need to do this before you assemble the birdcage and secure them with a little glue at the top and bottom.
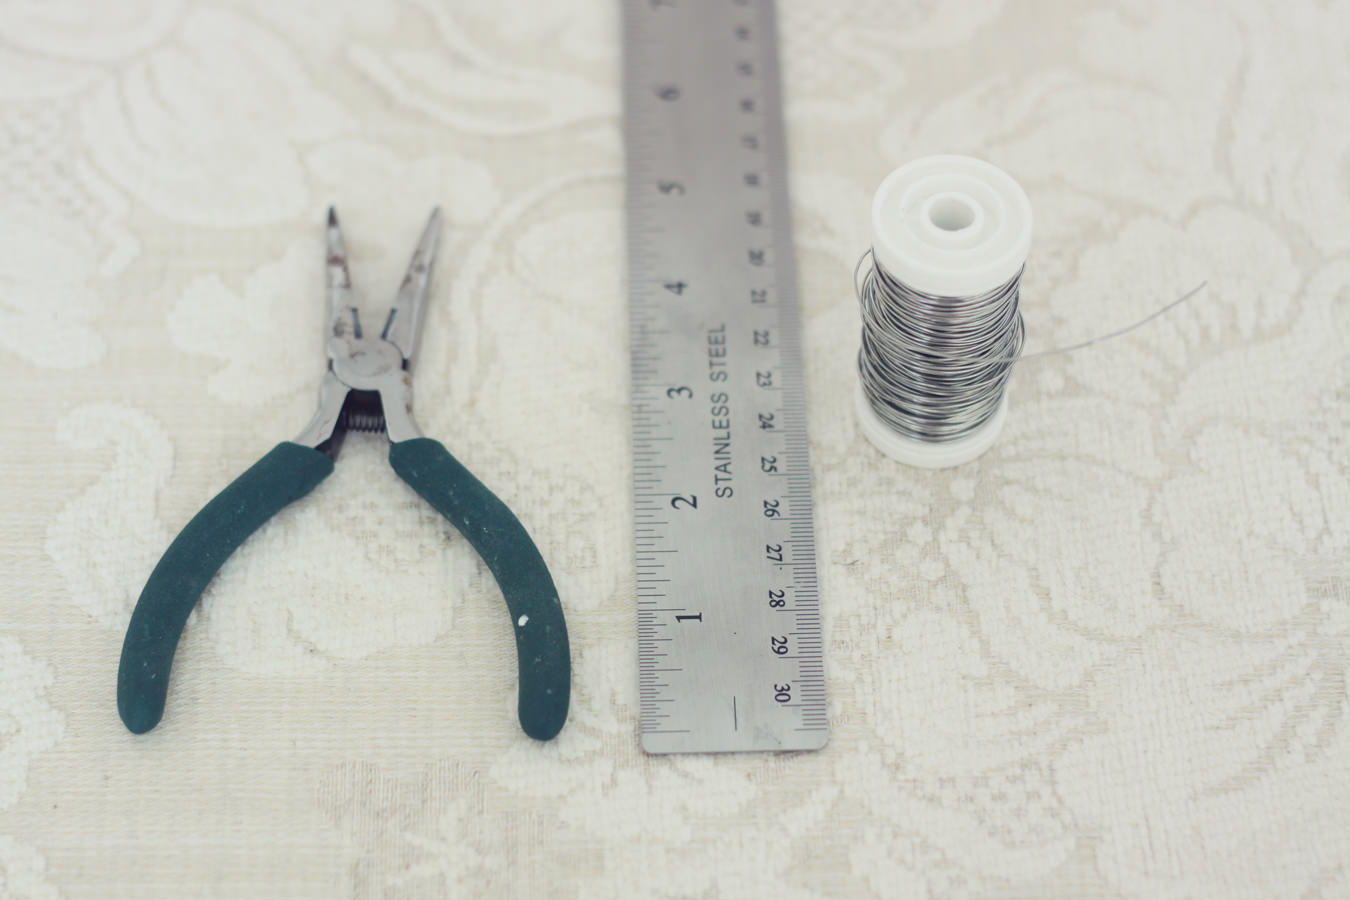
Cut a piece of wire 25cm long and wind it around the top wooden skewer.
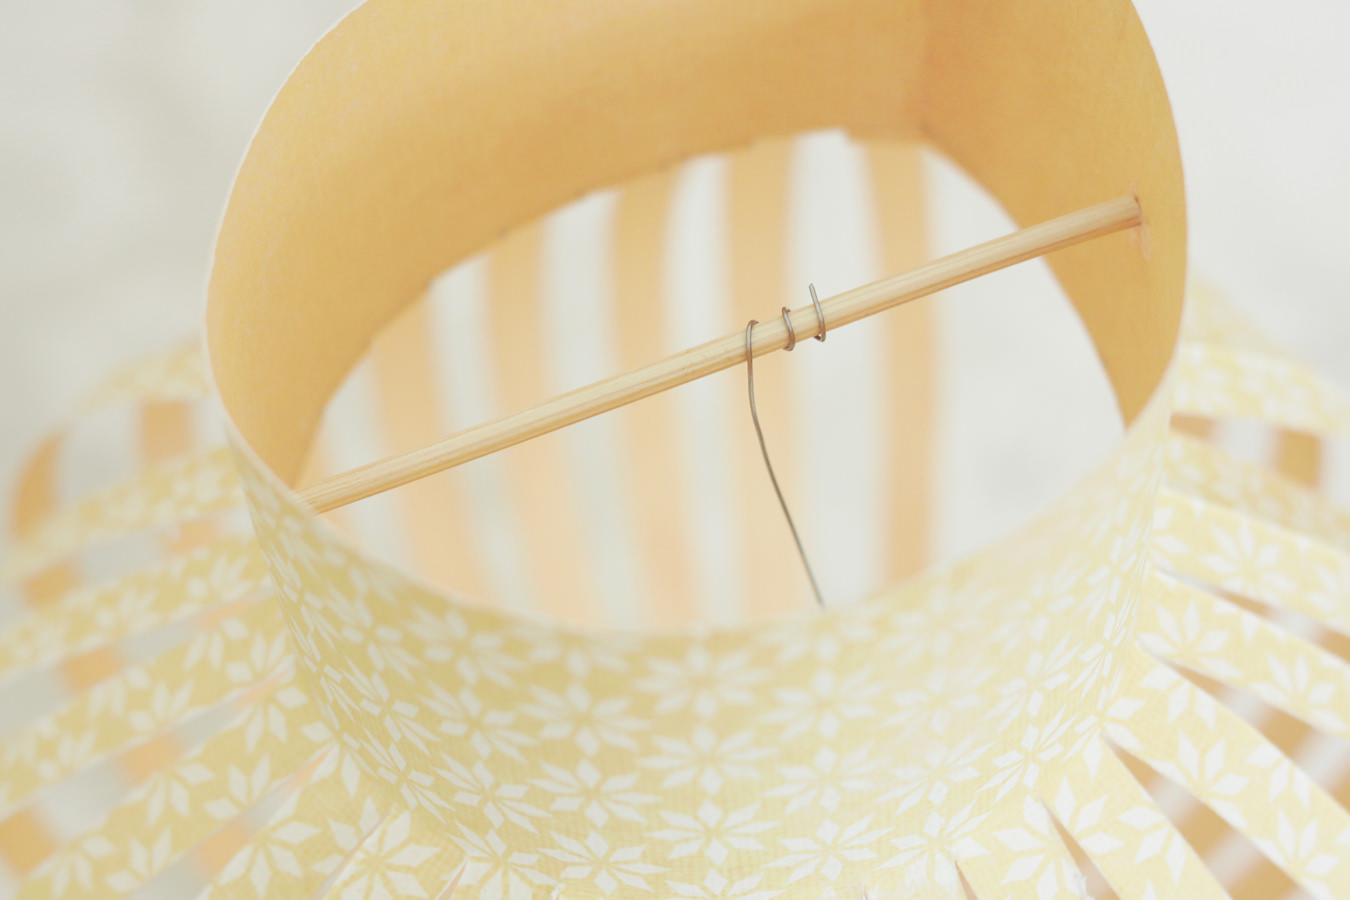
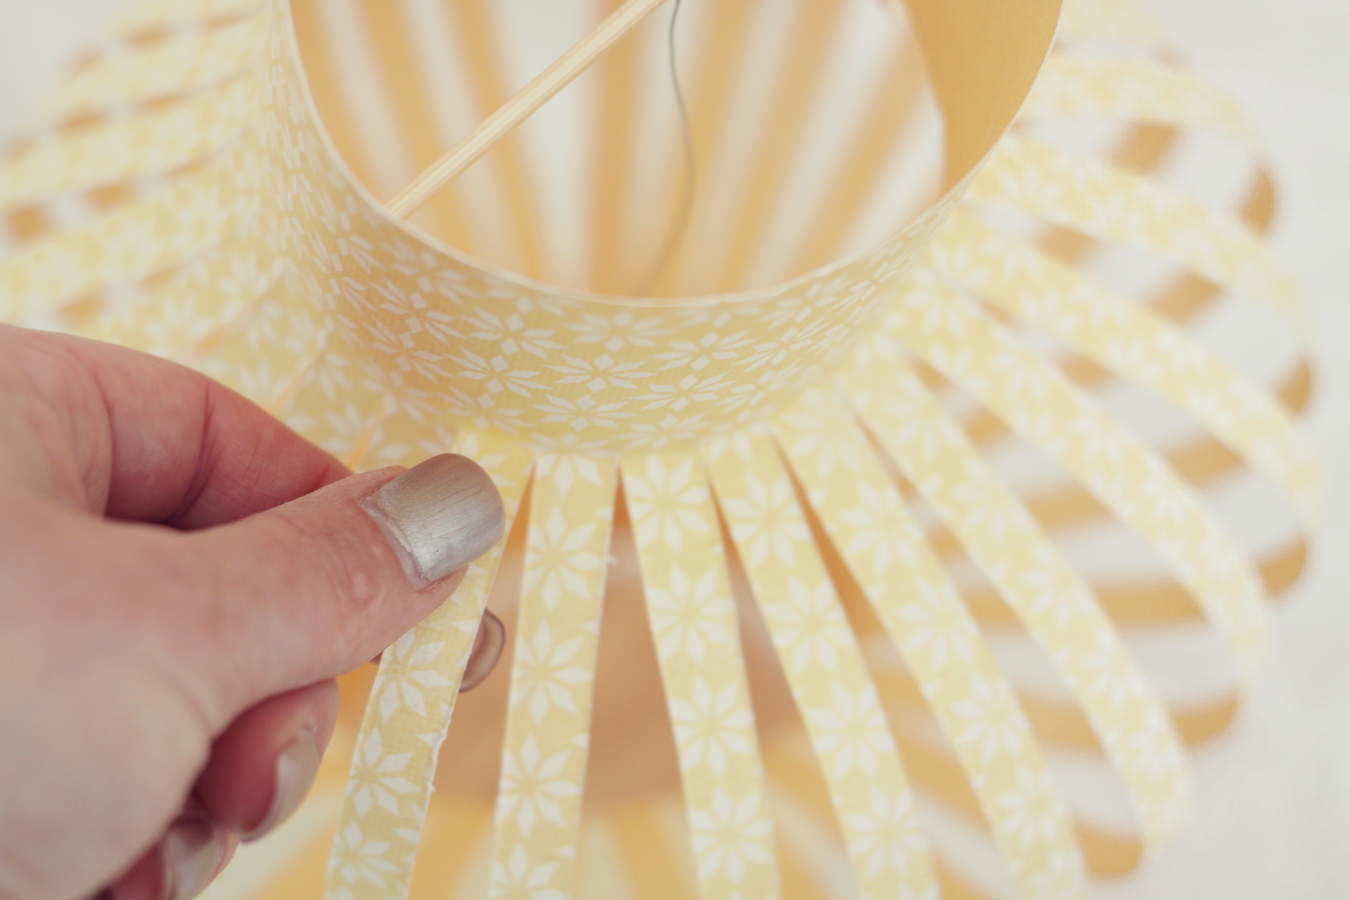
STEP 5)
Thread the wire through the birdcage and attach to the second wooden skewer. The birdcage will start to take shape.
Some of the cage will pop in as well as out. You will need to gently pull the ‘bars’ into place.
You will also need to bend each ‘bar’ up to encourage the curved shape. Do this at the top and bottom.
STEP 6)
Additional details can be added by hanging beads or shaped card from the bottom wooden skewer to further personalise your birdcage.
The beaded accessories were made using wire and a selection of different sized beads.
Use different coloured paper and birds to co-ordinate with your preferred colour scheme.

Share this post


Oh these birdcages are absolutely adorable! I think I may have a go at making one for my 3yr old daughter’s bedroom :)
LOVE IT!!!
I’ve already made one for myself. It turned out very cute. <,,
We came across this project and fell in love! What a great idea and use for 12×12″ cardstock. We will be sharing your post on our Facebook page – hope that is ok! Thanks for sharing.
Susan
Great creativity, and creative mind also, we can also make this like lamp just replace sparrow to night lamp we can use that in some special occasions like Diwali or Christmas. Thanks for sharing!
Cookie Consent
Have you tried our fabulous wedding directory?
discover more