Featured Post

Honeymoon Ideas: The Ultimate Honeymoon Guide: 5 Soulful Escapes
Not every couple wants the same honeymoon. Some are happiest cycling along coastal roads; others...
Not every couple wants the same honeymoon. Some are happiest cycling along coastal roads; others...
12
Feb
2019
By Boho
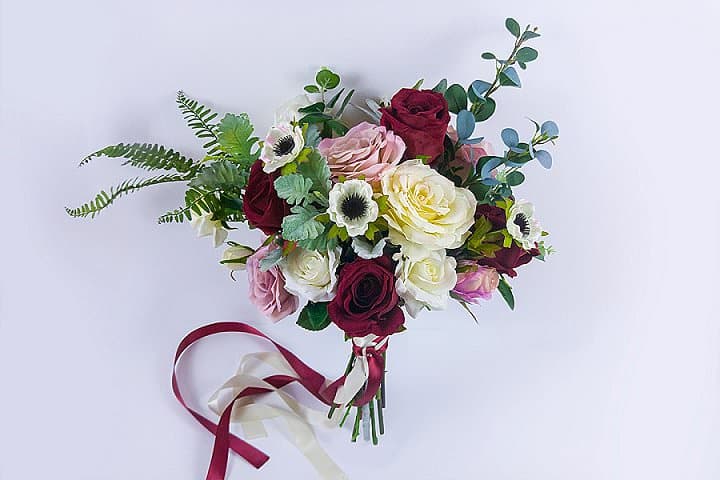
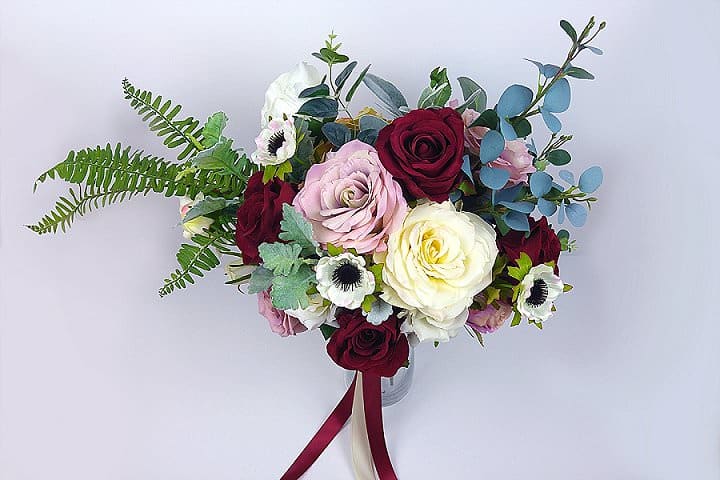
As we are celebrating all things romantic this week in the run up to Valentines on Thursday, I thought today would be the perfect time to share with you this gorgeous DIY tutorial from Sandra at Lily Knot. Lily Knot specialise in silk flowers. They create DIY bouquet kits where they get all the ingredients together for the perfect silk bouquet, put together the instructions and send it off, ready for you to put together. It’s a fab idea and perfect for any DIY bride who is looking for her bouquet to last a life-time, not just her wedding day. Sandra has created this stunning Boho Bouquet especially for the Blog and you can go head and purchase it here from her store, it’s called “Boho Romance” I’m sure you will agree, it is beautiful. If you want to have a go at putting it together yourself, this is what you will need.
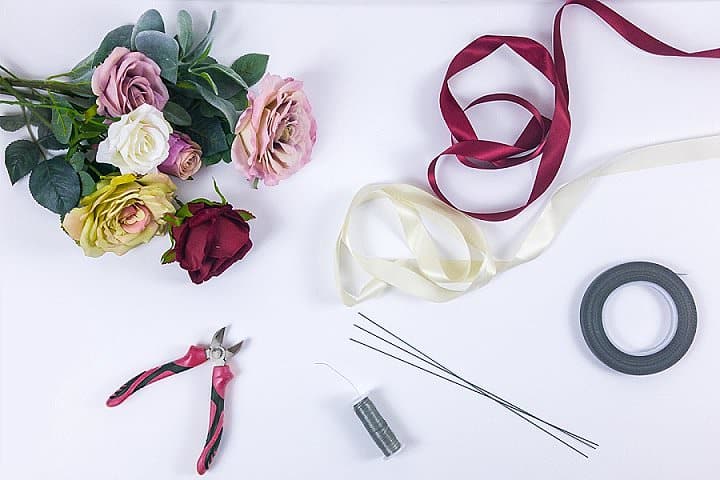

Step 1: Prepare the flowers and foliage.
Strip all leaves that will be below the point where you’ll tie them together. This will be around 20 – 30 cm from the top onwards.

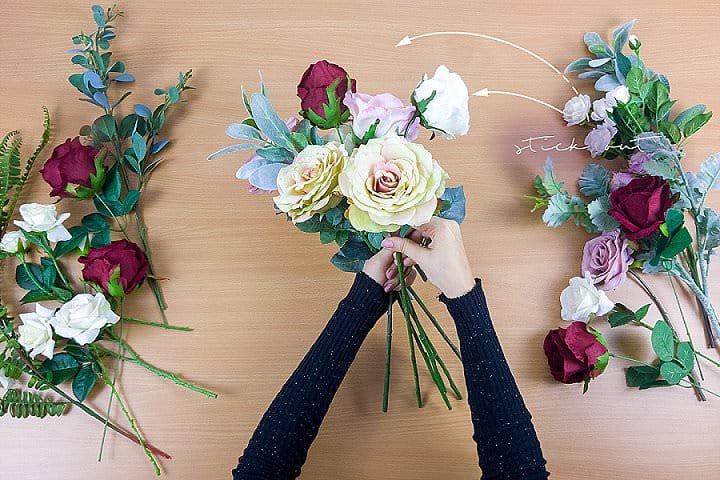
Step 2: Start with an antique pink rose. This will be the focal flower.
Use your hand to hold the stems, and try not to hold them too tight. The bohemian look that we want to achieve requires the stems to be a bit loose.

Step 3
Now we’ll start working our way around the focal flower by adding other flowers and foliage stems around it.
Add a red velvet rose.
Then add a green rose, a stem of dusty lamb’s ear, the cream rose and another antique pink rose.

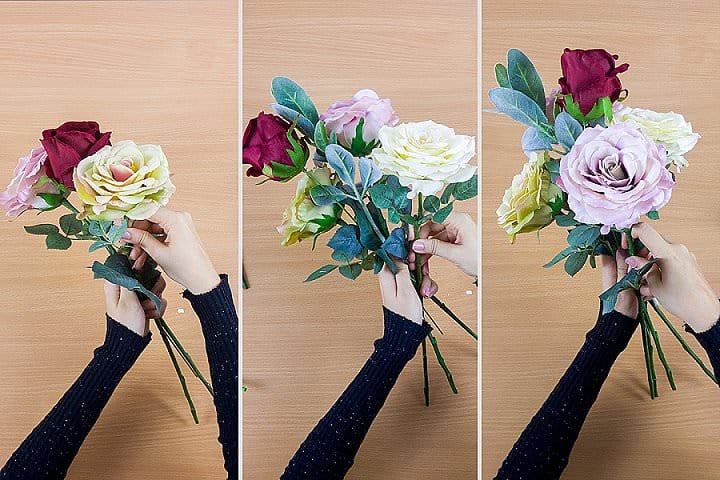
Notice how we’ve made the red rose pop out a bit more, while the other blooms are slightly sunk at different levels. We’re also alternating different hues and shades of flowers, while adding some greenery in between to break the homogeneity.
Before moving onto the next step, add one of the ivory Camelot roses, and another green rose. This will be the back of the bouquet.
Again, notice how we’ve made the ivory rose stick out a bit more.
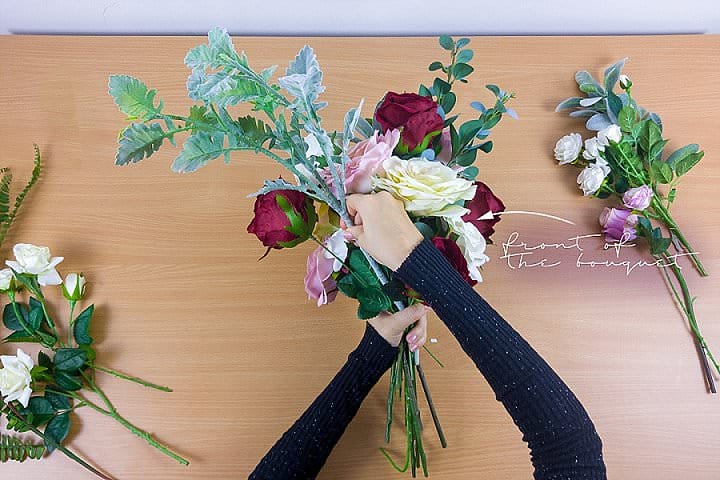
Step 4
For this step, continuously rotate the bouquet anticlockwise as you move towards the front and add flowers to it.
Add the real-touch eucalyptus spray, then a red velvet rose, an ivory rose, a red velvet rose again,……another red velvet rose, the last ivory rose, and the last antique pink rose


These are the outside blooms of the bouquet, so make sure that they are lower than the flowers in the center.
Remember not to hold the bouquet too tight, and feel free to reposition any stems as your bouquet grows.

Step 5
Once you have added all the big, single stem flowers, you can get started with the big foliage pieces
Insert the biggest piece of dusty greenery into the bouquet, next to the last flowers you added in the previous step.
Then, locate the front of the bouquet and insert the fern on the left side. Notice how the real-touch eucalyptus spray sticks out from the opposite side.

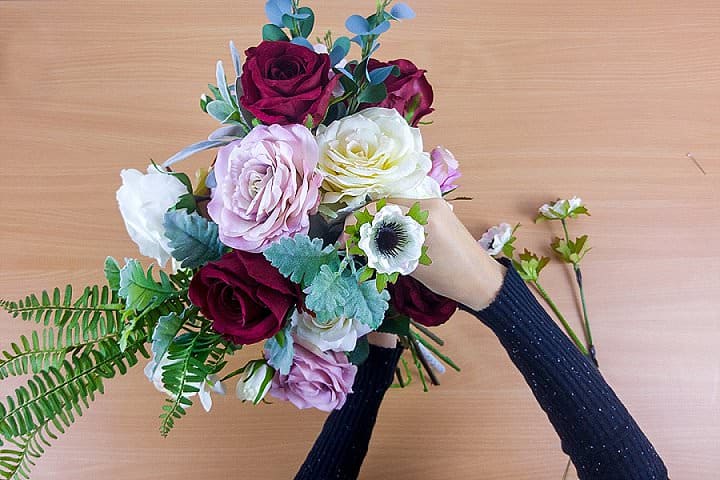
Step 6
Time to jump into the fillers!
Add the small diamond lavender rose and the lavender rosebud to the right hand side of the bouquet. Insert a white rose spray and some extra lamb’s ear.
Do the same with the remaining white rose spray on the left side, next to the fern.


Step 7
TIP: The anemones we’re using have stems that are too short, so here’s our little trick for that kind of situations: tape some florist strong wire at the end of the stem. Every DIYer should know the importance of having wire cutters in your toolbox, that will help you to cope with any idea.

Scatter the anemones throughout the bouquet, and try to make them face the front.
Add the individual eucalyptus stems scattered throughout the bouquet. Twist them a little bit to add some additional texture.

Step 8
Carefully wrap the bouquet with floral wire around the area where you were holding it.
Twist the wire and tug it in so that it blends with the stems. Then, secure with floral tape and do the final trim on the stems, making sure they all have the same length.


Step 9
Wrap with ribbon.
We’ve used two long silk ribbon pieces, wrapped around the bouquet once, made a single knot and secured it with a diamond pin


www.lilyknot.com / www.lilyknot.com/blogs/blog / FACEBOOK / INSTAGRAM / PINTEREST
Lily Knot is a London-based little workshop that revolves around the beauty of DIY silk flowers. Our main mission is to make gorgeous dreamy designs easy, accessible and ever-lasting. We put in the hard work by designing the bouquet, crafting the recipe and instructions, fetching picture perfect silk flowers and other materials and shipping them over in a single kit, so that the only thing left to do is to follow our carefully curated instructions, arrange and rock on!
Share this post


Easy DIY tips to make a beautiful bouquet. The part in Step 4 that says “These are the outside blooms of the bouquet, so make sure that they are lower than the flowers in the center” is so important. I have seen too many DIY bouquets that don’t do this, and all you really end up seeing is a lot of green stems and the underside of the blooms. Thanks for sharing.
Thanks for this blog. I learned a lot from this blog. I love flowers so much. Thanks for these tips you post for us. What a beautiful flower designs and arrangement. I hope you can teach me flower arrangements like that so that I can use it if there is an occasion in our family.