Featured Post

Ask The Experts: Honeymoon in Greece – How Much Does it Cost and How to Save Money
If you want to spend your honeymoon in an idyllic location, you probably wonder how...
If you want to spend your honeymoon in an idyllic location, you probably wonder how...
1
Apr
2021
By Boho
Happy Easter everyone and a very happy day before Good Friday to you. This is my last day in the office for a few days as I am taking some time off for the Easter break. Next week it’s the school holidays, so I am off with Dexter, hopefully enjoying some time with a friend or two! Now this Easter may be a bit different, and not exactly how we would normally spend it, but hopefully we can all still have a good time. Weather you are spending it outdoors with the rule of 6, or indoors with your household, I hope you have a lovely time. We are spending Easter Sunday with my brother in law and his family in his garden having an Easter BBQ! So I do hope the weather stays dry!!
If you are planning an Easter meal inside then why not try these super cute Easter Place Cards. It’s a super easy Easter DIY that has been brought to you by Anna from Download and Print . Anna has shared a variety of DIY’s with us in the past, so I am super excited to share this one with you. Today Anna brings you something for your Easter table, these super cute Easter Place cards. They could also be adapted as little Easter Cards.
You can download the Free printable HERE

Hello Boho brides. Anna Skye here, and I’m back with another exclusive printable just for you. With Easter around the corner I thought I’d take the opportunity to help you spruce up your Easter table. These cute little place cards are quick and easy to make, and will add some charm to each place setting. With just a few cuts the bunny magically pops up, and you’ll be moving on to more pressing tasks at hand, such as deciding between the Cadbury giant crème egg, or the Maltesers giant egg. If you’re like me, just take one of each. A well deserved reward for the adorable place cards you just created.
Grab the free downloads and follow along with the steps below to make the cards for yourself. If you don’t have the ink required to print the template, then stock up here
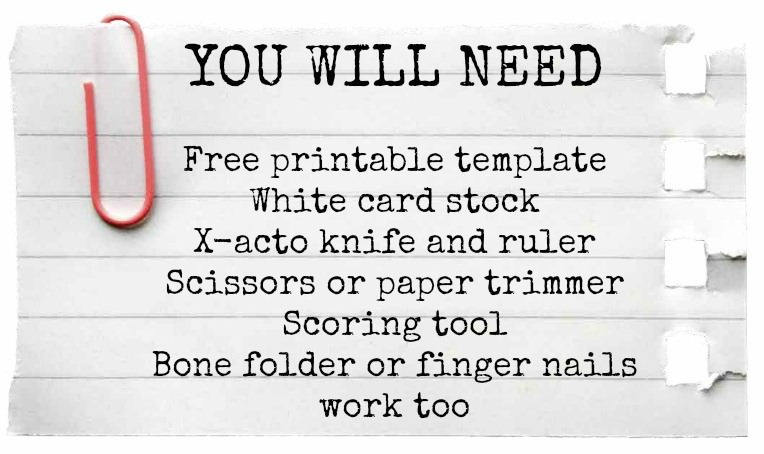

STEP 1) Download and Print – Download the template in MS Word, add your names, and print on white card stock.
The font I chose is called Channel, which can be downloaded here. If you don’t have this font installed on your computer Word will substitute a different font. Choose any font that you like.

STEP 2) Cut – Cut out each place card around the shaded area. You can do this using an X-acto knife and ruler, scissors, or a paper trimmer.
You will end up with four place cards for each sheet of paper printed.


STEP 3) Score and Trim – Using your scoring tool, score the card along the dotted lines either side of the bunny. Do not score through the bunny! Scoring the card starts a crease, and prepares the card for the fold that is to come.
Using your X-acto knife, cut along the outline of the bunny above the score line. Cut from one fold line, up and over the ears, and finish at the opposite fold line. Starting with a sharp blade in your knife will make this step a lot easier.

STEP 4) Pop Out –Carefully press the top half of the bunny forward and fold the card in half along your score lines.
The place cards are now ready to be added to your Easter table.


Thanks so much to Anna for this cute DIY, I just love it! Anna will be back in a months time with another fantastic FREE downloadable DIY Tutorial for you.
www.downloadandprint.com / www.downloadandprint.com/Blog / FACEBOOK / INSTAGRAM
Share this post


Love your site I saved the link to you bunny with the flowers for this years easter table, cant seem to find the link on your site to download and print