Featured Post

‘Rustic Glam’ Modern Boho Wedding Inspiration in Peach and Terracotta
Today’s styled shoot is all about soft romantic hues or beach and blush, mixed with...
Today’s styled shoot is all about soft romantic hues or beach and blush, mixed with...
26
Aug
2013
By Boho

Happy Bank Holiday Monday everyone! as it is a bank holiday I have just the one post for you today, so I’ve made it a good one with this super cute wedding guest book Tutorial. It comes from Rachel Thompson who is a new DIY contributor to the Blog, so please make her feel welcome. This tutorial is easy to do and shouldn’t take too long, as well as being pretty cost-effective.
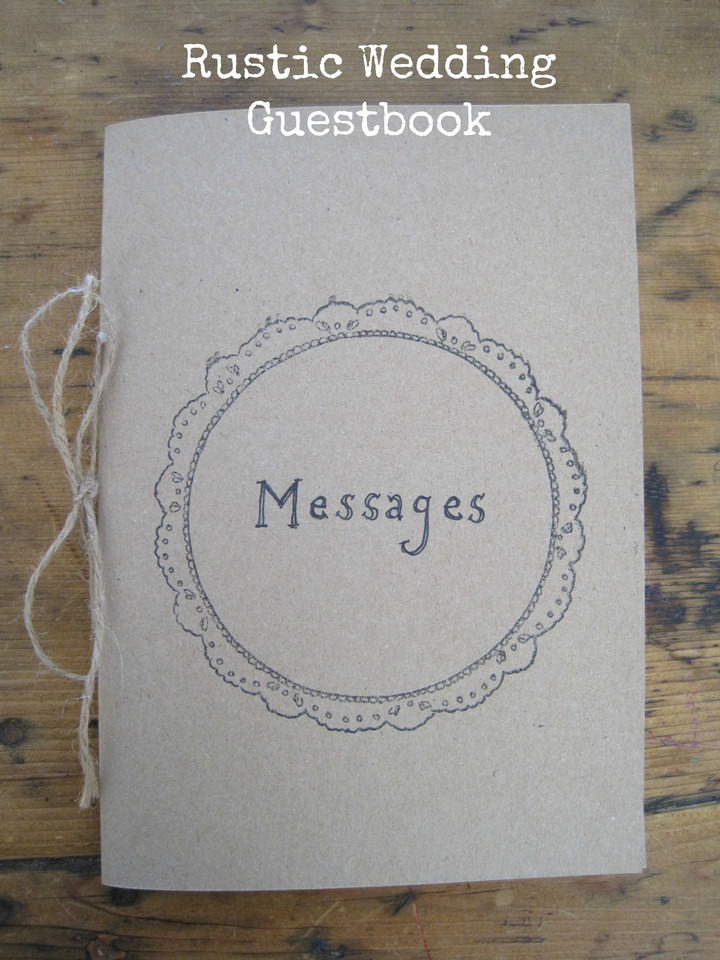


These rustic wedding guestbooks are a perfect addition to your hand made wedding reception and a great way to collect and keep memories of your special day.
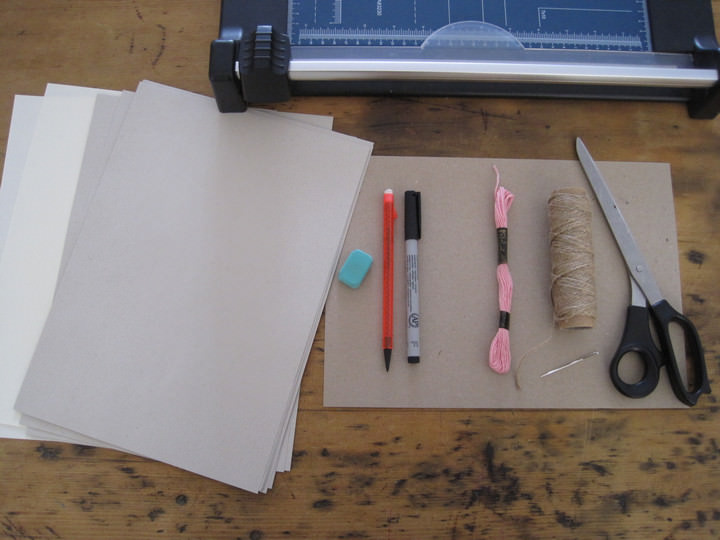
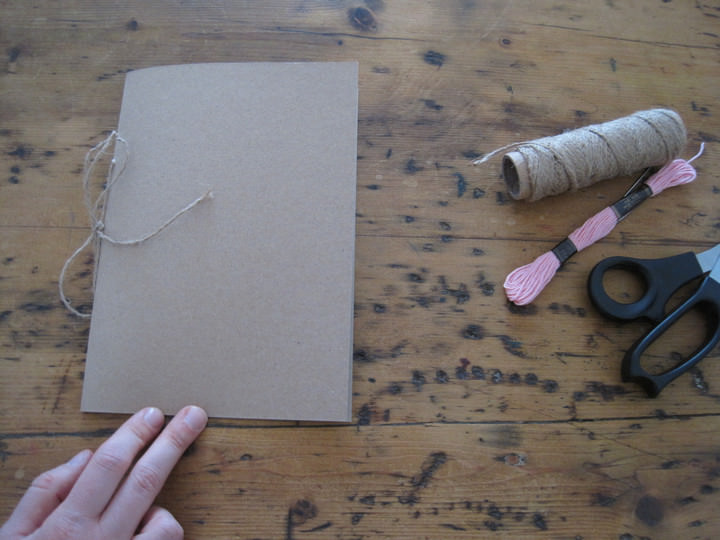
Step 1) Begin by folding your piece of 300gsm card in half. This will form the front cover of your guestbook.

Step 2) Do the same with your 8 sheets of paper, remembering to trim off a couple of cm off the length and width so they are slightly smaller than the front cover. You can do this with scissors and a ruler, but a trimmer or guillotine works well and means you get a really clean edge. You might like to have a variation of different coloured paper or keep to a more natural look with recycled paper. You can alternate or mix match these as you like
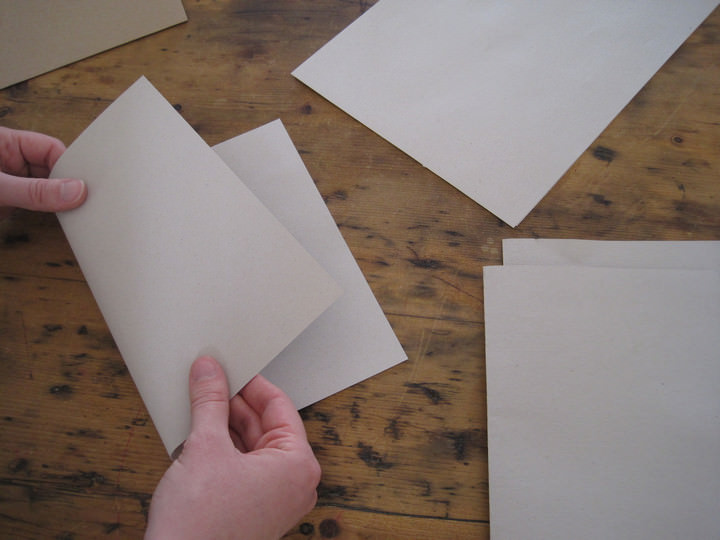
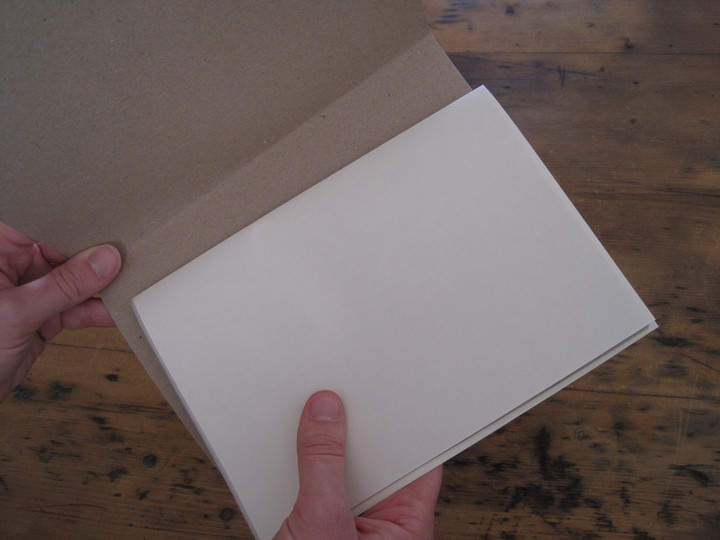
Step 3) Once you have folded each piece of paper in half, open them out again and place them on top of each other. Begin to form a stack, making sure you place them together with the central fold always visible so when you bind them together they stay together!

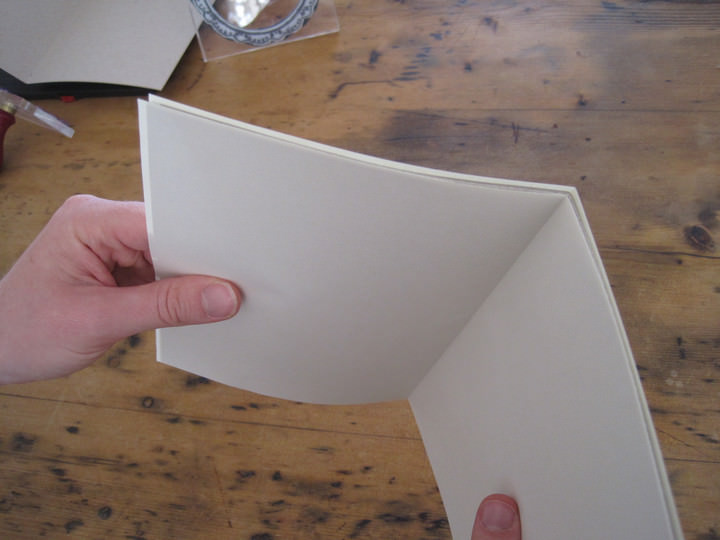
Step 4) Slot the stacked paper into the front cover
Step 5) Cut a 40cm length of gardeners twine or embroidery thread and thread through a large embroidery needle. You don’t need to tie a knot in the end
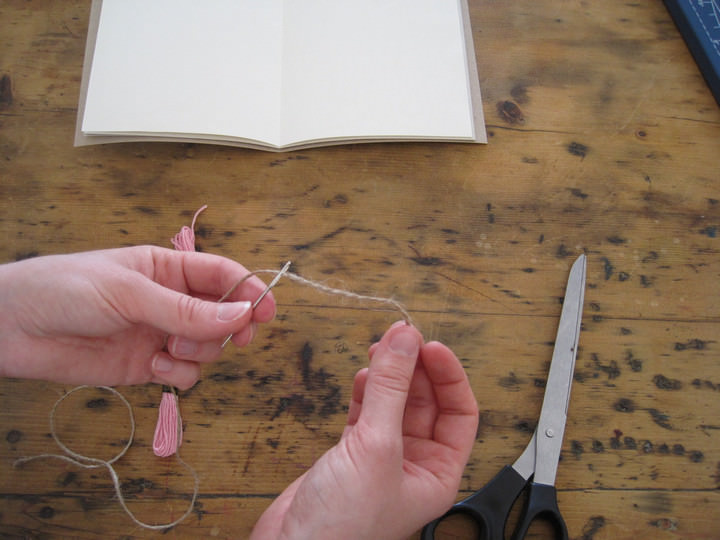
Step 6) Starting from the outer ‘spine’, push the needle through the outer card, about 4cm in from the edge. Push the needle and thread through all the layers of paper to the inner side, and then back though to the outer side again -so you end up with both lengths of twine at the back of the spine.
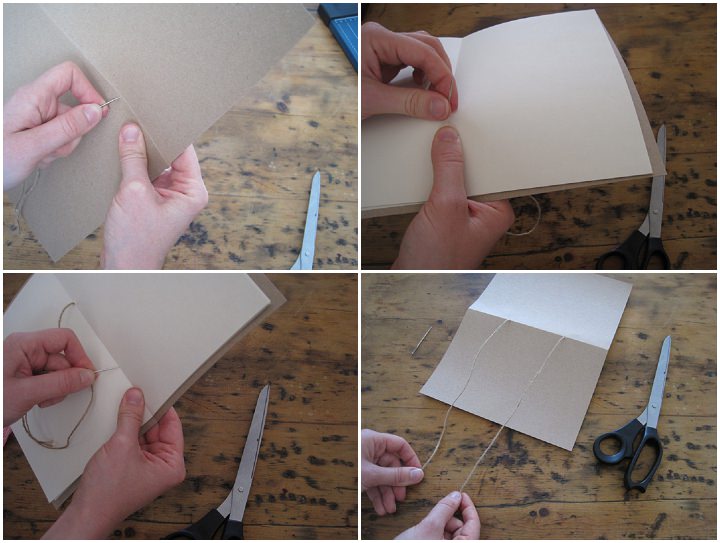
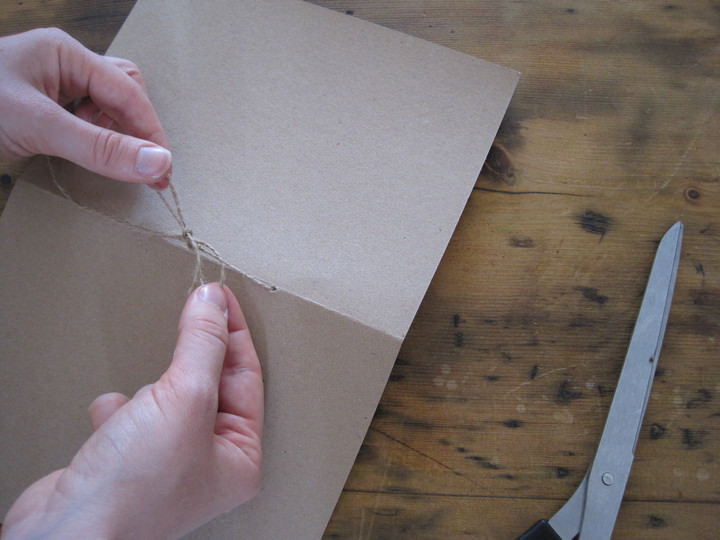
Step 7) Making sure each length is of equal length, tie a bow (with a double knot) to secure everything in place and you now have a bound guestbook!
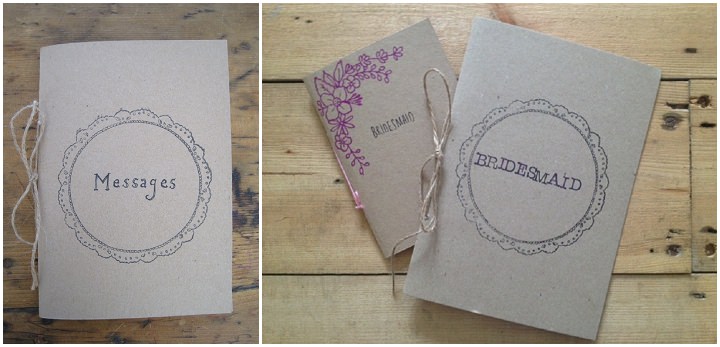
Step 8) You can decorate your guestbook however you like, and can mark out spaces within the book for guests to attach photographs or other memories.
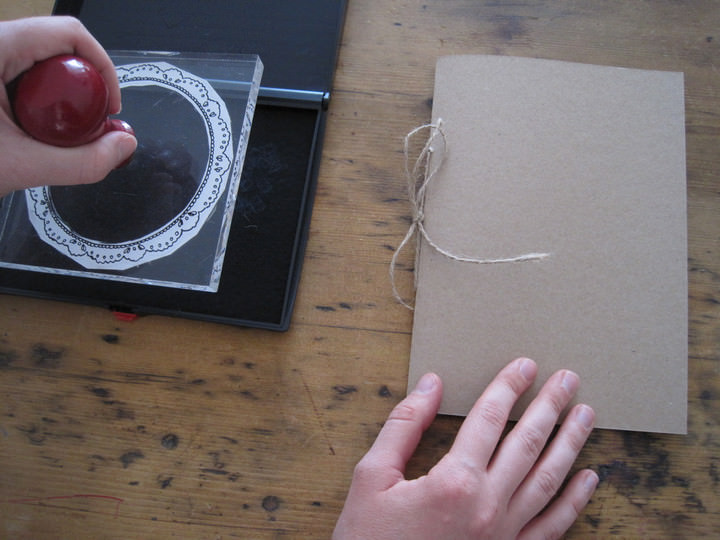
If you are not confident drawing, you can either buy, or get a custom made rubber stamp (perhaps with the Bride and Groom’s initials or a motif illustration personal to you) to decorate the pages. The one I’m using here is a doily and floral motif illustration I did and then had made with a local rubber stamp company. Stamp the front page and then embellish some of the inner pages as much as you like.
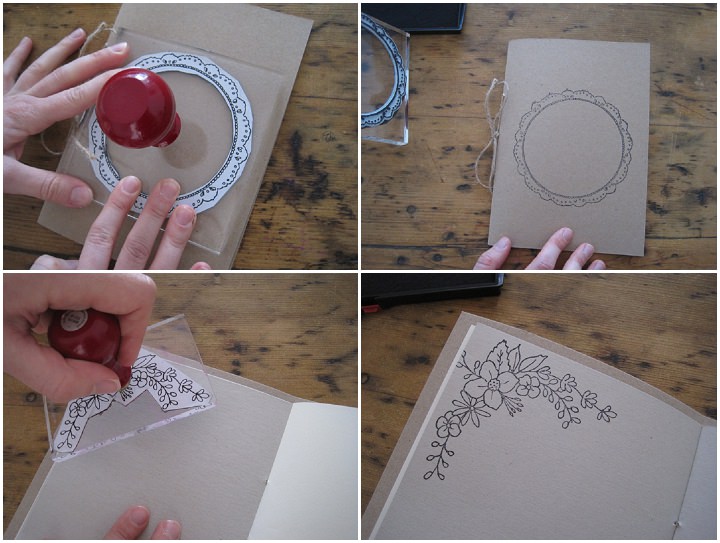
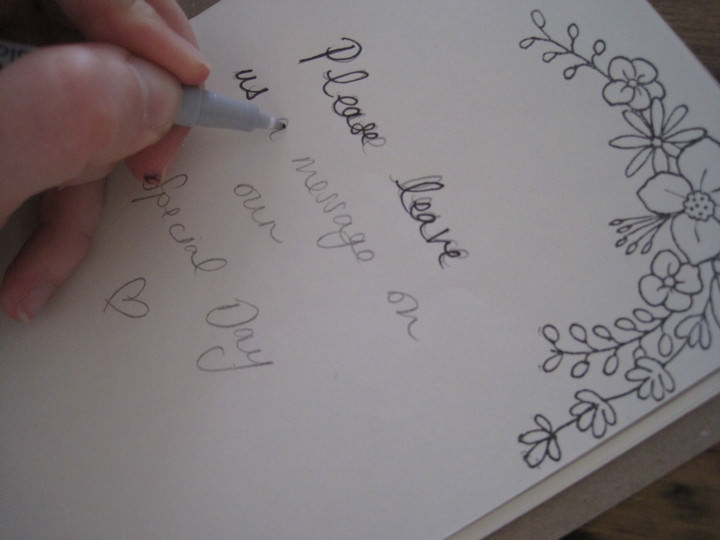
Step 9) The circular doily shape creates a pretty frame which you can then hand write ‘Guestbook’ or ‘Bride to Be’ in, depending on the occasion.

Make sure whatever you write is done in pencil first to make sure it is aligned correctly! You might also like to write a few words yourself on the first page inviting people to leave you a message.
This guestbook will look lovely along side other hand made decorations at your wedding reception such as brown luggage tags for place names, hessian bunting or recycled card favour boxes. It will also complement menu cards or table plans also made with similar paper.
You can also make bridesmaids notebooks, or any other sort of notebook that fits your theme.
www.rachelthompsondesign.co.uk
www.facebook.com/RachelThompsonDesign
https://www.etsy.com/uk/shop/RachelTDesign
[email protected]
Share this post


Love the vintage feel of this diy! Thanks for sharing