Featured Post
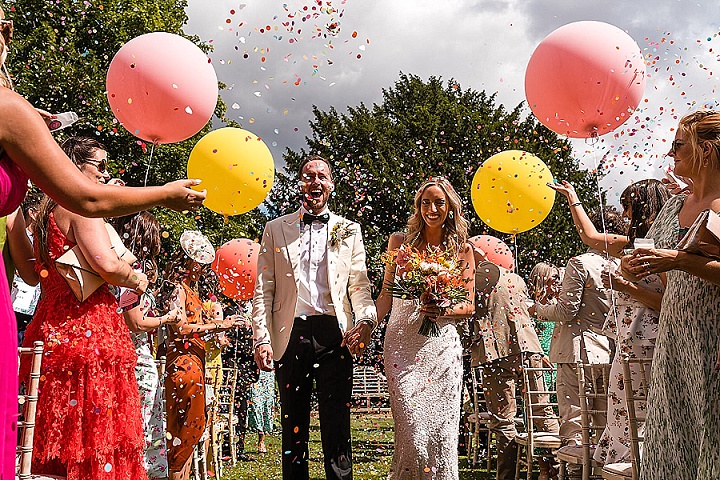
Des and Katie’s Bright, Tropical and Fun Outdoor Wedding in Gloucestershire by Babb Photos
I do love a bit of colour in a wedding! So when I was sent...
I do love a bit of colour in a wedding! So when I was sent...
10
Jul
2012
By Boho
Tuesdays DIY feature is a bit different today as it is an edible one (my favourite!) It has been sent in by Emma who runs her own wedding site called Hearts and Buttons. Emma appeared on the Blog a few weeks ago with her Bird Cage Tabel Plan, which went down a storm with you all. Emma is now married so all of her DIY features come from her actual weddings
Today’s feature is all about Vintage Button Style Sweets.
I’ll pass the Blog over to Emma……………

There is nothing worse as a guest than feeling hungry at a wedding, a way around it is to make sure there are plenty of little treats to keep them sustained between meals. I treated my guests to an array of sweets in various glass containers, these went down extremely with old and young but my favourite had to be these peppermint flavoured sweets handmade using a vintage button mould. Buttons appeared across my wedding theme so when I found the moulds on ebay I knew that they would be perfect in bringing the theme to my treats too. They are so easy to make and look just beautiful.
Here is a quick guide on how to make them, they keep well and taste yummy!!!


Step 1– Mix a few drops of Peppermint flavouring to about a handful of ready roll icing, you will be surprised by how far this goes. Knead the icing to fully mix the flavouring, if the icing gets too sticky then roll in a little icing sugar to absorb some of the moisture.

Step 2 – Roll between finger and thumb balls of the icing mix no bigger than a penny piece. Making enough for each shape on the mould. Press into the hollows of the mould. Using the knife to level the icing and scrape away any excess mixture.Don’t waste this as you can use it again for another mould. Repeat this for each hollow and then leave for 5 minutes to set.

Step 3 – Pop the sweets out of the mould by twisting the rubber. Arrange on a plate and then use your edible decoration. I sprayed a light mist of Lustre and added a delicate sprinkle of glitter or edible silver dust. But you could keep them plain and simple as they look just as beautiful.

Step 4 – Repeat the process until you have enough sweets for your needs whether it be a cut glass bowl full like me, little bags of them for favours or one a guest to have with coffee. You will need a little patience, working with small batches can be time consuming but worth it when you have finished a job lot.
Remove the flavouring and you have beautiful decorations for cakes too, great if you are saving money and baking it yourself or buying from a supermarket. You will wow your guests with your creativity and bring a little bit of vintage to your treats for your guests.
Store in a airtight container until ready for display.

Thanks so much Emma, do let us know what you thought of this beautiful DIY feature and if you decide to make the sweets what you thought. There will be more DIY projects coming up from Emma in the next few weeks.
Emma can be found on
www.heartsandbuttons.com
[email protected]
FACEBOOK
TWITTER
♥ If you are a DIY Bride and you have a Tutorial you wish to share then let me know. Email me at [email protected] ♥
Share this post


Oooh -these look delicious and beautiful. Could definitely feature on the sweetie buffet!