Featured Post

Ask The Experts: Honeymoon in Greece – How Much Does it Cost and How to Save Money
If you want to spend your honeymoon in an idyllic location, you probably wonder how...
If you want to spend your honeymoon in an idyllic location, you probably wonder how...
28
Jan
2013
By Boho
Today’s DIY Tutorial comes from the very lovely Lauren from Flat Broke Bride. Lauren is the queen of DIY and today has a fantastic tutorial for you. It may take some time to do, so you will need a steady hand and a lot of patience but the results will be amazing! It’s a Ceremony Book, which Lauren has made to carry her rings as well as the ceremony details and paper work.
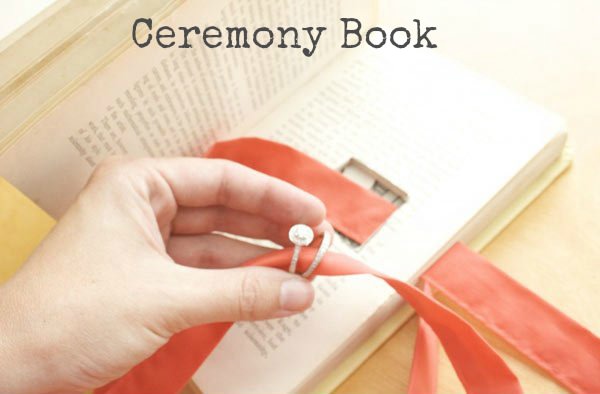
When thinking about the ceremony, I really wanted a concept of telling our love story. I knew I really wanted to do a popular Pinterest DIY where we cut a hole out of an actual book to sort of be our “ring pillow” if you will, but I thought I’d take it one step further.
I decided instead to create my own ring book. And it won’t hold just the rings! I want to put the whole ceremony structure in the book as well as our vows, that way, we forever have a keepsake of our special day!
It is a very long process so this is going to be an incredibly long post, but the end result is pretty cool.

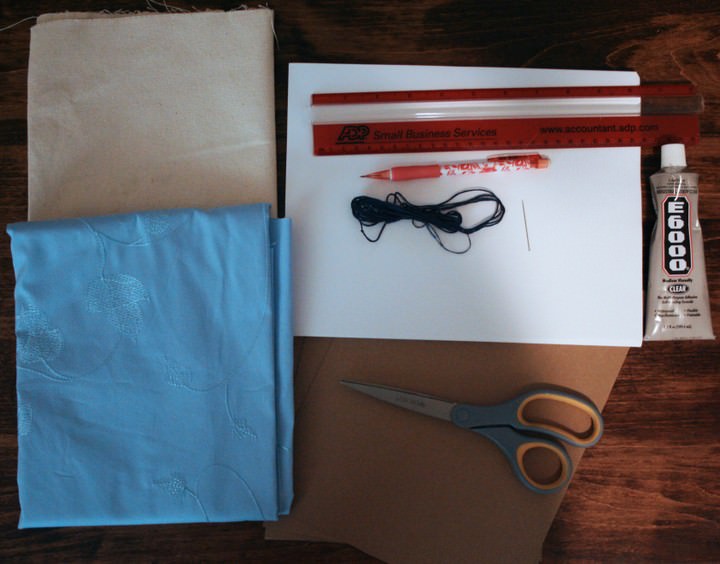
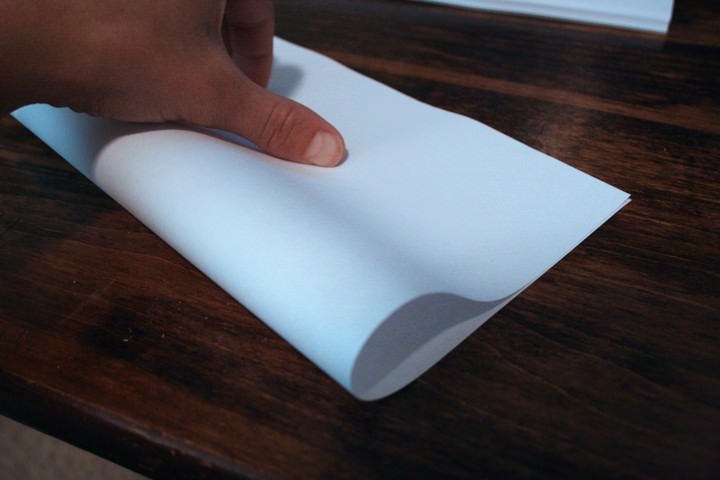
Step 1) This DIY starts out easy, with just folding paper. I am not going to give measurements too much throughout this, because This part does take a while if you want a nice, thick book. I think I folded about a half a package of paper for this book. I chose to just take a regular printer-size paper and fold it in half. You don’t have to do that at all, I found it just worked for me. It’s up to you how big or small you want your book.
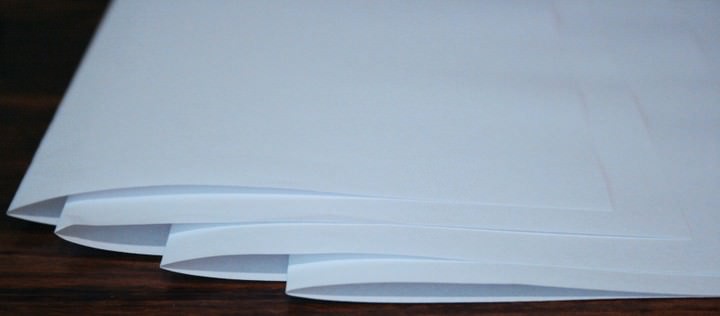
Step 2) Now it’s time to stack the paper inside one another. I decided to do stacks of four, I wouldn’t advise doing any more than six in a stack.
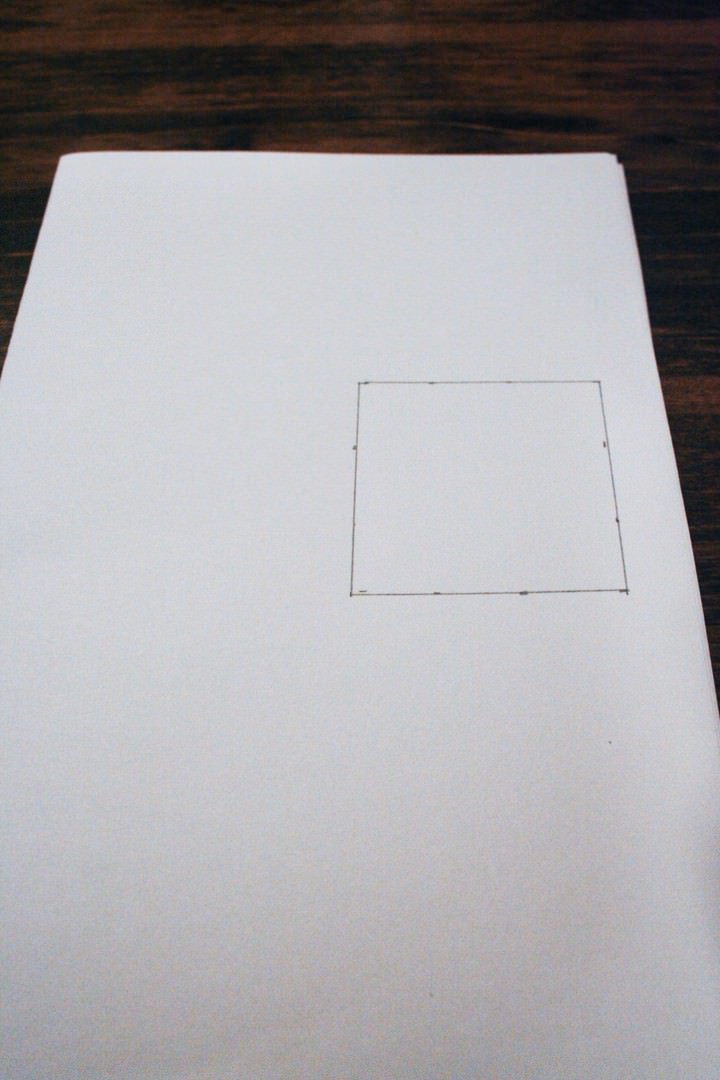
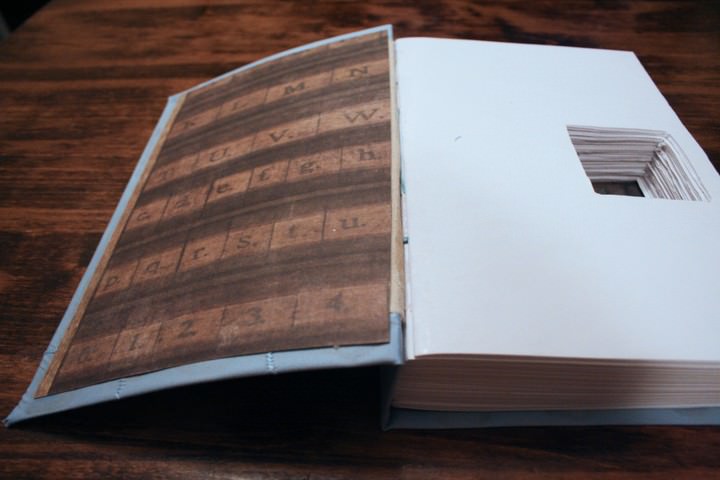
Step 3) After stacking all your folded pages, we can now cut the hole for the rings. First measure out your square (or rectangle or heart…whatever you want be creative!) and draw it out.
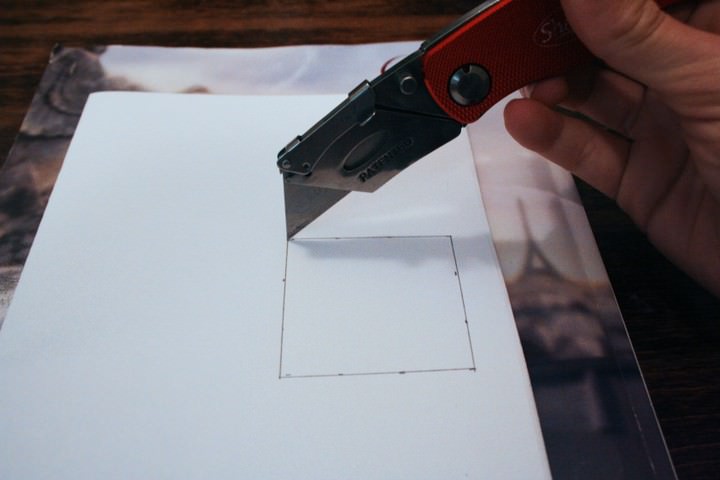
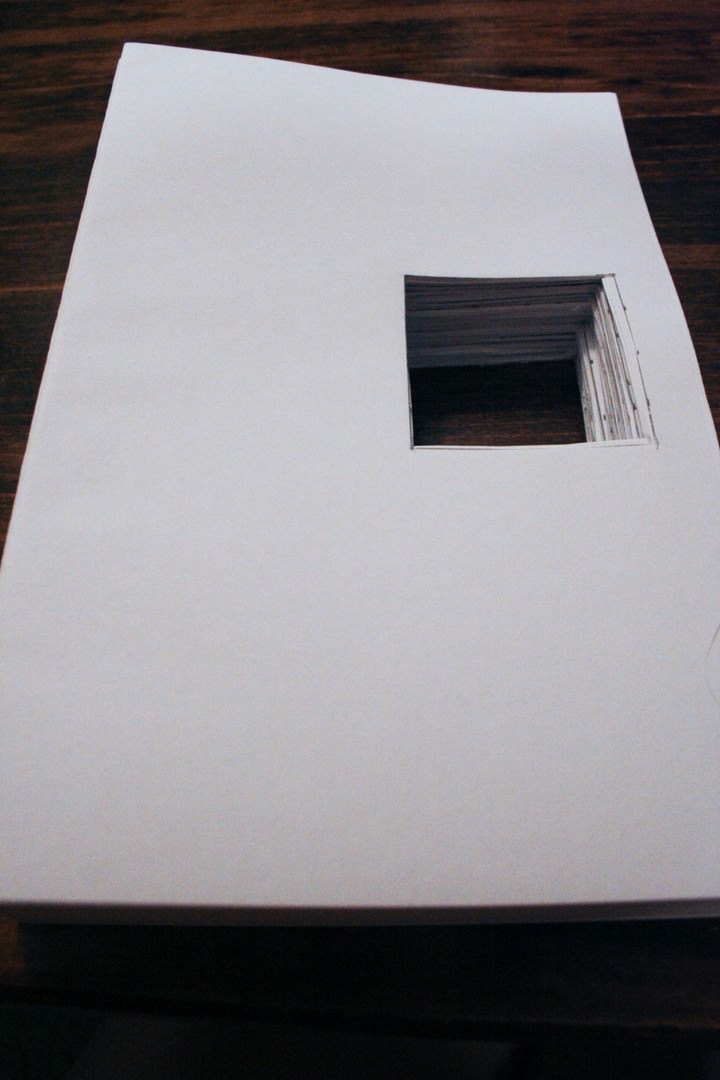
Step 4) Next take your knife and cut through the square. I tried cutting two stacks at once, but that’s because I was impatient, do as I say not as I do, cut one stack at a time, it will make your cuts cleaner.
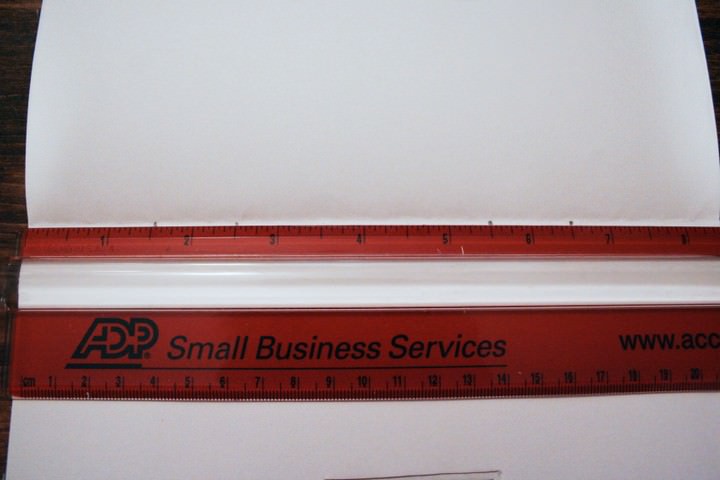
Step 5) Now that you’ve cut your shape out we can start to measure for the holes where we will sew the book together. I measured about one and a half inches in on either side and kept each dot an inch apart. You do need four dots placed in a similar fashion, but your measurements may be different.
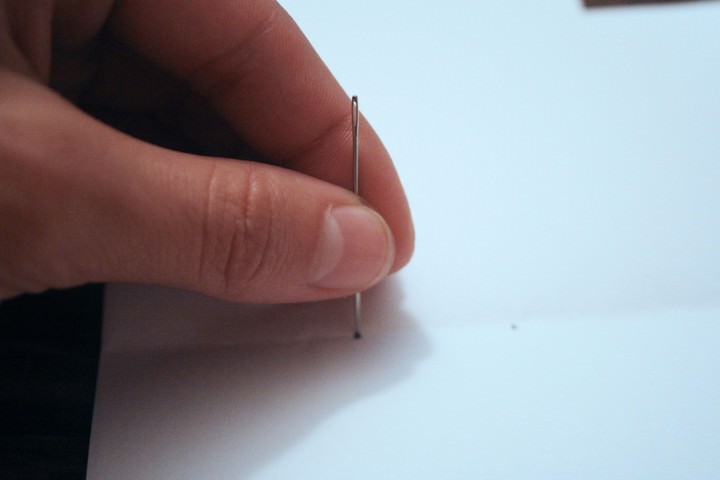
Step 6) Once you’ve done this on ALL your stacks (yes all), we can start to poke holes where you measured. I used the needle to poke the holes, but it would be easier to use a stronger tool, such as an awl. I just didn’t have one, so I improvised.
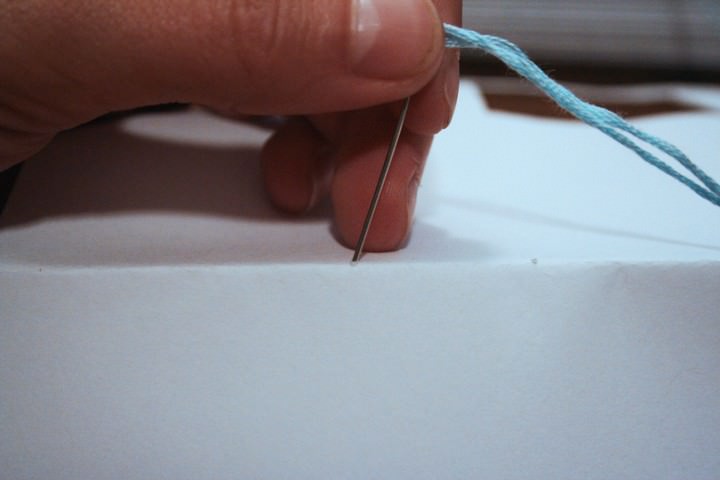
Step 7) Now that all the holes are poked in all the stacks we can start sewing the stacks together. The very first hole you go to sew you go in from the outside. This way, the inside has two thread lines on the inside, and one long thread line on the outside.
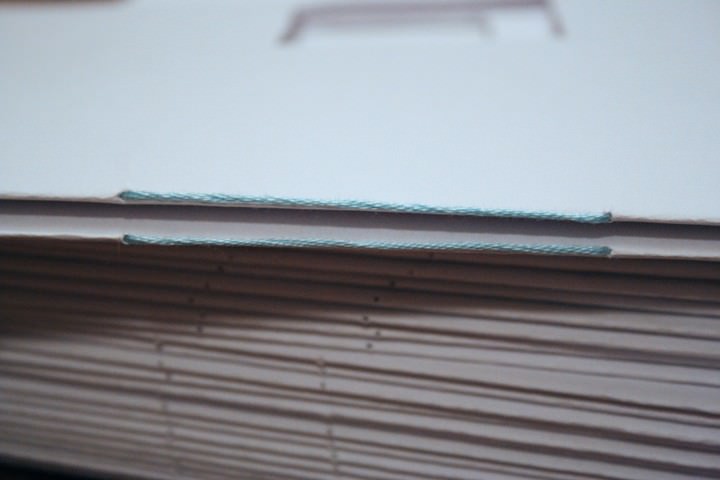
Step 8) This is the outside view, no one will ever see this side, and it will look a little less neat than the inside.
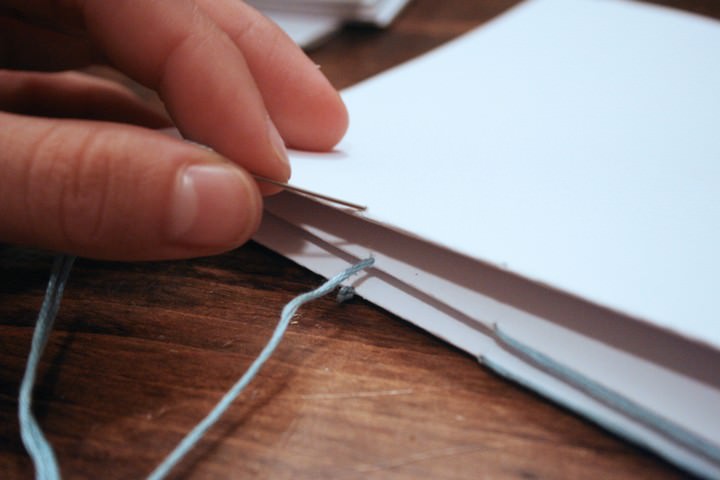
Step 9) Once you have sewn in and out of all your holes on one stack, you need to connect that stack to the others. After you’ve sewn in and out of all four dots, your needle and thread should have ended up on the outside of the stack, so to attach it to another, simply go inside of the first dot of the next stack. Like so:
Step 10) Now you can just rinse and repeat with all of your stacks so they are all bound.

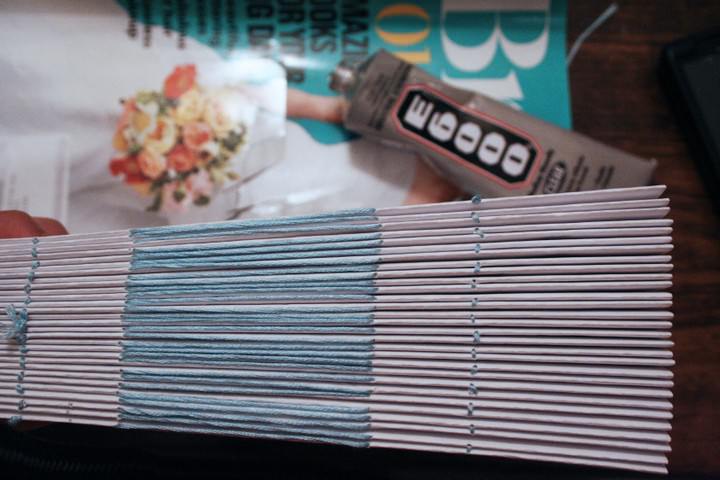
Step 11) Once you are all sewn it’s time to glue the crap out of the spine. Take your nice, strong, non fabric glue and slather it all over the spine of the book. When it’s all glued, take some heavy books and lay them on top to crush the spine down flat. You might want to put some wax paper between the two so you don’t get glue on your heavy books. This is the halfway point! Congrats! You can take a break while you let the book dry overnight.
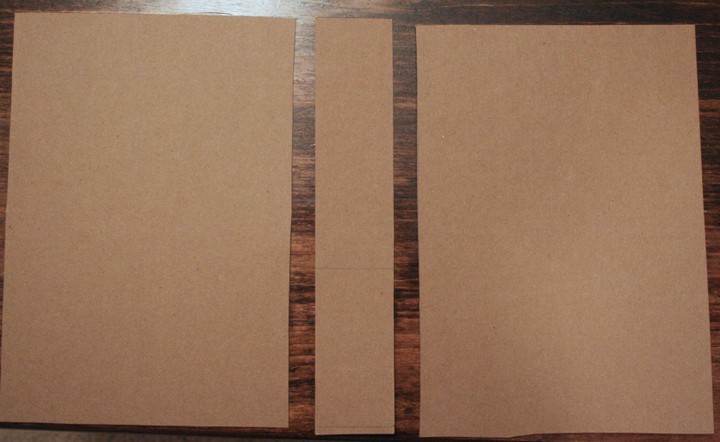
Step 12) Once the book is all dry you can start to work on the cover. Measure the length and width of your book to get an idea of how big you want to cut your chip board. I made my cover about a quarter-inch larger than the pages.
In addition you also have to cut your spine, which I also have made about a quarter-inch larger total (so when you attach the spine it will be about 1/8 of an inch wider on either side of the spine).
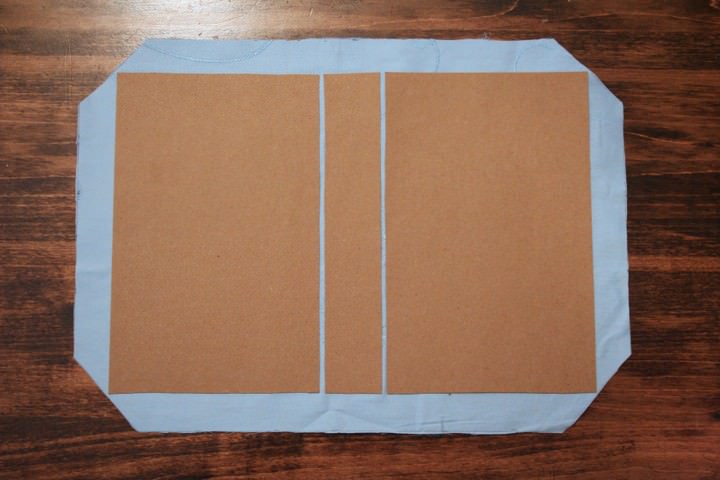
Step 13) Once the chip board is measured and cut, you can place it on your cover fabric, with each piece between 1/8in and a quarter inch away from the each other. Now draw a one inch boarder around your cover. This is a measurement I recommend, no matter how big or small your book is.

Step 14) Next, make a 45 degree angle at the corners of your border, leaving a tiny bit of space between your chip board and your line

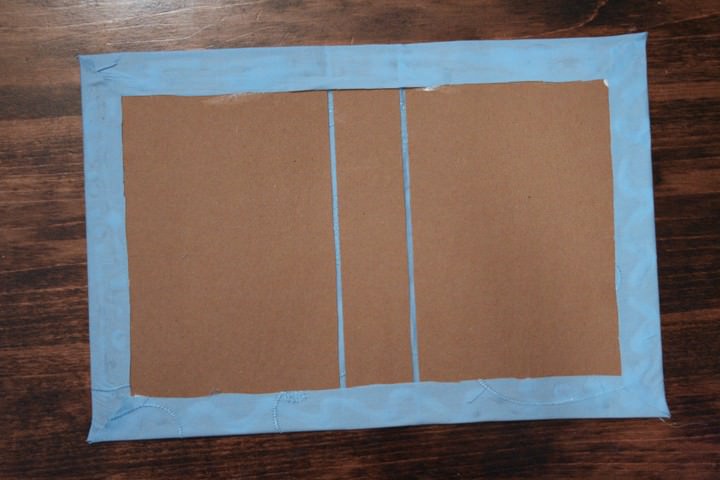
Step 15) Then you can cut it all out around your outline.
Step 16) Take all the edges and glue them to the chip board. The corners should just naturally come together to cover the chip board.
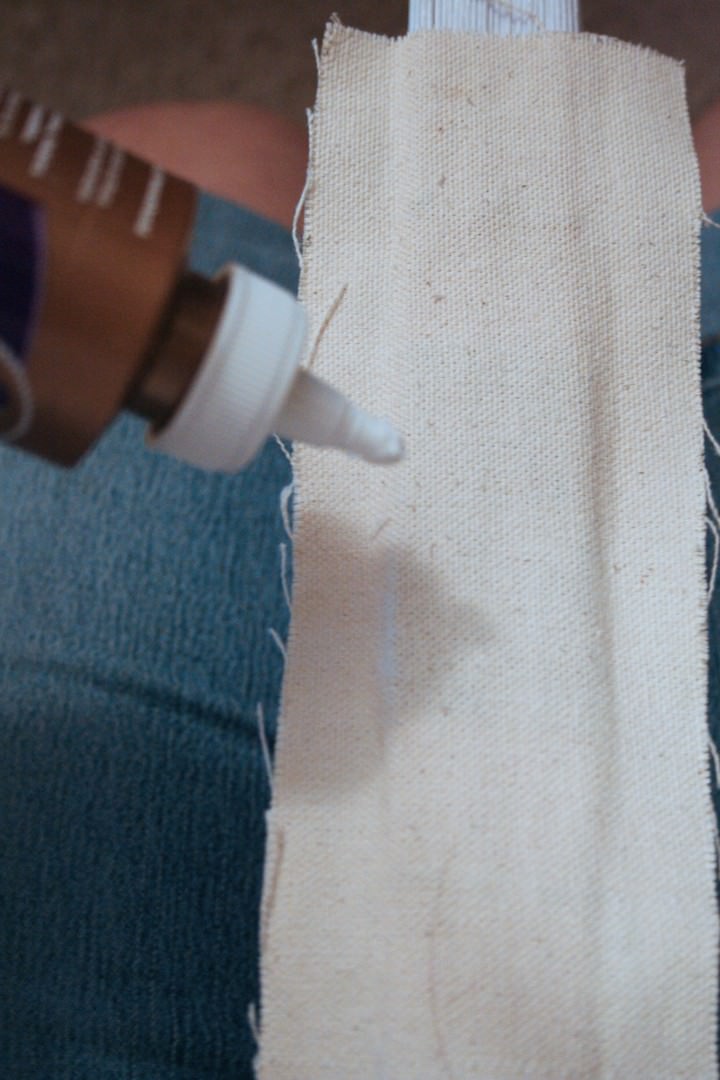
Step 17) Once the glue to your fabric is dry, you can move on to gluing the book to the spine. Put some fabric glue all over the canvas fabric and place the spine of your book in the middle of your chip board spine so that it’s even width and lengthwise. Press down the excess canvas until the glue dries, you can use some books to hold it down.
Step 18) I swear we are almost done! the last thing to do is totally optional. You can glue paper to the front cover and back cover to hide the fabric and canvas.
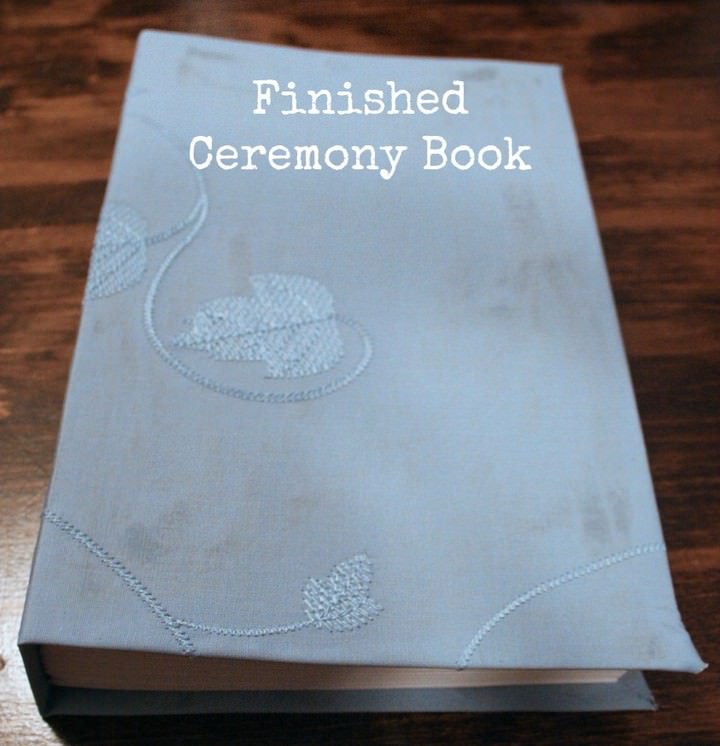
So there you have it! Book finished! Whew! I hope you guys could follow, I know it’s super involved. The only thing I would caution you about is the glue with the fabric. If the glue isn’t totally smooth and 100% not thick in any place, it will create sort of dirty looking spots on the fabric. I don’t know how to combat that, and since it’s not too bad, I’m ok with it. The only thing I can think of is to maybe double up the fabric.
In the end I do like the result! I love that this will be something that will hold our rings and our vows to each other. It’s something we can keep forever and pass down for maybe our son or daughter to use for his or her wedding vows, something that can go through generations, and first it contained our story.
Thanks so much to Lauren for this fab DIY Tutorial. Lauren will be back in a few weeks time with another great idea!
http://flatbrokebride.wordpress.com
[email protected]
FACEBOOK
TWITTER
Share this post


Thanks so much for this. It’s a lovely idea and very clearly explained – can’t wait to try it out!
Jessica x
Soirèe de Luxe | Wedding Planner London
glad you like it Jessica xxx
Super cute tutorial. Love it!
I love it! You can even use parchment paper to give it a vintage look.
What a clever idea! It is such a sweet idea, and the tutorial is very helpful. I love it! Im sure some of our bride to be hens will love this idea!
Have you tried our fabulous wedding directory?
discover more