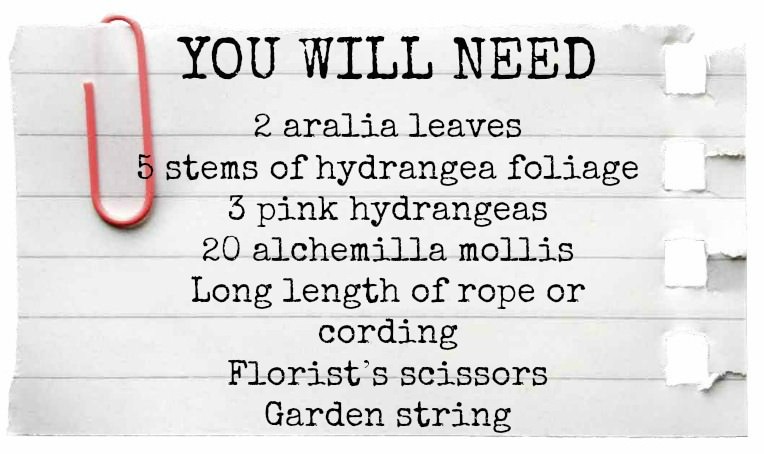
Featured Post

‘Timeless Love’ Elegant and Romantic Wedding Inspiration From Greece
It’s that time of year when we are all beginning to think about our holidays!...
It’s that time of year when we are all beginning to think about our holidays!...
31
Mar
2014
By Boho

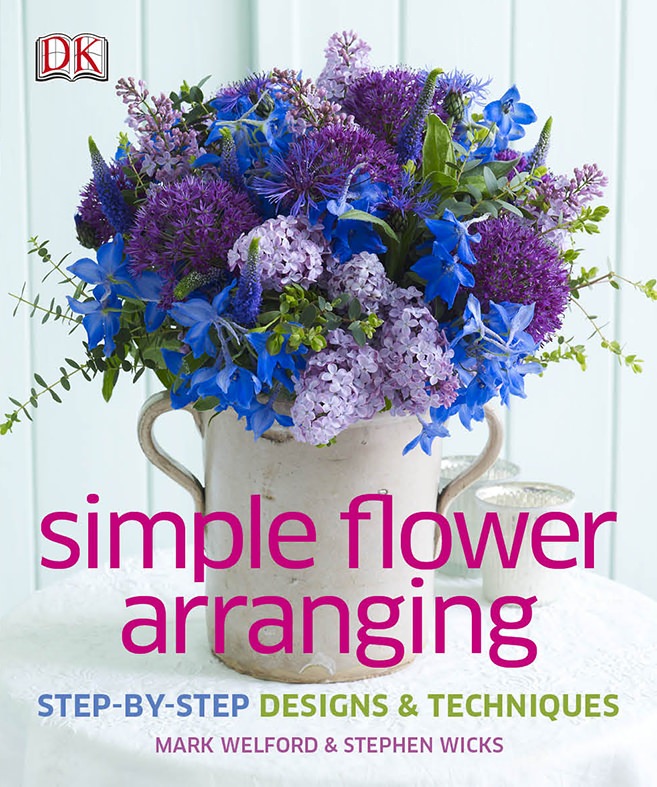
A few weeks ago I posted a gorgeous tutorial showing you how to create this White and Green Hand Tie Bouquet. The tutorial was taken from a wonderful book called Simple Flower Arranging. This book is FULL of amazing flower arrangements as well as incredibly useful hints and tips to create the prefect flower arrangement just like the professionals. The books is jam packed with amazing turoials, so today I have another one to share with you.
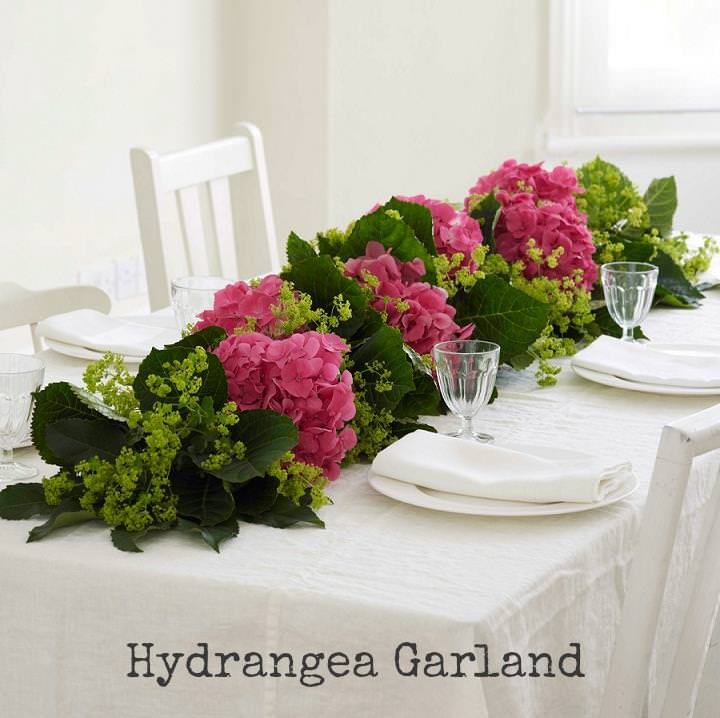
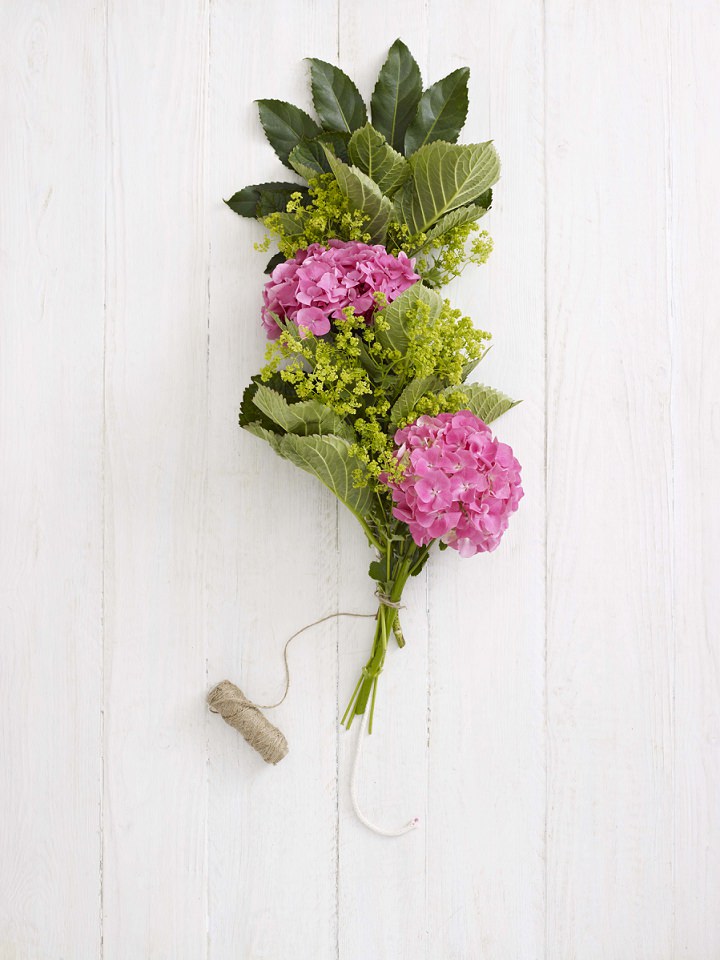
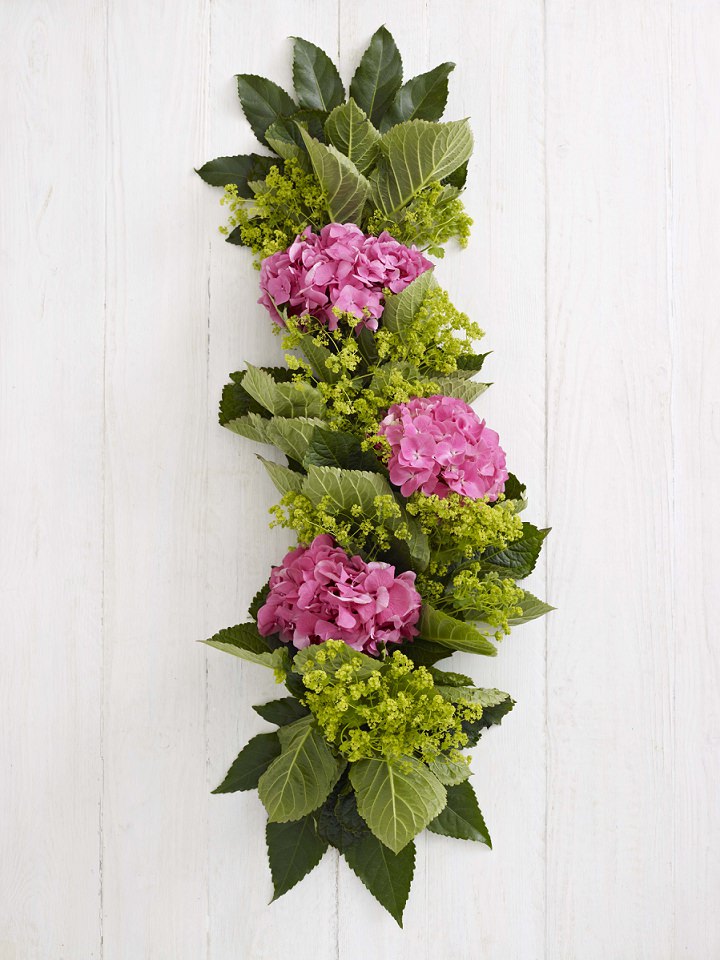
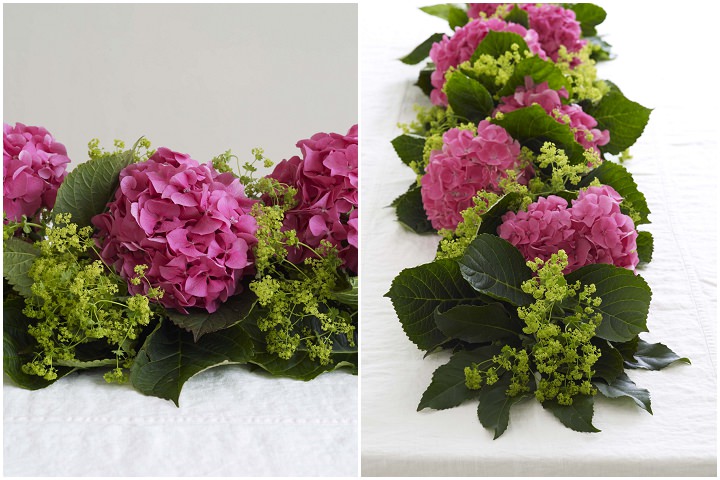
‘This arrangement, running the full length of a table, is a real show-stopper for a celebration or party. Add the flowers and foliage bit by bit, until the garland matches the length of your table, and make it fairly last-minute, as it will only look its best for 24 hours. The flowers are layered on top of dark-green deeply veined leaves to create a sumptuous table display, and the hydrangea heads are angled out at either side to accentuate the three-dimensional shape of this design.’
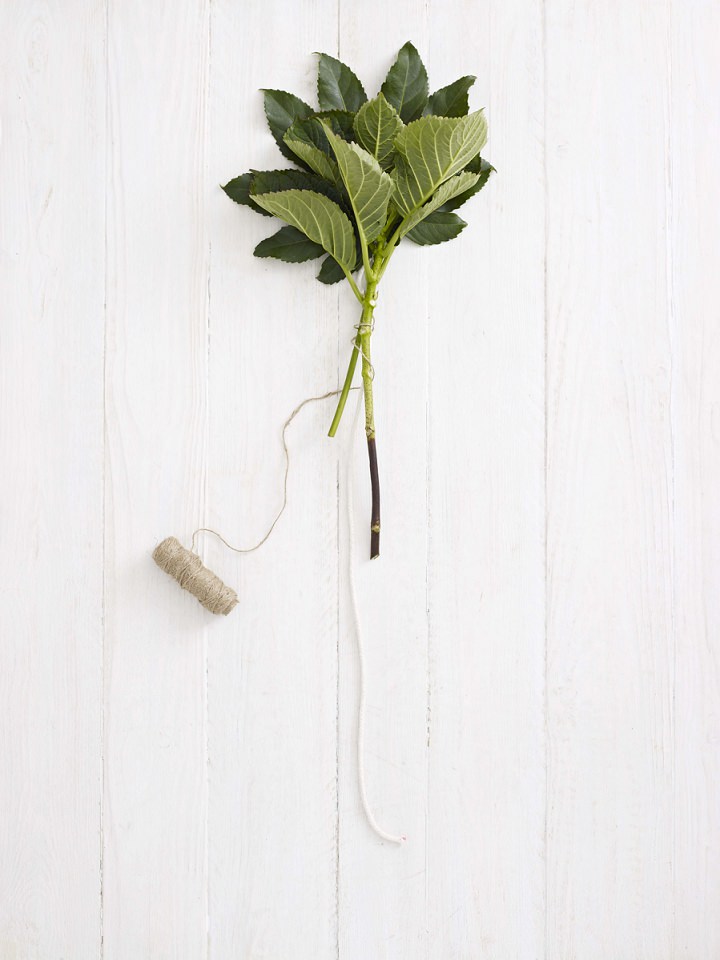
STEP 1) Cut the length of cord slightly shorter than the length of the table, place it on a flat surface, and tie 1 aralia leaf onto the end of the cord with garden string secured in a simple knot.

STEP 2) Layer 1 hydrangea leaf stem over the aralia leaf, so its leaves are graduated just below those of the aralia. Wind the string around both stems and cord to make the swag more robust.
STEP 3) Place a group of 3 alchemilla stems on top of the hydrangea and aralia so they form another graduated layer. Pull the string tightly around the first 2 leaf stems before winding more string around all the stems and cord to secure them together.
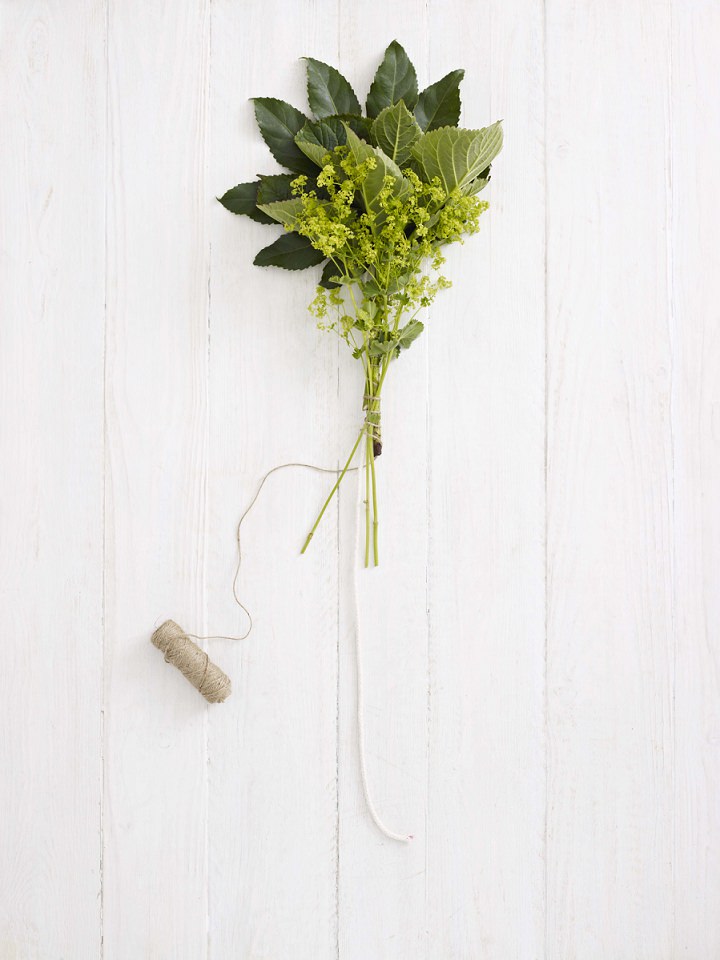
STEP 4) Add a pink hydrangea to the garland, placing it just beneath the lime-green alchemilla. Bind it to the secured stems by winding the string 3–4 times around all the stems and the cord, and adjusting the flower head so it is slightly angled to one side of the design.

STEP 5) Add another hydrangea leaf stem and a cluster of 3 alchemilla stems to the garland in the same way. Arrange another hydrangea flower at an opposite angle to the first flower.
STEP 6) Add more flowers and foliage until 15cm (6in) of rope remains. Lay the last stems of alchemilla and hydrangea leaf, and, finally, the second aralia leaf, in the
opposite direction to the other stems. Pull the string tight and wind it 3–4 times around these last stems and rope. Secure the string firmly in a knot and cut off the ball of string.
You can keep up to date with Mark & Stephen’s news here
F:BloomsburyFlowersLondon
T: Bloomsbury Flowers
P: Bloomsbury Flowers
B: Bloomsbury Flowers
Share this post


Anything that includes hydrangea always gets a huge tick from me. I think I might give this a go for the Easter meal I was nominated to host yesterday ;)
x
That’s a great idea, would love to see some variations on this too. x
Absolutely gorgeous!!
I’ve just ordered the book. Thanks for the introduction and recommendation ;-)
Such a great tutorial to be used at weddings, baby showers. Love this
Definitely bookmarking this for easter.
Have you tried our fabulous wedding directory?
discover more