
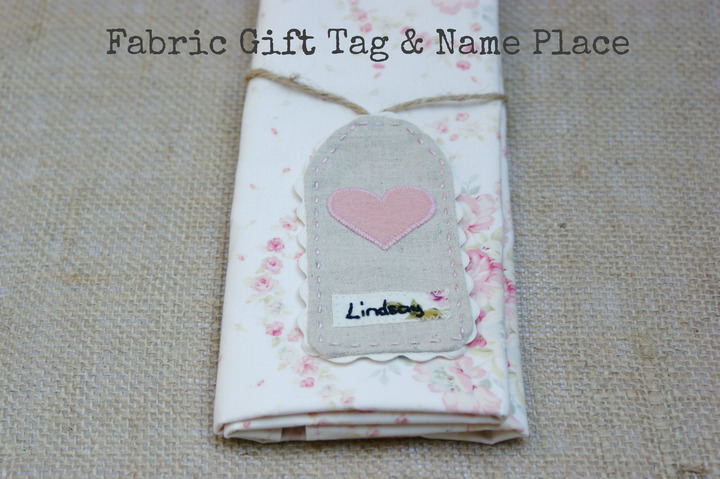
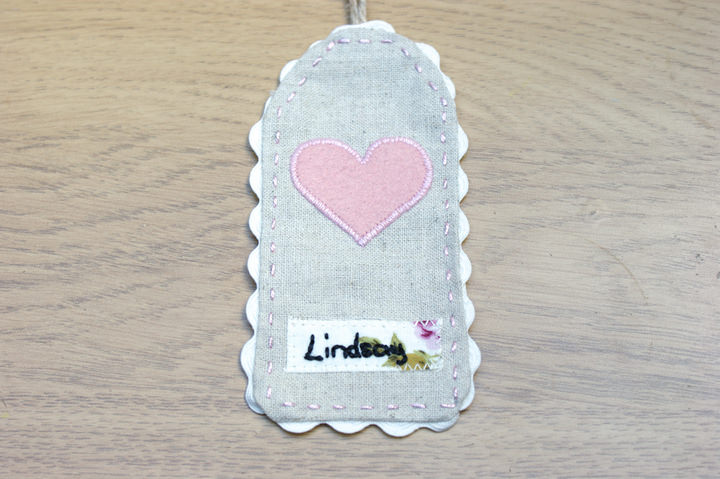
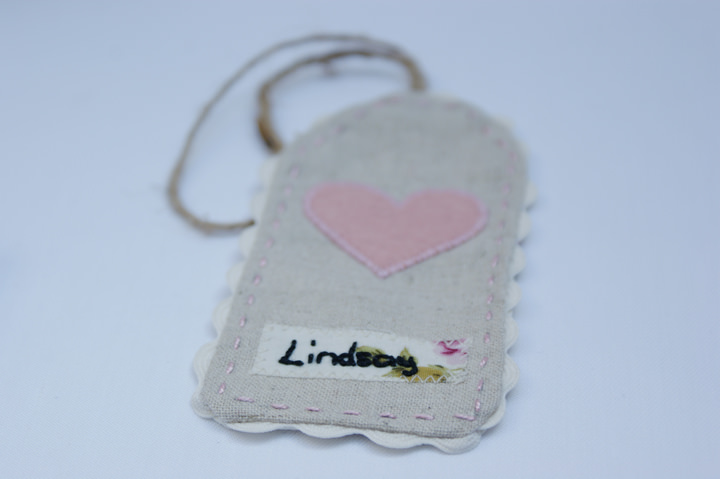
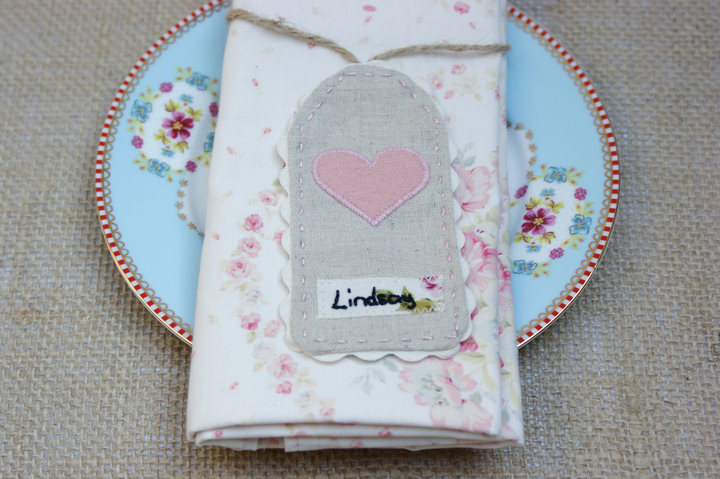
I’m delighted to welcome back Emily Carlill from Love me Sew back to the blog this afternoon. After crafting her own DIY wedding in 2011, Emily Carlill now continues to make lots of items for other people’s weddings. She also makes up one half of Love Me Sew, a crafty business selling fabric, craft packs and running workshops. Emily is a DIY expert, last time she showed us how to make a super cute Wedding Ring Cushion and today she is showing us how to make this Fabric Name Place Tag that also doubles up as a cute gift tag.


STEP 1) Cut the fabric
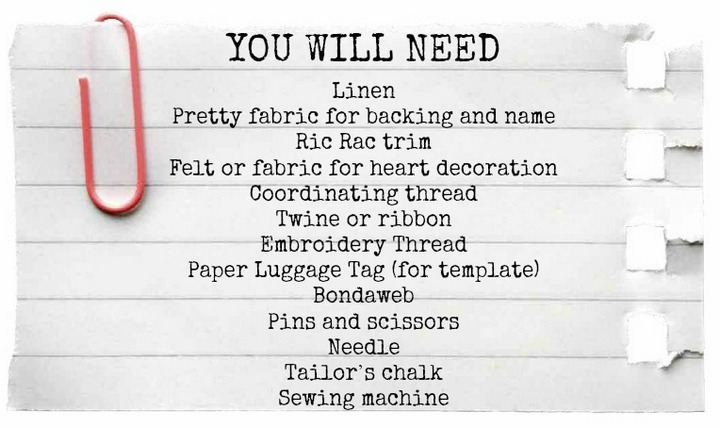
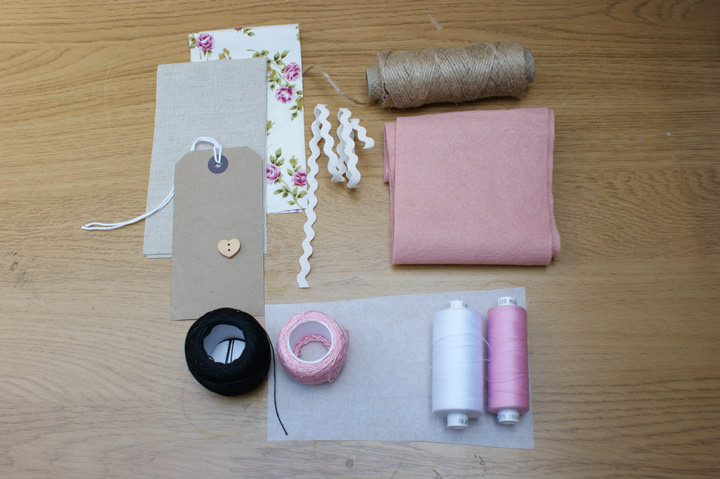
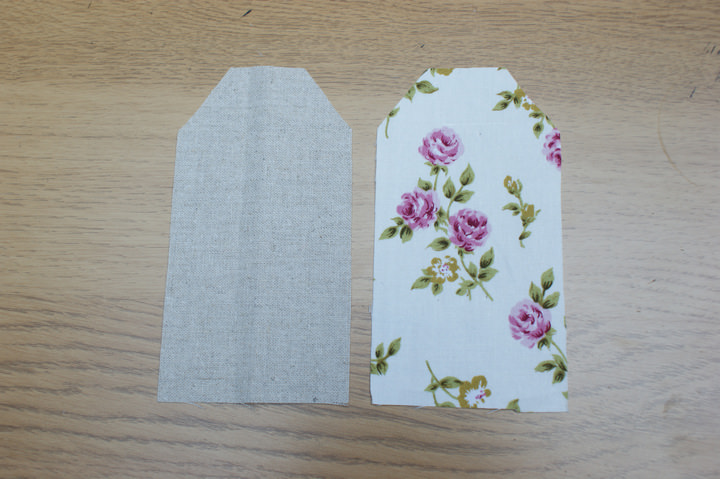
- On the back of your two fabric pieces (front and backing), draw around the paper luggage tag, and cut out the shape.
STEP 2) Make the decorations
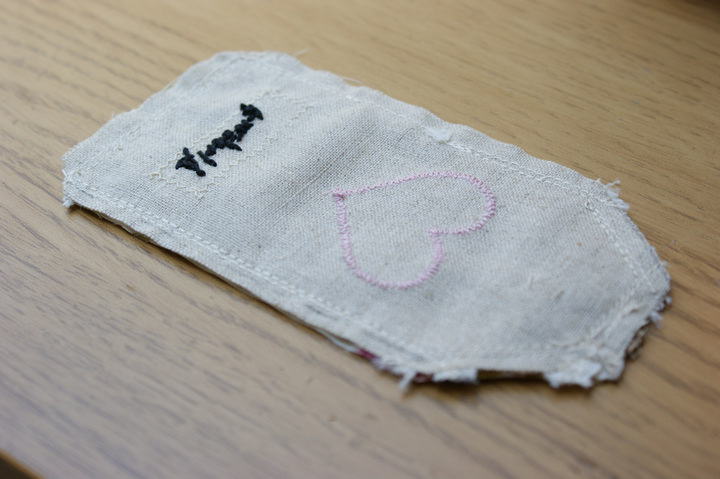
Add the heart
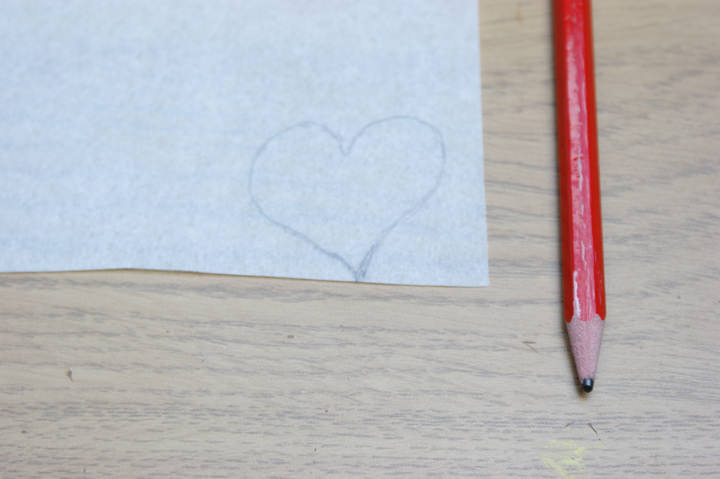
- On the paper side of the Bondaweb, draw a small heart shape.
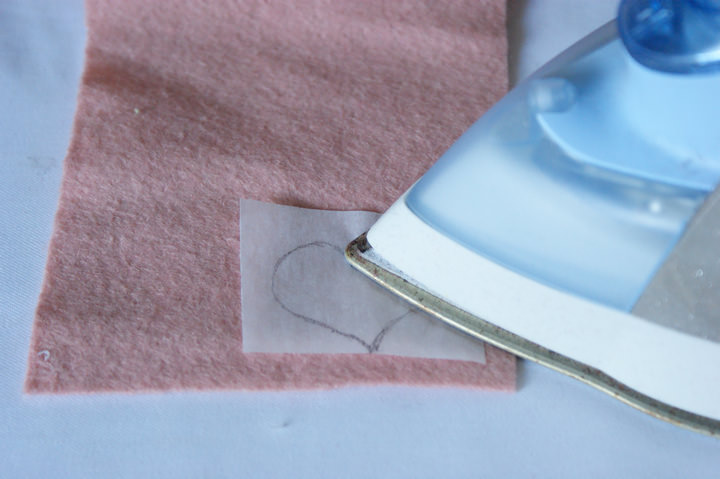
- Place the Bondaweb, paper-side up, onto the piece of felt. Press with an iron for a few seconds until the glue side of the Bondaweb has fused to the felt.
- Cut out the heart shape and peel off the Bondaweb paper backing.
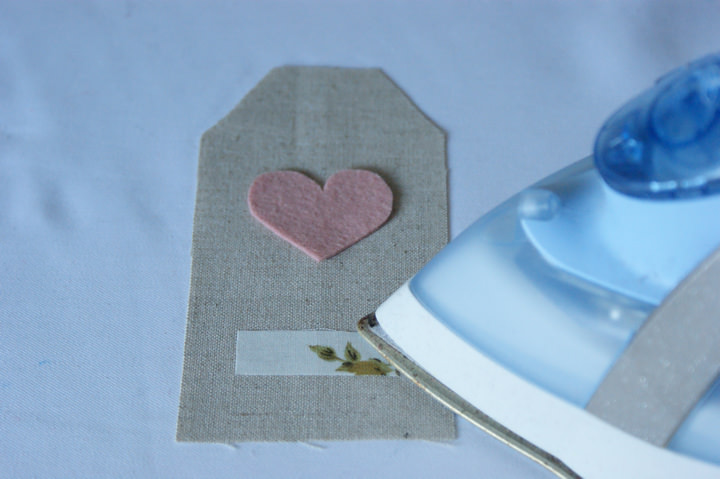
- Place the heart onto the piece of linen and press, so the glue from the Bondaweb sticks to the linen.
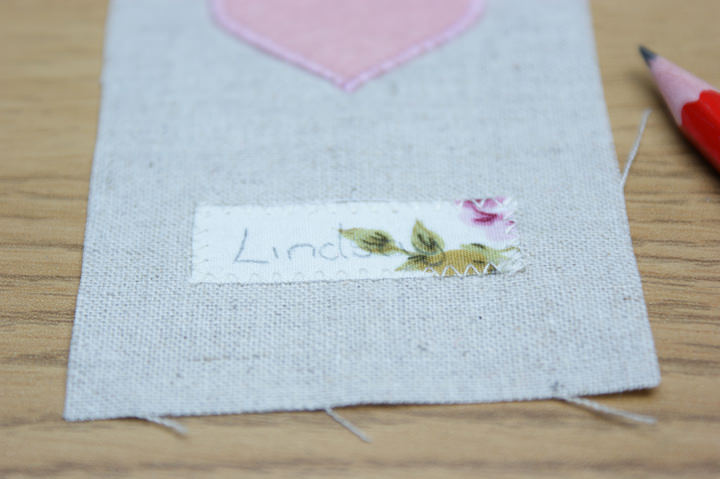
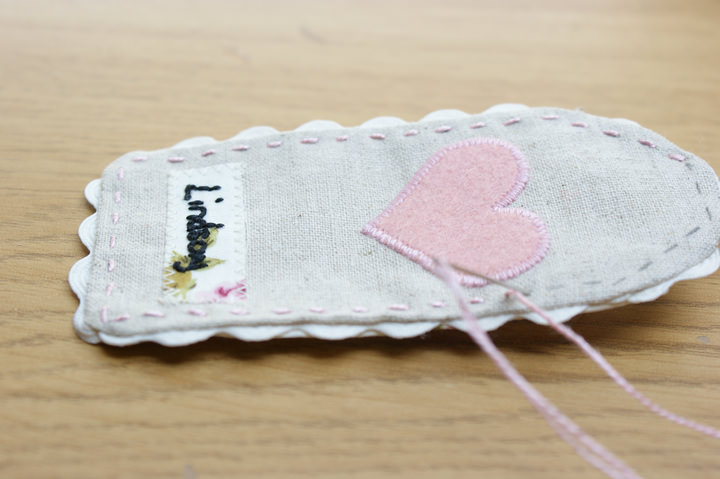
Add the name
- Using the same technique as above, draw a small rectangle shape on the paper side of the Bondaweb and place on the back of a spare piece of the fabric you have used for your backing. Press
- Cut of the shape and peel of the Bondaweb paper backing.
- Place this fabric shape onto the tag, under the heart. Press for a few seconds until it sticks in place.
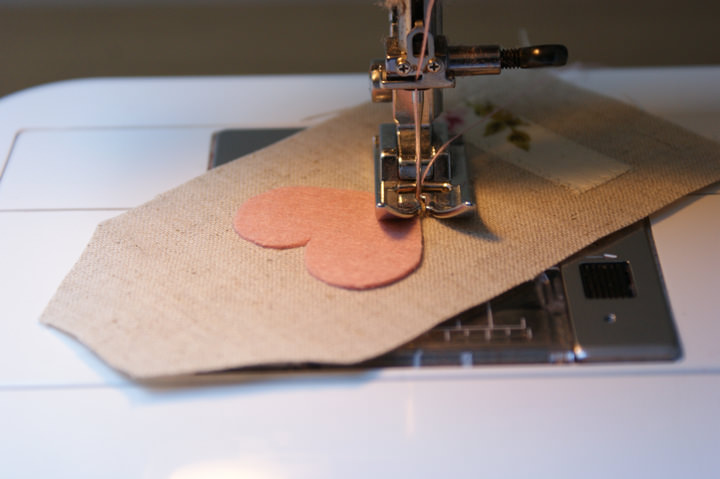
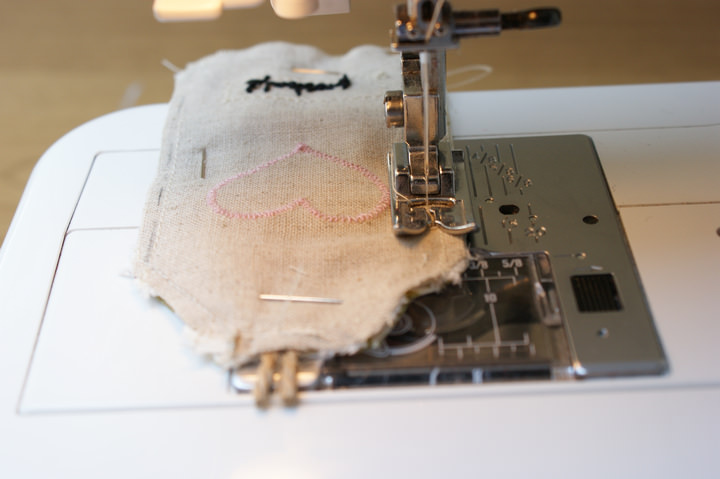
- Using coordinating coloured thread, and a small zig zag stitch, sew around the shapes (both the heart and the rectangle).
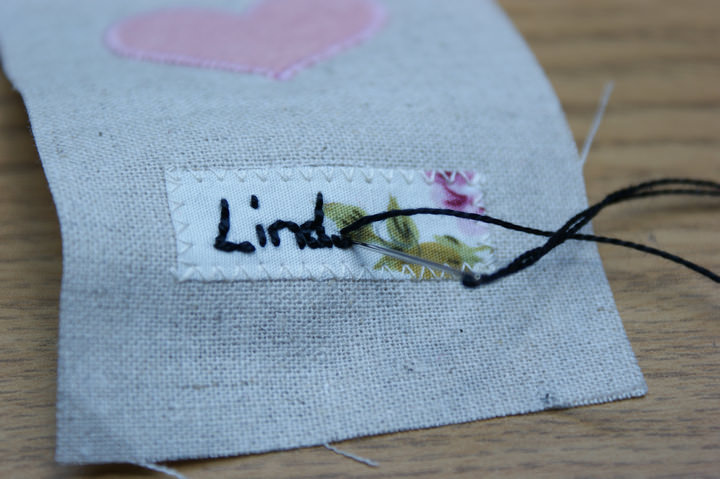
- Using a pencil, lightly mark the name of the guest and, using embroidery thread, hand-sew, using backstitch the name.
Add the Ric Rac trim
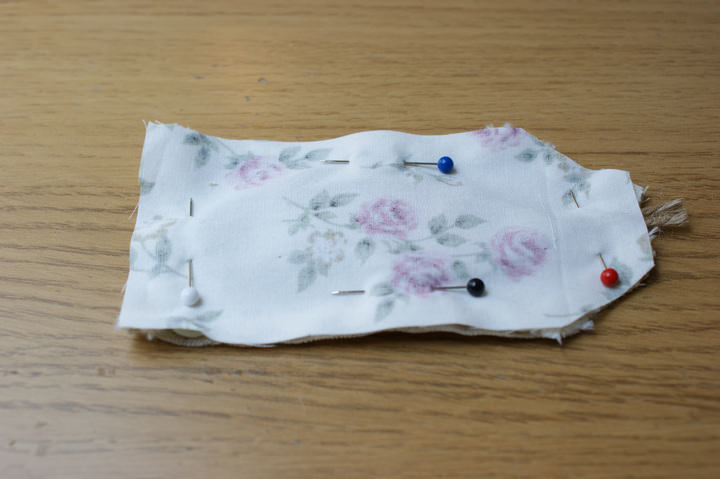
- Pin the Ric Rac trim around the edge of the right-side on the linen fabric, cut each piece for each side (as opposed to a continuous length all around the edge).
- To attach the Ric Rac, sew a line of stitches a few mm from the edge of the trim so you are catching the curves.
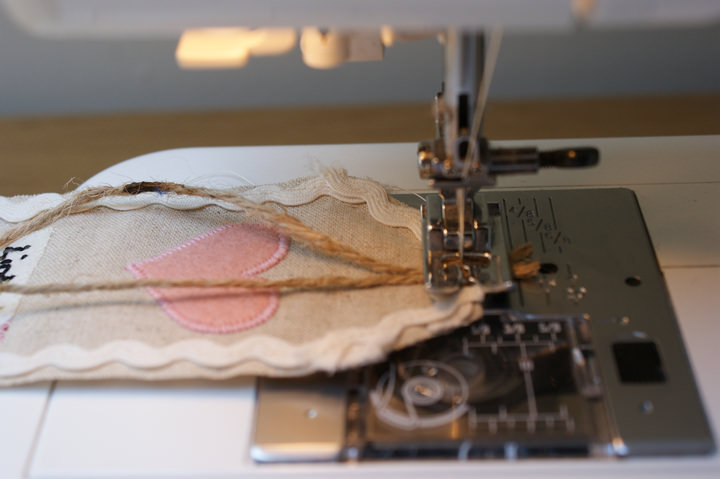
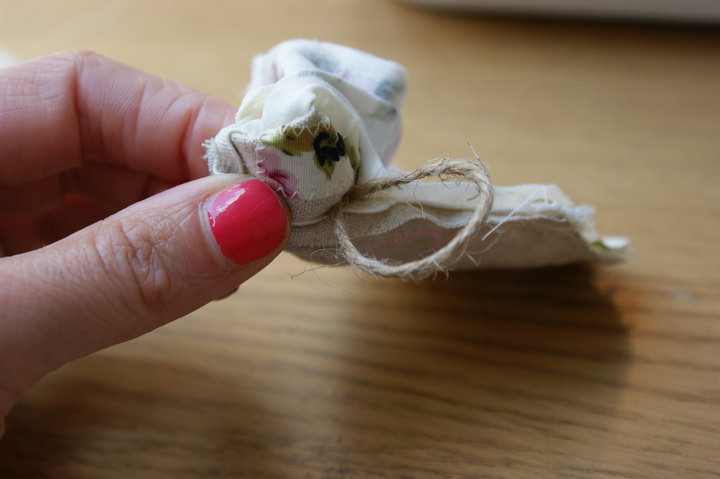
STEP 3) Add the label tag
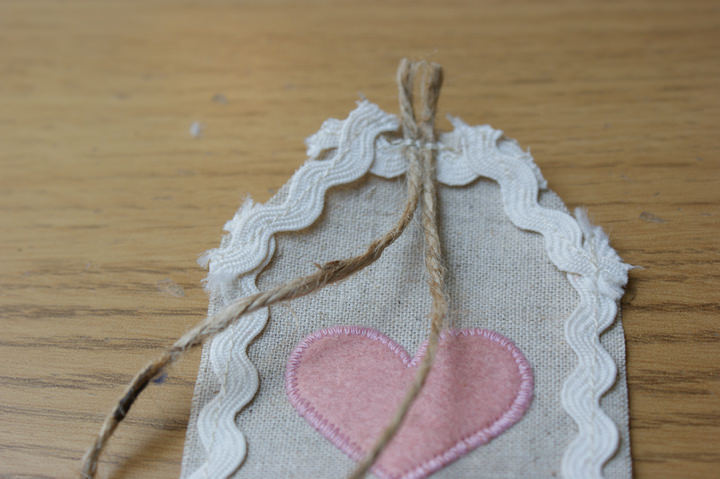
- Cut a piece of twine or ribbon (whichever you are using for your label tag) to your desired length.
- Fold in half and pin to the top of the label, on the right side (the side that you have just decorated), so the loop is facing in and the raw edges are poking over the edge of the linen.
- Sew a few stitches across the ends to hold in place.
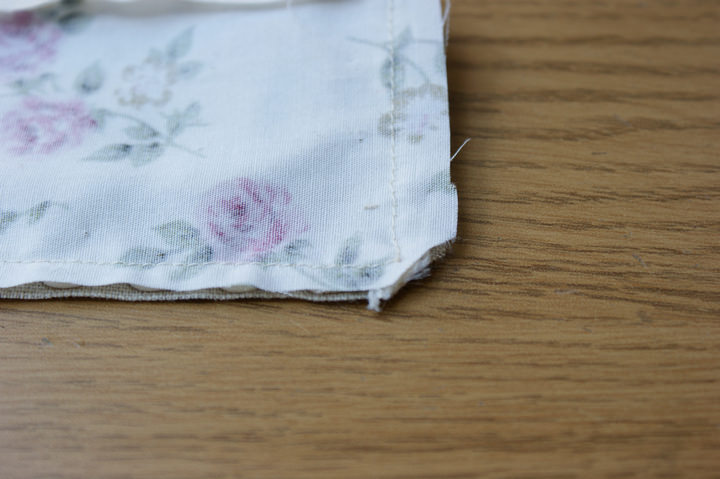
STEP 4) Sew the label together.
- Pin the backing fabric and the linen fabric right-sides together.
- Starting from one long side, sew all around the edge of the label, stopping approximately 2cm from where you started, leaving an un-sewn space. Stay stitch at the start and end of your stitches so they don’t become loose when turning the label the right way out.
Tip: When sewing around the label, follow the line of stitches you made to attach the Ric Rac – sew a few mm on the inside of this line – this will ensure you a neat finish.
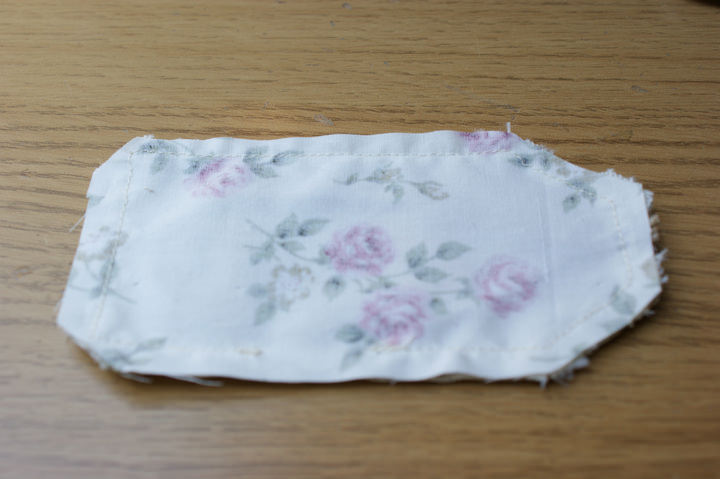
- Clip the corners and turn the label the right way out through the opening. Press
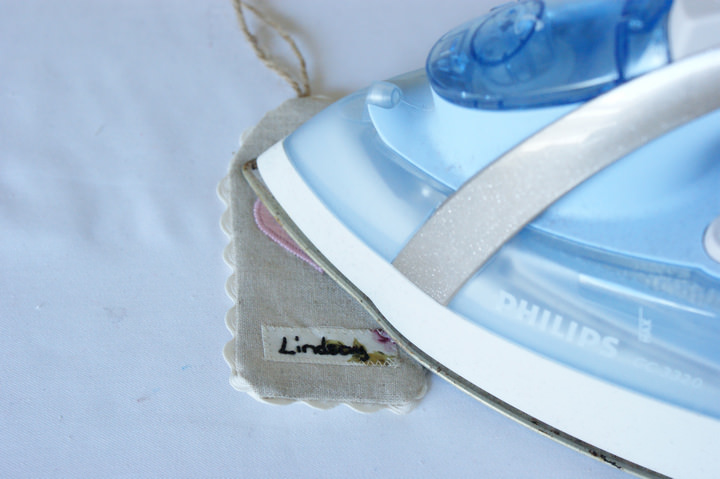
STEP 5) Finishing.
- With a pencil, lightly mark the running stitches evenly around the edge of the label.
- Using your embroidery thread, hand sew a running stitch around the label, making sure to sew closed the opening.
- And your done! Isn’t it pretty! Now you have a gorgeous name place tag for your guests that they can keep as a favour, or an exra special gift tag, for a special present.
For more information on Emily’s DIY ideas go to
www.lovemesew.co.uk
http://blog.lovemesew.co.uk/
Facebook
@LoveMeSew
After crafting her own DIY wedding in 2011, Emily Carlill now continues to make lots of items for other people’s weddings. She also makes up one half of Love Me Sew, a crafty business selling fabric, craft packs and running workshops (including DIY wedding workshops and crafty hen dos) with business partner Sam Lowe.


Oooooh love these! Totally doing Xmas inspired ones for my gifts this year (yes. I said the C word. already.)
x