Featured Post

Boho Pins: The Best of Boho – Disco Ball Weddings
Happy Monday everyone! I hope you all had a fabulous weekend? I had a lovely...
Happy Monday everyone! I hope you all had a fabulous weekend? I had a lovely...
3
Jun
2013
By Boho

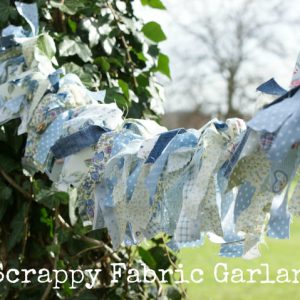
I’m delighted to welcome back Emily Carlill from Love me Sew back to the blog this afternoon. After crafting her own DIY wedding in 2011, Emily Carlill now continues to make lots of items for other people’s weddings. She also makes up one half of Love Me Sew, a crafty business selling fabric, craft packs and running workshops. Emily is a DIY expert, last time she showed us how to make make Scrappy Fabric Garland and today she is showing us how to make this super cute Ring Cushion.


STEP 1) Cut two pieces of fabric: one 7.5” x 7.5” for the back and the other 7.5” x 17” for the top piece. Put aside the bag piece for now.

STEP 2) On the top piece, make small light chalk marks at 2” intervals along the long sides (so the marks are directly opposite on both sides)

STEP 3) On the ironing board, begin to fold the fabric so every other chalk mark matches up, and press. Pin the folds in place. Repeat until there is a 2” unfolded piece of fabric at either side.


STEP 4) Sew using a straight stitch, close to the edge of each fold.

This folded piece of fabric should now be the same size as your square back piece of fabric. (You may need to trim a little if not!)

STEP 5) Pin the crochet trim around the right side (the side with the folds) of the top piece, approximately 1cm from the edge. Sew the crochet trim in place.

STEP 6) Pin the top piece of fabric right sides (patterned sides) together with the back piece

STEP 7) Sew the pieces together, with slightly more than a 1cm seam allowance to sandwich the crochet trim, and leaving a 4cm opening, stay stitching on either side of the opening.
Tip: Sew on the inside of the trim’s line of stitches to ensure you hide these stitches.

STEP 8) Snip the corners and trim off the excess fabric from around the outside before turning through the opening. Press, making sure to tuck the raw edges into the opening.

STEP 9) Stuff the wadding in through the opening and hand-sew to close the opening.

STEP 10) Hand-sew a piece of twine or ribbon to the centre of the cushion, create the bow to tie the rings to.

And here’s the finished item, isn’t it pretty!


www.lovemesew.co.uk
http://blog.lovemesew.co.uk/
Facebook
@LoveMeSew
Share this post


Very pritty cusion
Nice cushion. Simple and easy way to make it. I want to show to my customer. Hope they also like it.
Really nice cushion and simple to follow. I’m planning my wedding myself and im a beginner in sewing but my little cushion turn out fantastic! Thanks for sharing!! :)
No problem at all! :-)
Have you tried our fabulous wedding directory?
discover more