Featured Post

‘Marriage in Colour’ Bright and Bold Wedding Inspiration From France
I have been featuring a lot of colour on the blog over the past few...
I have been featuring a lot of colour on the blog over the past few...
14
Apr
2014
By Boho

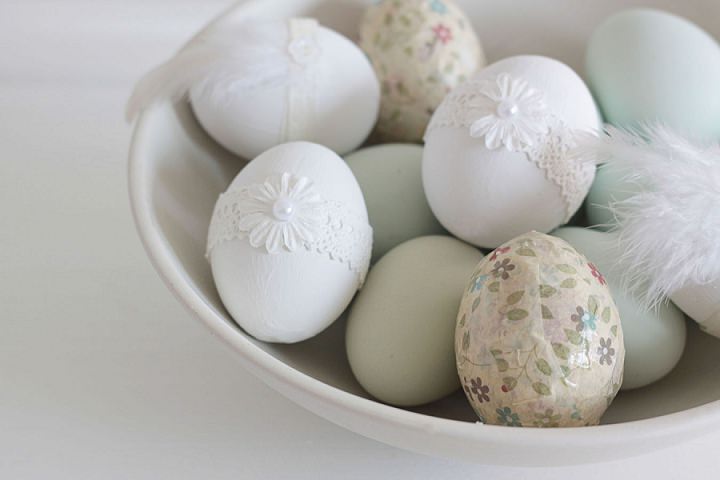
Today is part 2 of our Easter special, last week I brought you this super cute FREE Easter printable from download and print. Today it is the turn of Andrea Pittam from Kiss the Frog as she brings you these Hand Decorated Eggs. These hand decorated eggs from Andrea are just adorable, so pretty and delicate and actually pretty easy to do! If you want an extra Easter treat you can pop over to A Boho Life, for a 3 part family fun easter tutorial.
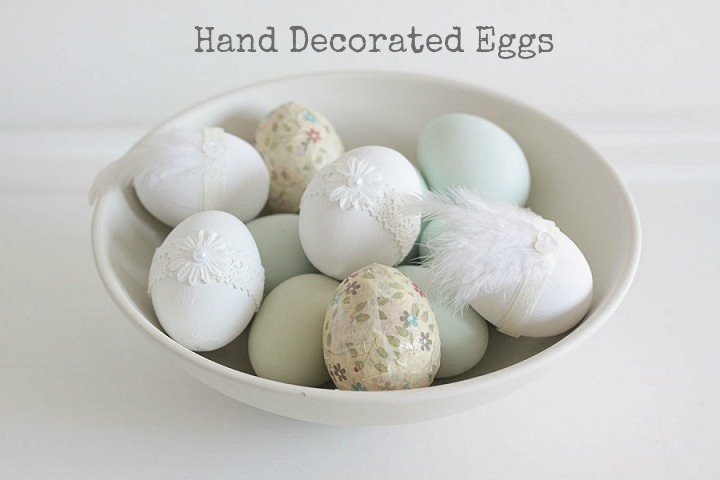
Made from real eggs these pretty decorations can be made to match any colour scheme with lots of options for personalising your design.
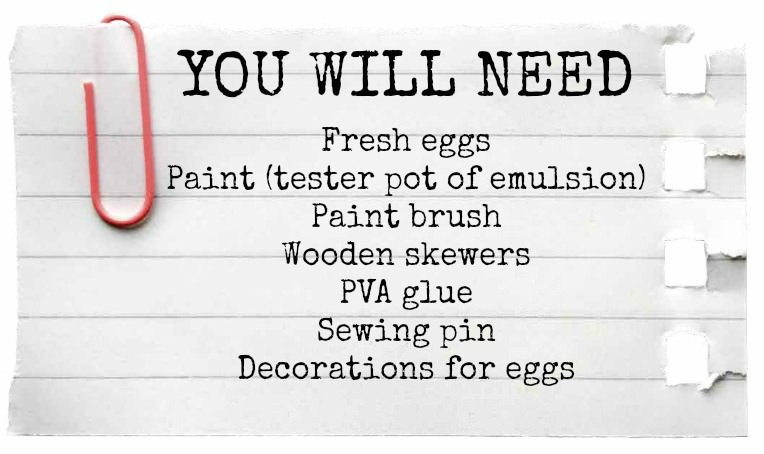
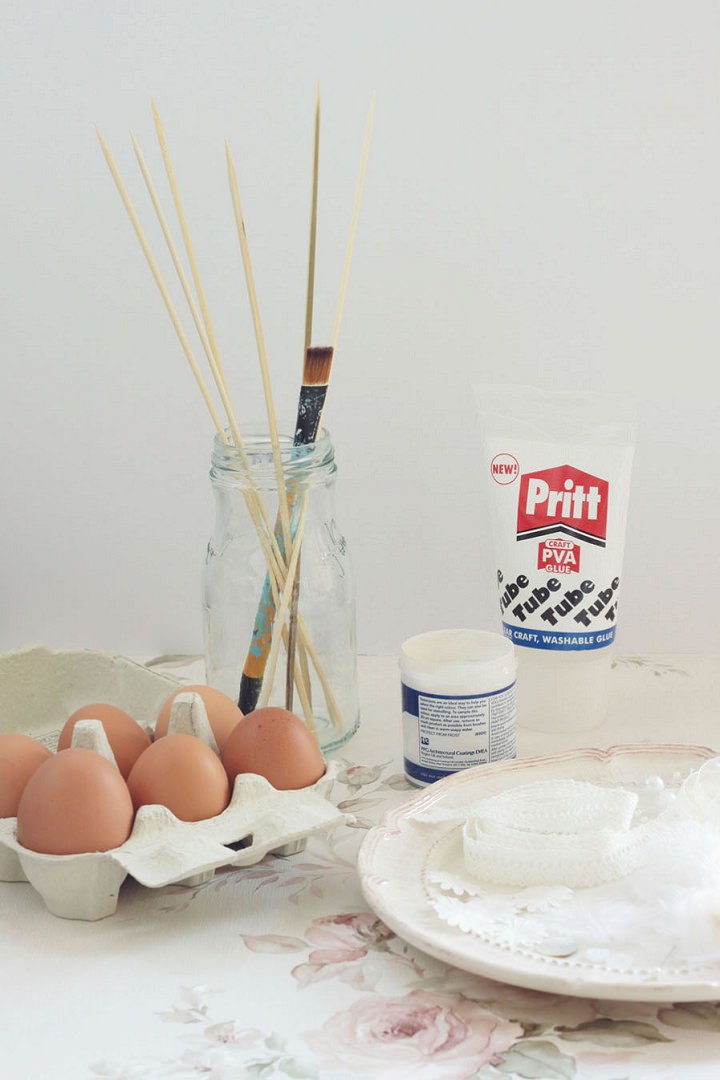
STEP 1) Firstly you need to remove the insides of the eggs. To do this you need to make a hole in the top and bottom of the egg using the sewing pin. Pierce the egg a few times in each end to make the holes slightly bigger. This will make the egg easier to blow out of the shell. Blow through the top hole and the egg will come out of the bottom. Submerge your egg shell in warm soapy water to give it a clean and blow the water out.

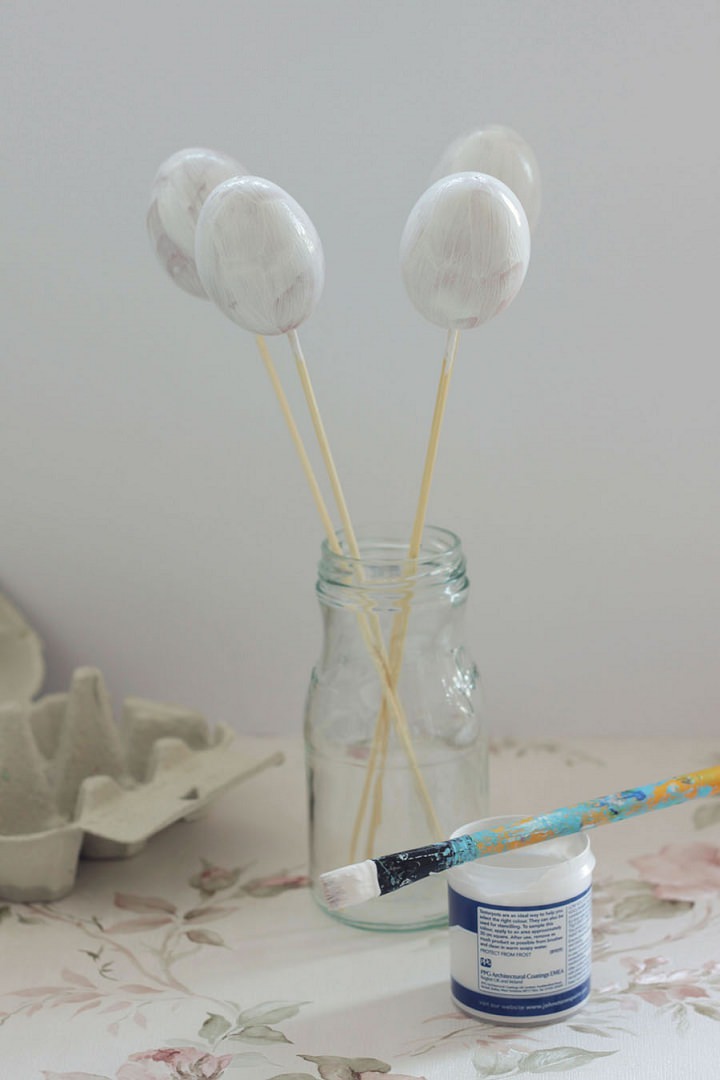
STEP 2) Paint the eggs using the emulsion. Allow them to dry on wooden skewers for a perfect finish. You will need to give each egg a couple of coats of paint.
STEP 3) So that you can get a perfect finish dry them on wooden skewers, or something similar.
STEP 4) Decorate your eggs using PVA glue to secure everything in place. Wrap ribbon around the middle of the egg and add some embellishments.
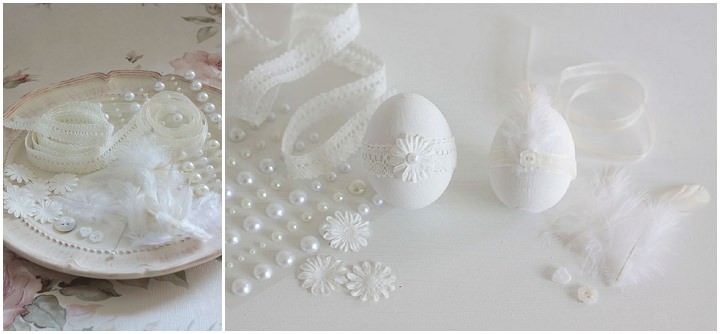
STEP 5) The decoupage eggs are made by cutting up small strips of patterned paper, gluing them and wrapping them around the egg.

www.kissthefrogx.com
[email protected]
Etsy Shop
FACEBOOK
@KisstheFrogx
Share this post


Wow, these look fabulous! Great idea… perfect for those little Farrow and Ball tester pots in beautiful colours!
Perfect for when I’m babysitting this easter hols!