Featured Post
Boho Wedding Directory: This Weeks Awesome Wedding Suppliers – 15th March
The Boho Wedding Directory is a hand-picked list of all awesome wedding suppliers in the business, ready to help you...
The Boho Wedding Directory is a hand-picked list of all awesome wedding suppliers in the business, ready to help you...
13
Jan
2014
By Boho
Today’s DIY Tutorial comes from Rachel Thompson who in the past has shown us how to make these cute Guest books and as well as these Fabric Hearts. After last time showing us how to make these vegetable stamps for handmade stationery, Rachel is back with a more detailed tutorial as she shows us how to make decorative stamps out of Erasers. You can use all sizes fo Erasers, from tiny pencil erasers to much bigger ones, for larger designs.
This tutorial is an extension to the vegetable stamps tutorial I did last year. The level of skill is stepped up a bit and there’s some more specialist equipment involved but it is still a really fun and accessible craft and a great way to make something unique to you and your wedding.
You can use the rubber stamps for your Save the Date cards, invites, favour labels, place names…the list goes on!


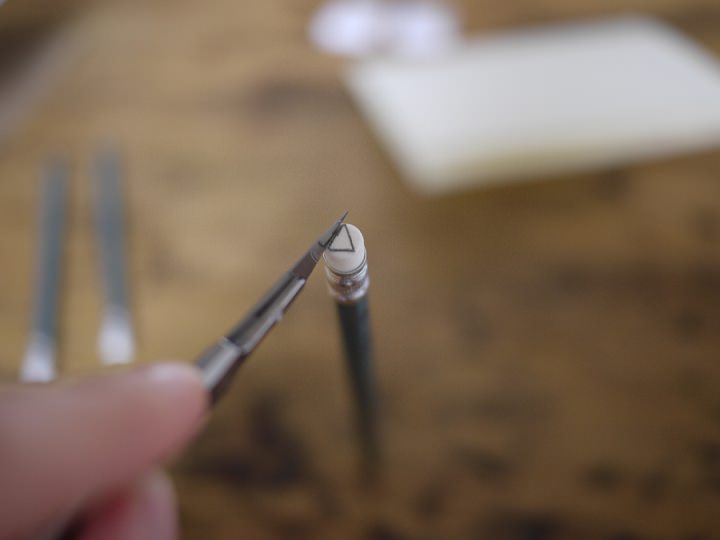
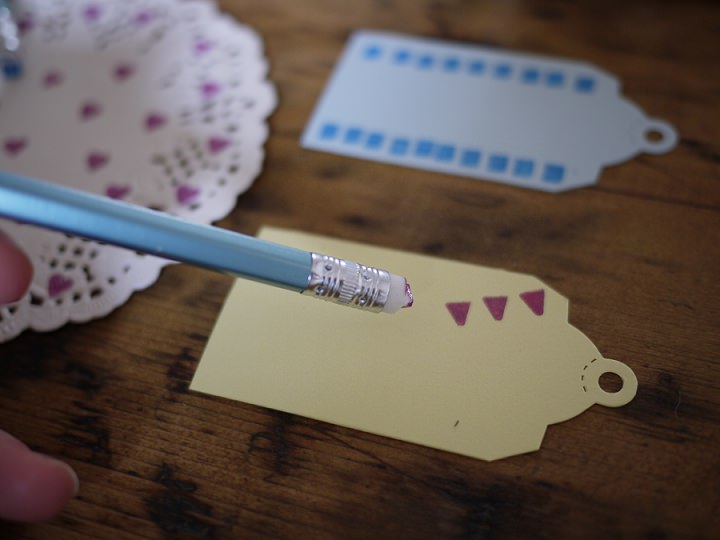
STEP 1) Put the lino cutting equipment and paper to one side and take your pencils and scalpel. With your drawing pencil, mark out a simple triangle on the rubber end of one of your other pencils. You can draw out a number of other shapes according to your preferences, such as a heart or square.

STEP 2) Using your scalpel, carefully cut around the triangle and any other shapes you draw so that it is ‘raised’ above the rest of the rubber. You can turn the angle of the scalpel and cut in a horizontal line to trim around the edges.
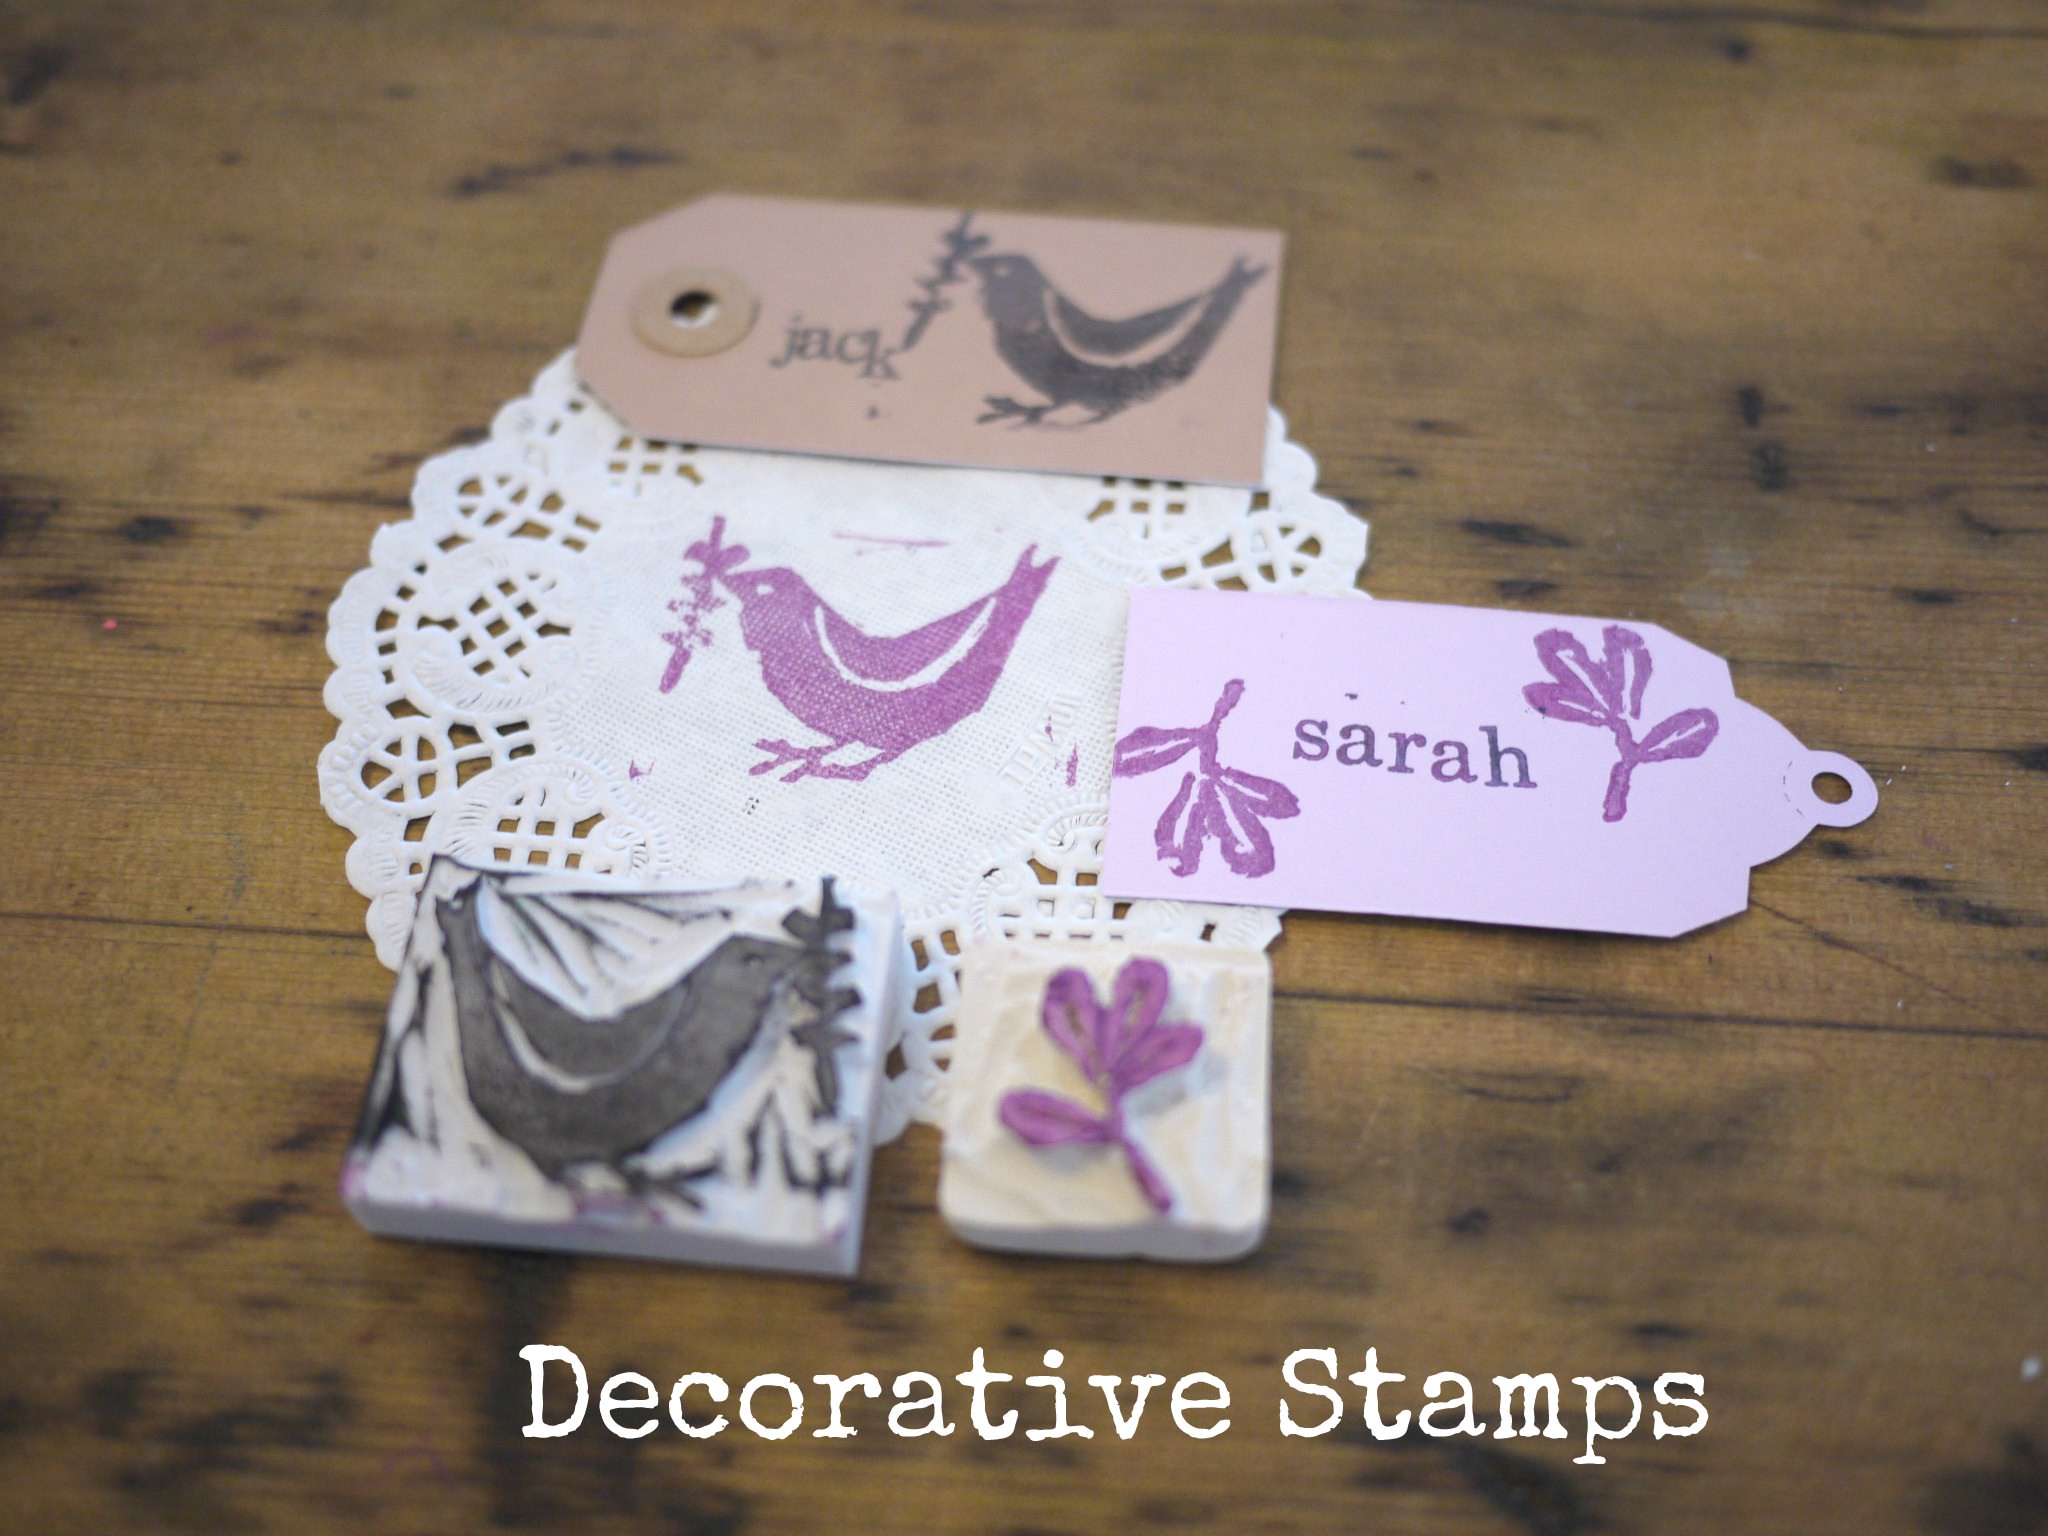
STEP 3) You should end up with a selection of little stamps that are raised from the rest of the rubber or pencil end.

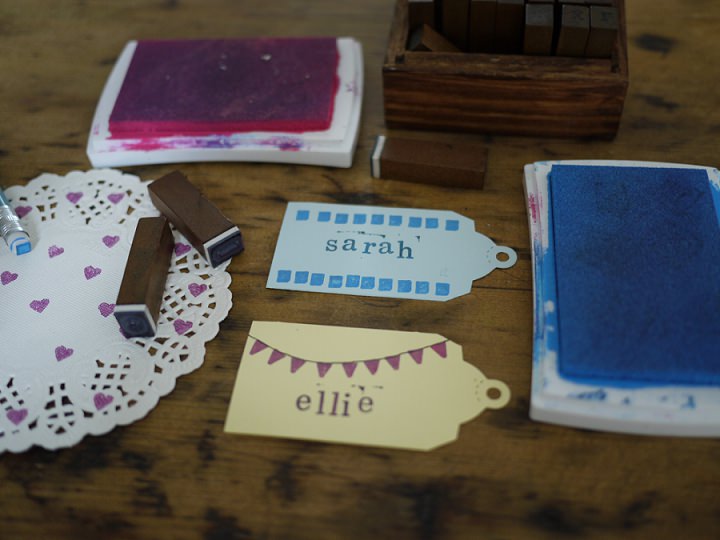
STEP 4) You can then decorate your paper, doilies or luggage tags however you like, perhaps using the triangles to make a line of bunting, or the squares to make a more geometric pattern. Names and initials can then be added to these either by hand, or with alphabet stamps.
STEP 5) Put the pencils to one side and take your large eraser, lino cutter and handle, paper, and drawing pencil.
Using a drawing pencil and scrap paper, play around a bit with designing your next stamp. These will be bigger than the pencil-end ones. The rubbers shown here are approximately 4cm in width, but you can get larger erasers easily in craft shops or online if you want to go even bigger!
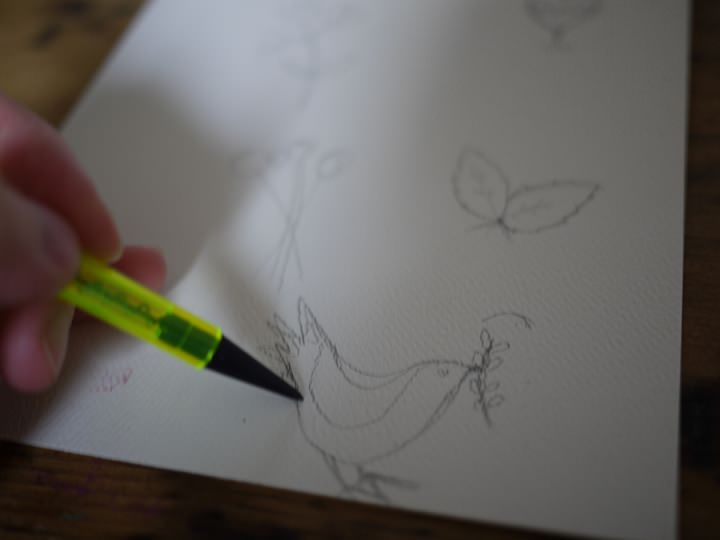
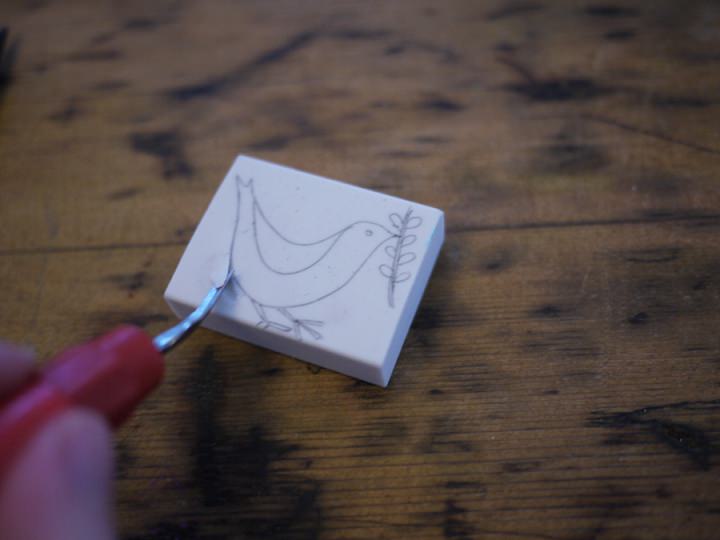
STEP 6) Once you have decided on your final design, take your large eraser and begin to mark it out again in pencil onto the surface. You may wish to go over this in pen once you are happy with it.
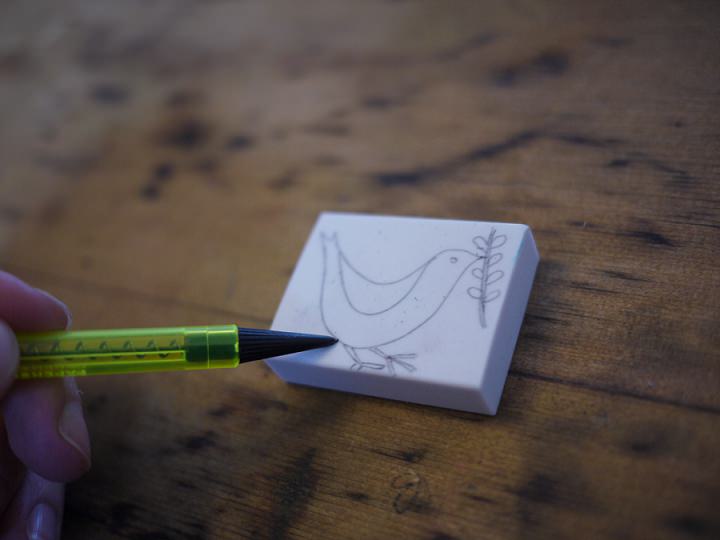
STEP 7) Using the lino cutter and handle, begin to carve around the shape, carving off the areas of rubber you don’t want to show on paper. This will take a little while and can look a bit messy to begin with but stick with it! Take your time and it will begin to take shape.
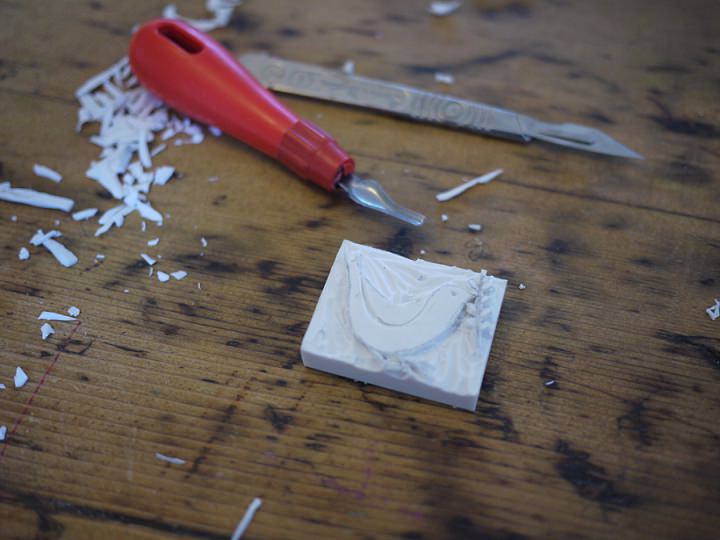
STEp 8) You now have your own hand made stamp, which, like the pencil ends, you can use to create decoration on a wide range of wedding stationery and paper goods.
You can add more of a handmade feel to your design by printing your text using alphabet letters.
Experiment drawing different motifs to make into stamps. You may wish to try something more botanical, or even a feature of your wedding day such as your cake or a tipi tent.
Using lino cutters can take a bit of practice but has a beautiful finish so it’s worth pursuing with it even if you don’t think you are very ‘arty’..!

www.rachelthompsondesign.co.uk
www.facebook.com/RachelThompsonDesign
https://www.etsy.com/uk/shop/RachelTDesign
[email protected]
Share this post
This site uses Akismet to reduce spam. Learn how your comment data is processed.


Comments