
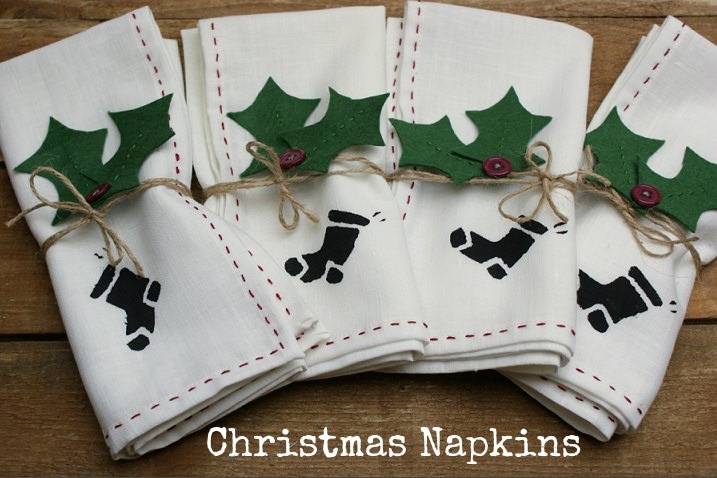
Today we carry on with our Month of Christmas DIY’s with a rather special Christmas tutorial from Emily Carlill from Love me Sew. Last week Anna from Download and print showed you how to make these FREE Printable Paper Christmas Ornaments and we have more Christmas DIY tutorials coming up in the next couple of weeks. This tutorial from Emily comes in 3 parts, so you can choose to just do the first part or do all 3, it all depends on how much time you have and how creating your are feeling! It really is a fab tutorial, Emily has pulled out all the stops for you today!

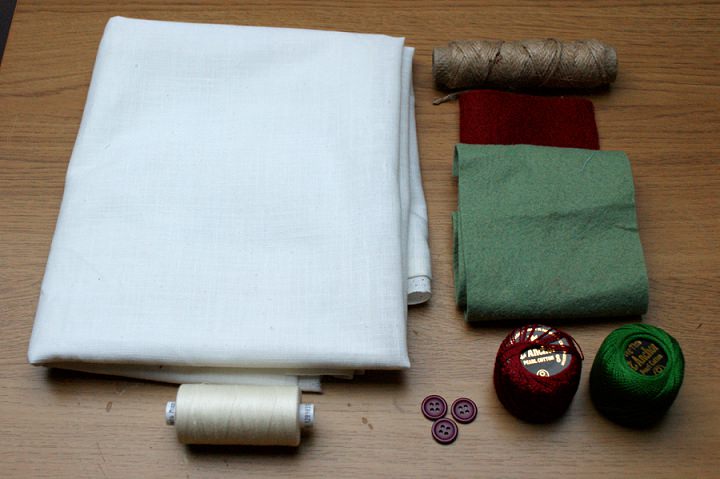
There are three parts to this napkin tutorial; the first is making the napkin, the second printing on the napkin and the third making the ‘holly’ ties for the napkin. You many choose to skip out either the second or third stage or these.


Making the napkins
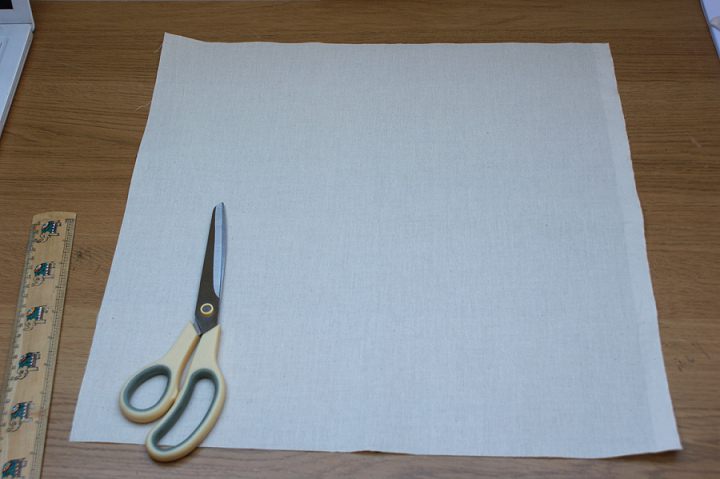
STEP 1) Cut the fabric
- Cut a square of fabric (these can vary to suit your preferred size on napkin, but here mine are 43cm x 43cm)
- If you have made a paper template that you want to use more than once, pin this template to the fabric and make dashed chalk marks around the outside. Remove template and cut out your shape.
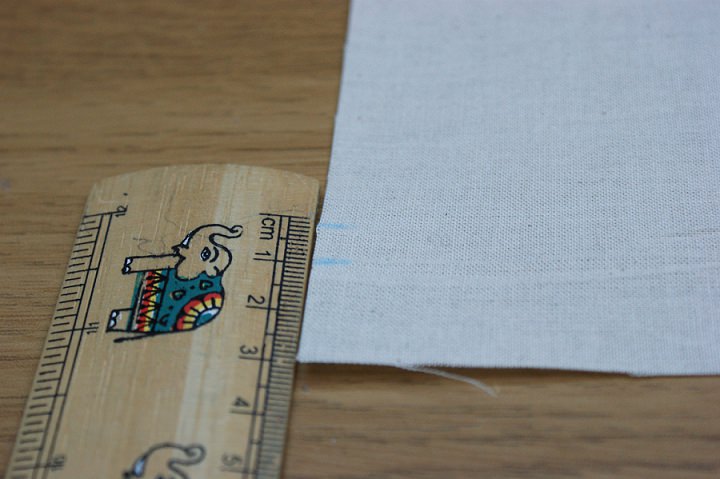
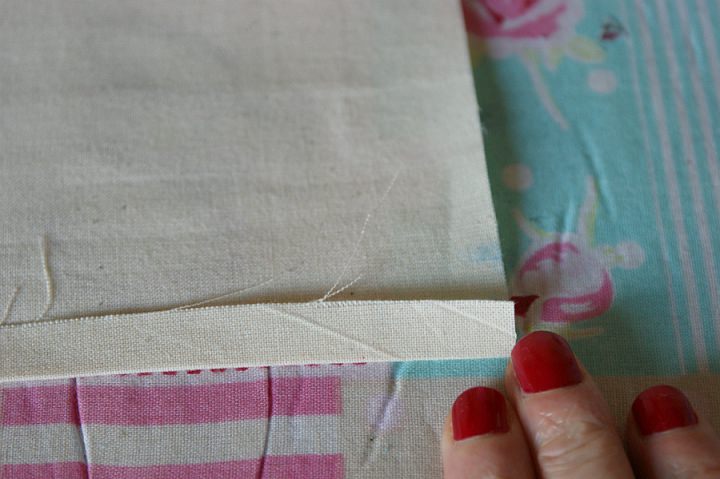
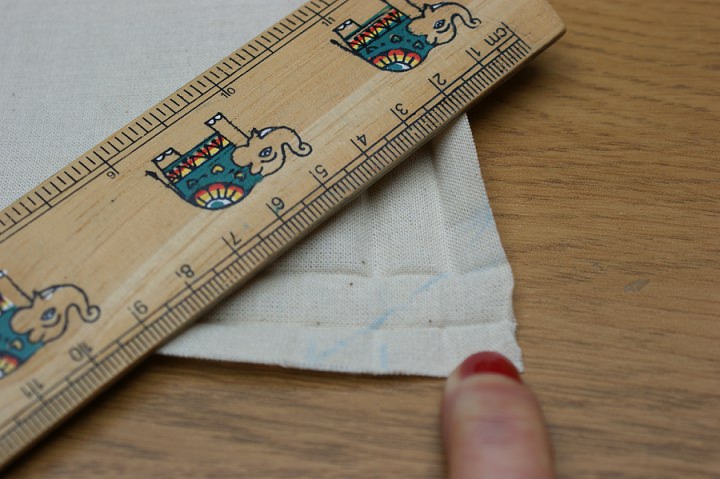
STEP 2) Hem the Napkin
- On a corner of the napkin fabric, make a small chalk mark at 3cm and at 2cm from the corner.
- Repeat on the opposite/parallel side of the napkin fabric.
- Fold one side of the napkin fabric up 1cm to meet the 2cm mark (that you made on opposite sides of fabric).
- Fold this side up again another cm to meet the 3cm mark. Press

- Repeat the above steps for all four sides of the fabric napkin. Pop a couple of pins in to hold in place for now.
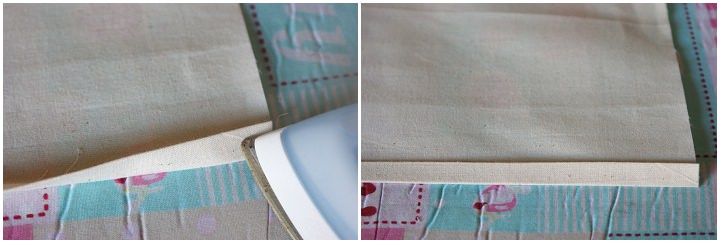
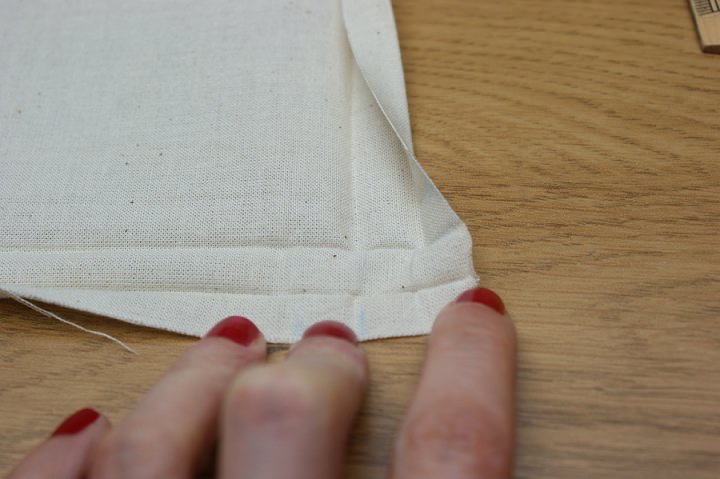
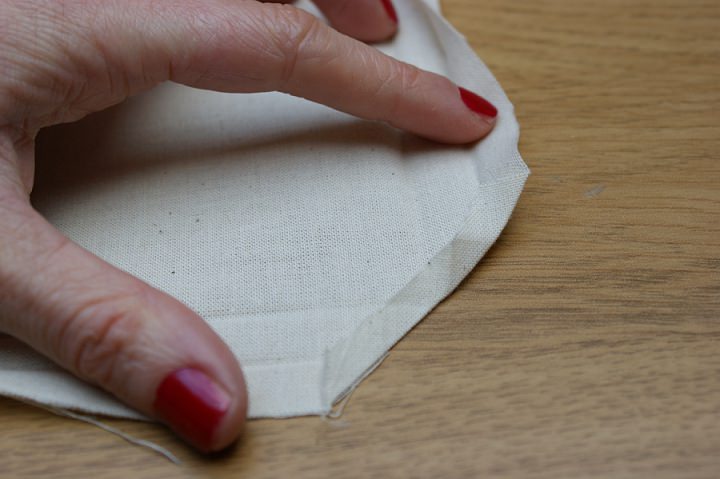
STEP 3) Mitre the napkin corners.
You may notice that when you have folded and press all four sides of the fabric, the corners overlap and do not sit very neatly together – to resolve this, we mitre the corners.
- Unfold one of the corners – the pressed fold marks should still be visible on the fabric.
- The fold marks have formed little squares from the corner. Lay a ruler, diagonally, across three diagonal squares (as shown in Image 9).
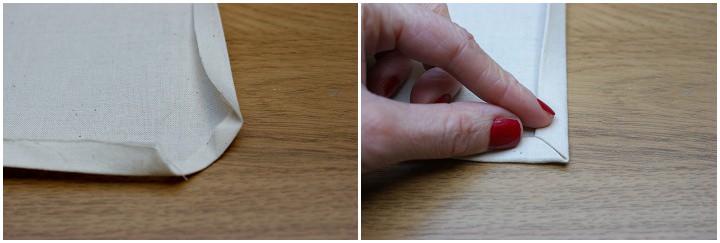
- Cut the fabric corner off from this line.
- Fold this cut edge up, so the fold runs diagonally across the centre of the next row of squares.
- Refold the long sides again, at the original fold mark, enclosing the fold of the cut corner.
- Repeat the above steps to mitre all four corners. Once you have refolded the sides, pin to hold in place.
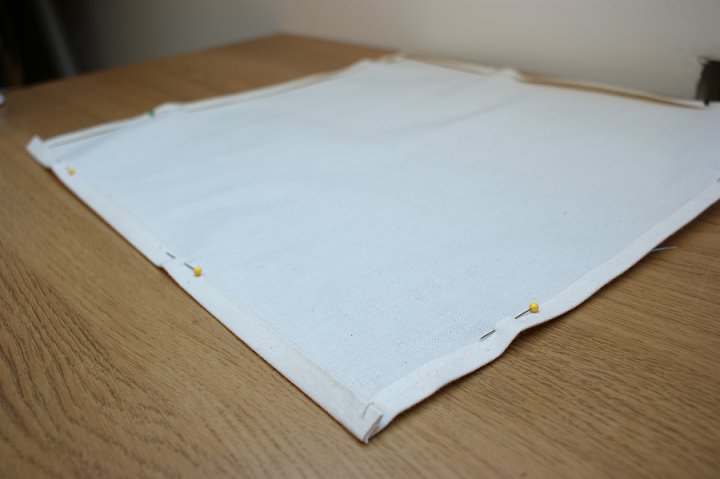
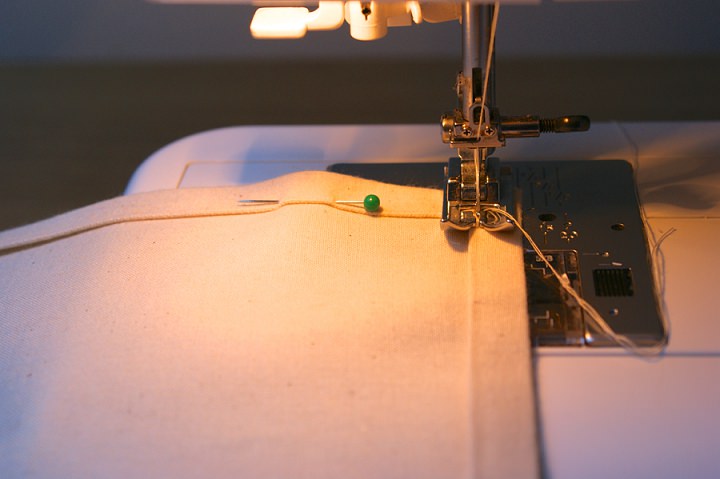
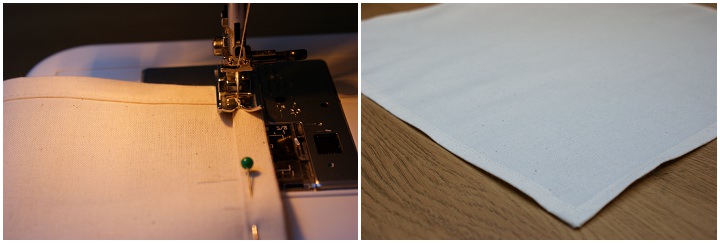
STEP 4) Sew the hems.
- Using matching thread, starting from one corner, sew the hems all around the napkin a few mm from the edge, removing pins as you go.
When you get to the corners, leave the needle in the fabric, lift the presser foot, spin the napkin fabric around, lower the presser foot and continue along the next side until all four sides are sewn.
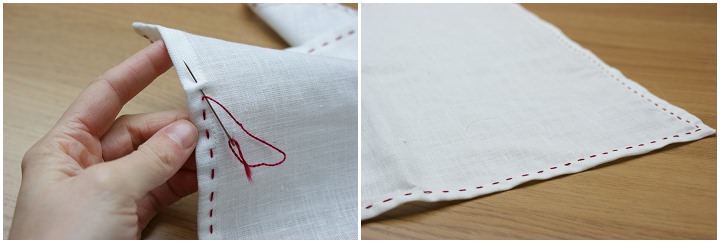
STEP 5) Edge the napkins
- Using the embroidery thread and needle, edge the napkins in a running stitch.
You may like to keep these napkins unprinted, in which case finish the tutorial here or just to Step 3 to make the ‘holly’ ties.
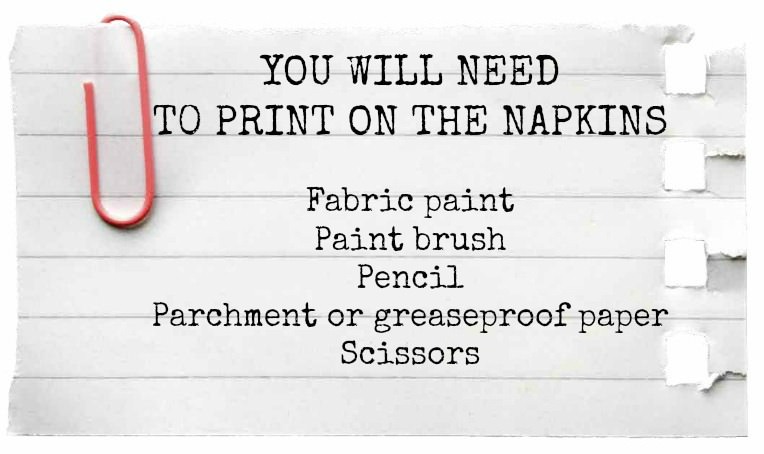
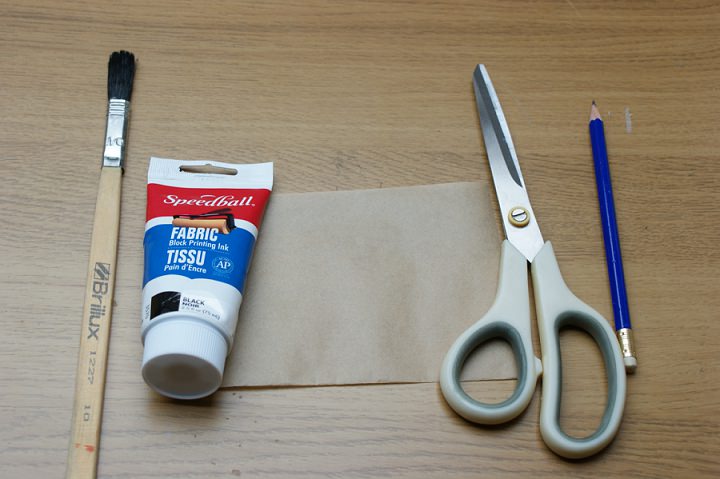
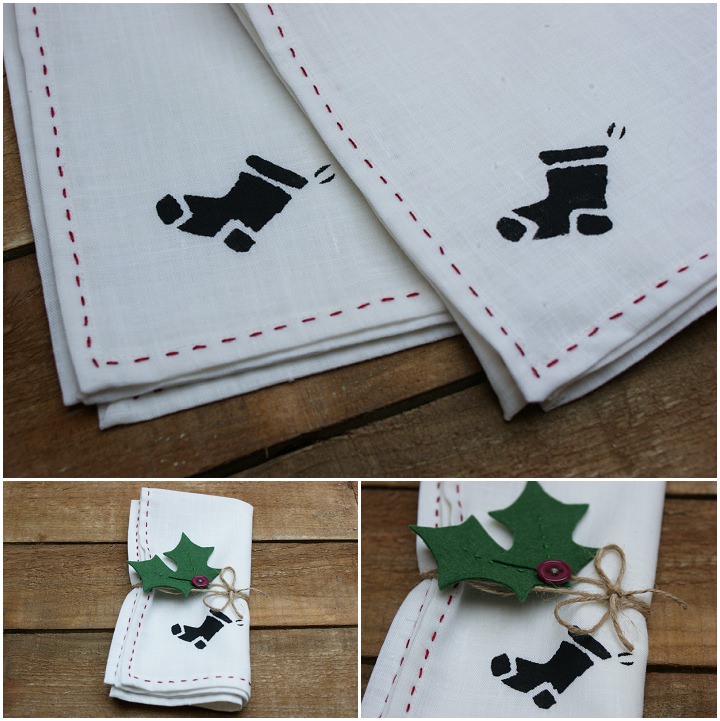
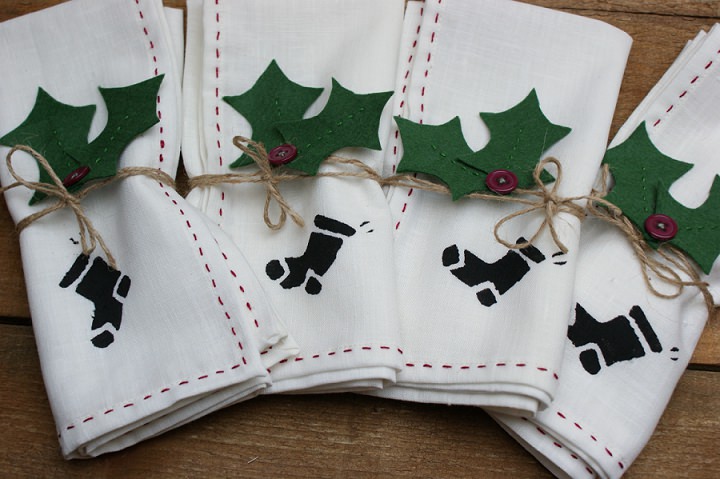
Printing the napkins
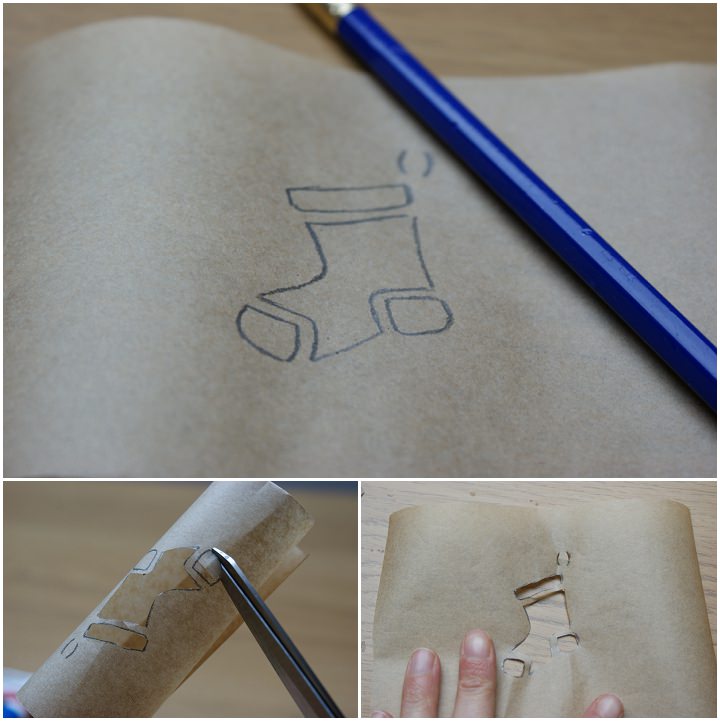
STEP 1) Make the template
- Draw a simple design onto the parchment paper and cut out

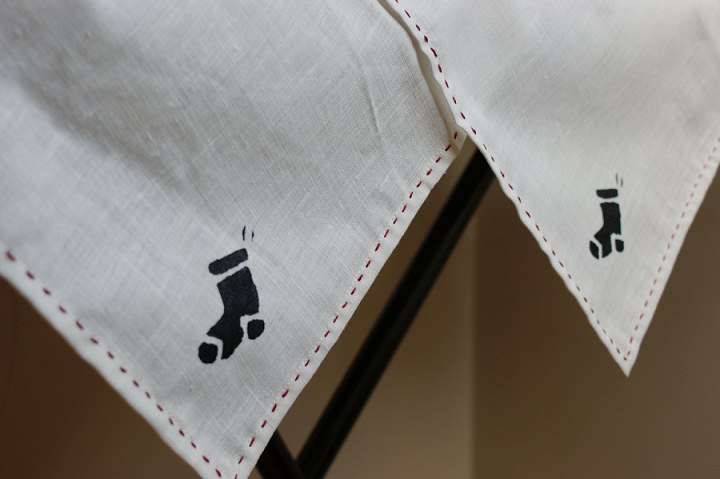
STEP 2) Print the design onto the napkin
- Lay the napkin on top of a piece of paper (or something you don’t mind getting paint on as this may come through to the other side of the napkin and mark your surface)
- Place the template onto the corner of the napkin and carefully paint over. Carefully peel away the template leaving the print of your design on the napkin.

- Tip: I’d recommend testing this on a scrap piece of fabric before you print on the real napkin to make sure you are happy with how your design looks.
- Repeat for as many napkins as you are making and leave these aside for the paint to dry.
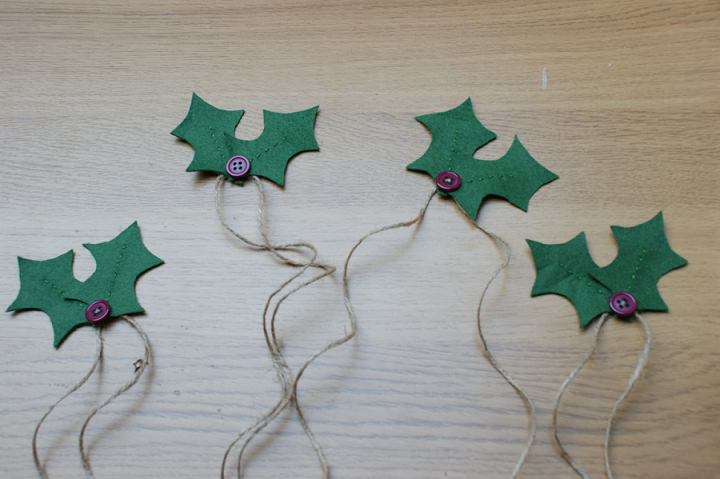
Make the ‘Holly’ ties
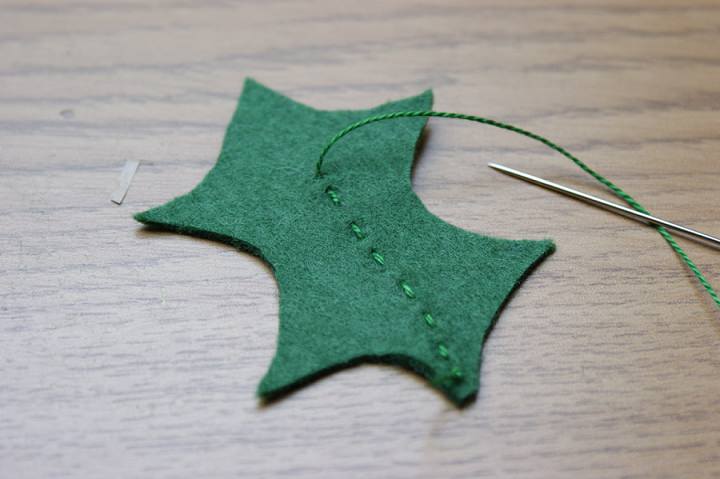
STEP 1) Cut out the holly leaves
- Fold over the green felt and either by free-hand or using a pre-made template, draw a holly leaf shape.
- Place a pin in the centre, and cut out the shape with the felt still folded so you have two leaves.
STEP 2) Decorate the leaves
- Using the embroidery thread and needle, hand-sew a running stitch along the centre of each leaf.
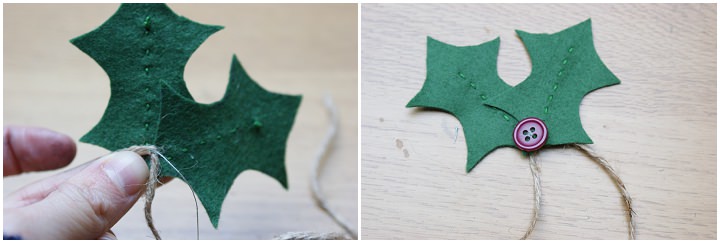
STEP 3) Attach the leaves together
- Sew two leaves together at one end
- Place a red button on this end of the joined leaves and sew in place.
STEP 4) Attach the twine.
- Find the centre of the twine and sew to the back of the leaves, behind the button.
- Repeat the above to make a ‘Holly’ tie for each napkin.
STEP 4) Finishing
- Once the napkin prints have dried, fold the napkins neatly and wrap your ‘Holly’ ties around with the felt holly leaves on the front. Place on your Christmas table!
For more information on Emily’s DIY ideas go to
www.lovemesew.co.uk
http://blog.lovemesew.co.uk/
Facebook
@LoveMeSew
After crafting her own DIY wedding in 2011, Emily Carlill now continues to make lots of items for other people’s weddings. She also makes up one half of Love Me Sew, a crafty business selling fabric, craft packs and running workshops (including DIY wedding workshops and crafty hen dos) with business partner Sam Lowe.


What a cute diy to spruce up your table for the holidays.
Really liking the holly ties! They’re a great idea.
Wow! napkins Christmas napkins idea…