Featured Post

‘A Step Back in Time’ Romantic Sicily Wedding Inspiration
Today I am taking you off for a real treat, a styled shoot so real...
20
Nov
2012
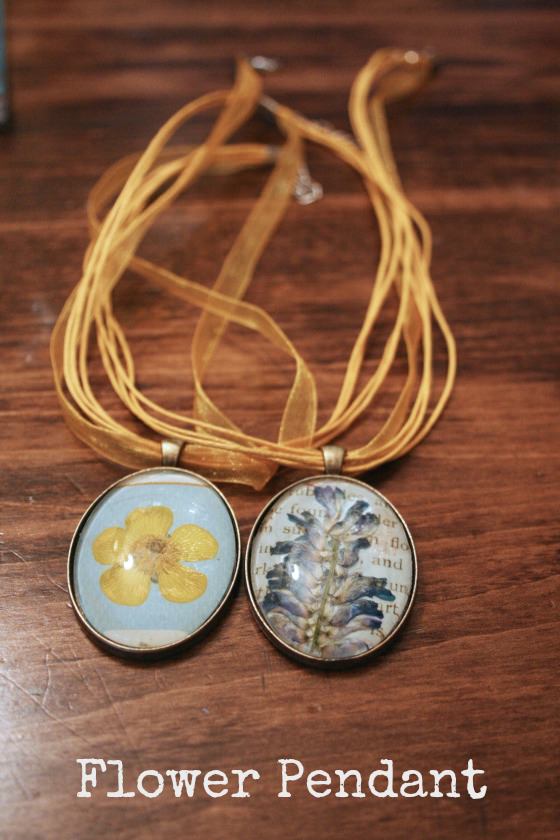
Today’s DIY Tutorial comes from the very lovely Lauren from Flat Broke Bride. Lauren is going to be showing us how to make these super cute Flower Pendant Necklaces to give to your bridesmaids and flower girls as gifts. Lauren is currently planning her own wedding and has become a DIY expert in the process.

I’ll pass the Blog over to Lauren…………
I have decided to make gifts for my bridesmaids and have found these really cute flower pendant necklaces to share with you.
This is probably the first DIY where you have to buy a kit to complete it. But don’t worry! Everything is super easy and cheap to purchase. I shopped around and finally chose CandyTiles Craft and Jewellery Supplies as the best store with the best deals. The owner of this awesome jewellery shop has agreed to give all Flat Broke Bride readers 10% off to everything in her shop! Just use the coupon code: FLATBROKE10 when you check out!
At the risk of sounding cheap, you can make 10 pendant necklaces for around $3, which is a really a good price. I chose the Oval Bundle Pack as my kit. It comes with everything you need to get started, you only need to order a few things separately. So of course, as always, let’s get started with the materials you need.

* Oval Bundle Pack or something quite like it (you can find similar packs in hobby craft) that comes with a backing, glass that fits the backing and a ribbon necklace. (In the pack there are 10 of each, and an assortment of colored ribbons to choose from)
Step 1) First, you have to pick your flower and apply the glue to it with your toothpick. Be really careful because the flower is very delicate and comes apart easily.

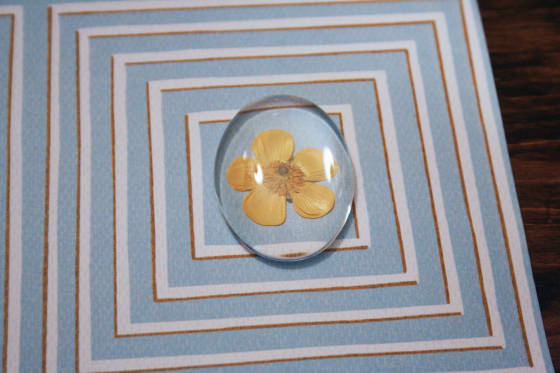
Step 2) Once you’ve placed your flower where you want it, and glued it down, take your glass oval and position it where you want over your flower.

Step 3) Now it’s time to apply that diamond glaze that’s so important. It’s sort of a clear glue that surrounds your flower and adheres to the glass allowing everything to stay in position. Depending on the size of your pendant, apply 4 or 5 drops of the glaze to the middle of the glass on the back side. Try to keep it all in the middle.

Step 4) Now that you’ve got the glaze on the back of the glass, flip it over carefully and press it down on the flower. Keep pressing down firmly for about a minute.

Step 5) If your glass puckers a bit after you release pressure, hold it down for another minute. It’s very possible the flower is a little bulky and making it hard for the glass to stick evenly. Once you are done putting pressure on the glass, leave it to dry for ten minutes. As always take this time to watch trashy reality TV just like me…
Step 6) Once everything is dry, it’s time to cut around the glass. Cut as carefully and as close as you can to the glass. Try not to leave any paper hanging over. This is where a super sharp knife really comes in handy!

Step 7) Once it’s cut out, flip it over, get out your super sticky glue and glue the entire back

Step 8) Position the glass inside the backing, and that’s it! Let it dry fully before wearing it!
That was pretty simple wasn’t it? I really love they way they turned out! But if you are going to give them away, you need a cool box to keep them in! I have just the DIY for that coming up on the Boho Blog in the next few weeks. I can’t wait for you to see! You’ll be able to have your present and wrap it too!

Don’t forget to go to CandyTiles Craft and Jewellery Supplies and get your 10% off coupon by typing in FLATBROKE10 at check out!
Thanks so much to Lauren for this fab DIY Tutorial. Pop back in a few weeks time when Lauren will be showing us how to make the gift box to put the necklaces in.
To see more of her posts you can read Lauren’s blog here:
http://flatbrokebride.wordpress.com
[email protected]
FACEBOOK
TWITTER
‘I’m broke and planning a wedding! My fiance and I met about a year ago. He is the perfect man for me and I can’t wait to marry him, but it is so difficult to plan the wedding of your dreams on a teeny-tiny budget! However, I refuse to go into serious debt for the wedding. This is not the time to be in debt, especially when you are young and still paying off college loans. I started my blog, Flat Broke Bride, to show how to achieve the wedding of your dreams on a tight budget. I offer lots of DIY tutorials as well as some great inspiration pictures. This is my first (and hopefully only) time planning a wedding, so check out the site and come along as I feverishly plan away!’
I love ‘you can have your present and wrap it too’! Sooo pretty. Thanks for the inspiration. :) Now off to check out the blog…
Wowzers, these look amazing. Loving your work.
How much glue should I put on the oval dome?
This is pretty simple. Love the way it turned out. Thank you, Lauren, for this in-depth tutorial.
Have you tried our fabulous wedding directory?
discover more